Microsoft 365 Outlook
This guide explains how to set up the inflow from your Microsoft 365 Outlook email inbox — and, optionally, a SharePoint document library — to Paperbox by configuring Microsoft Entra and providing the required permissions.
Add a new "App registration"
Go to entra.microsoft.com
Log in with your company email address and password
Go to Applications and click on App registrations
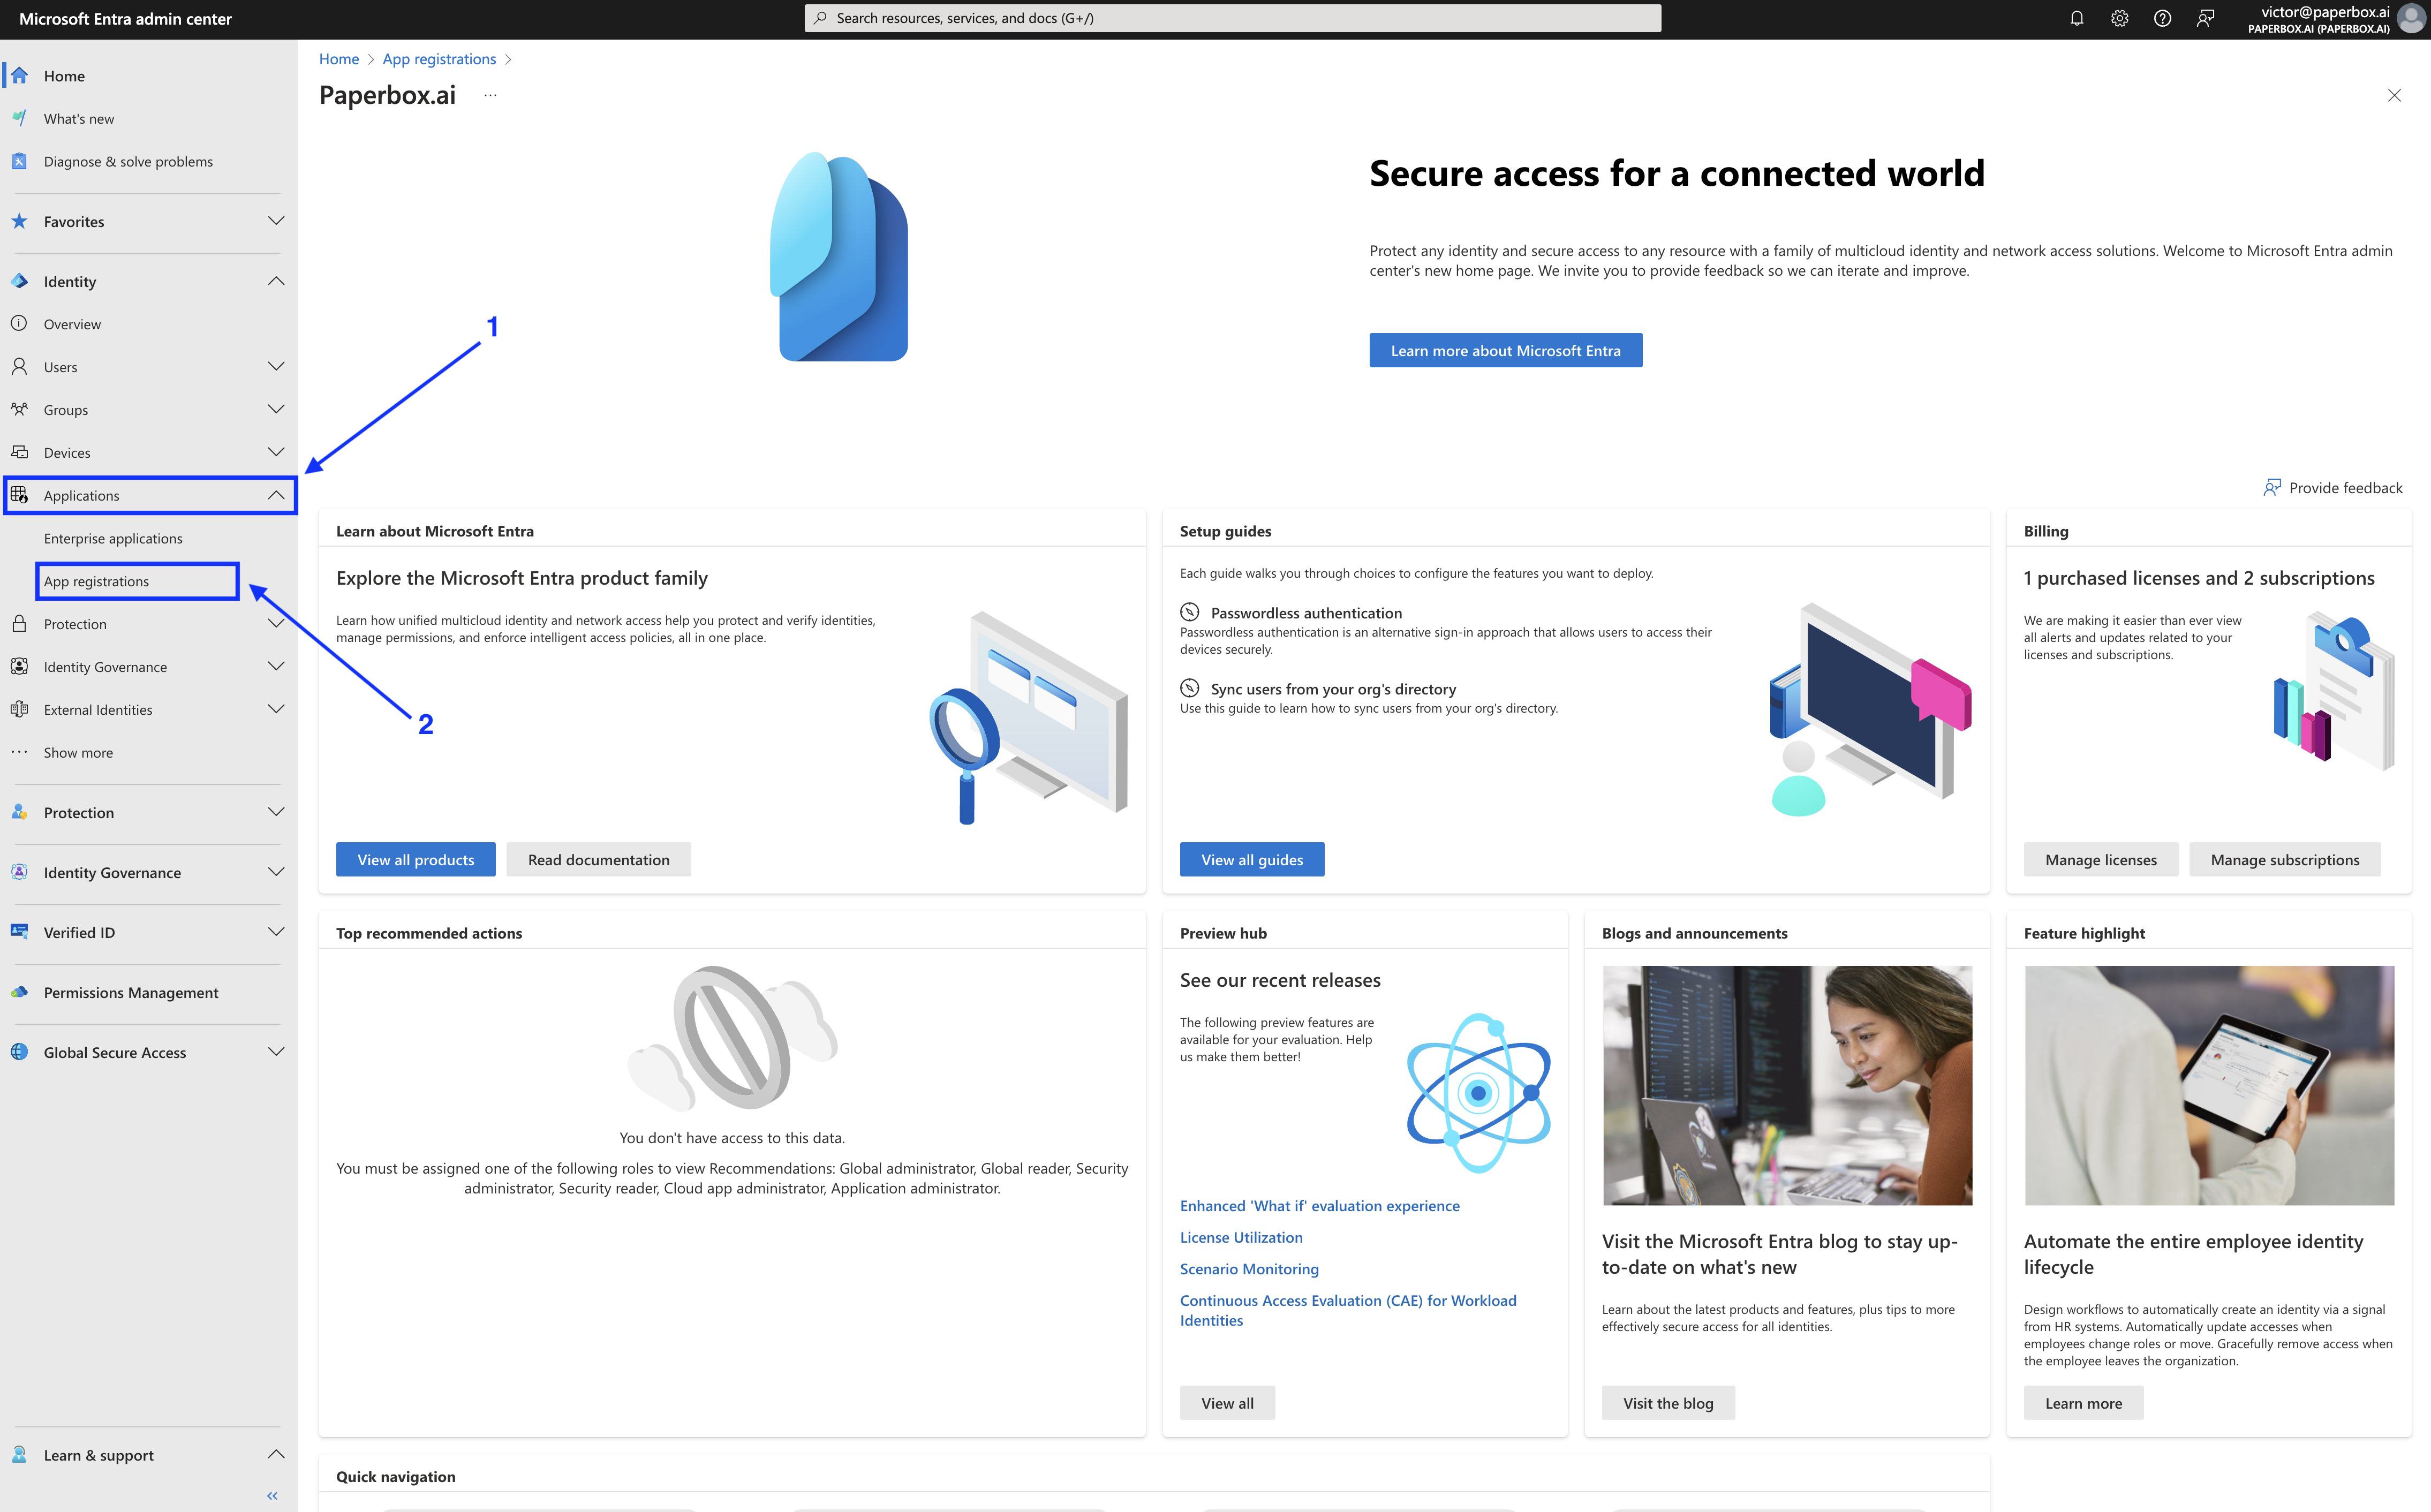
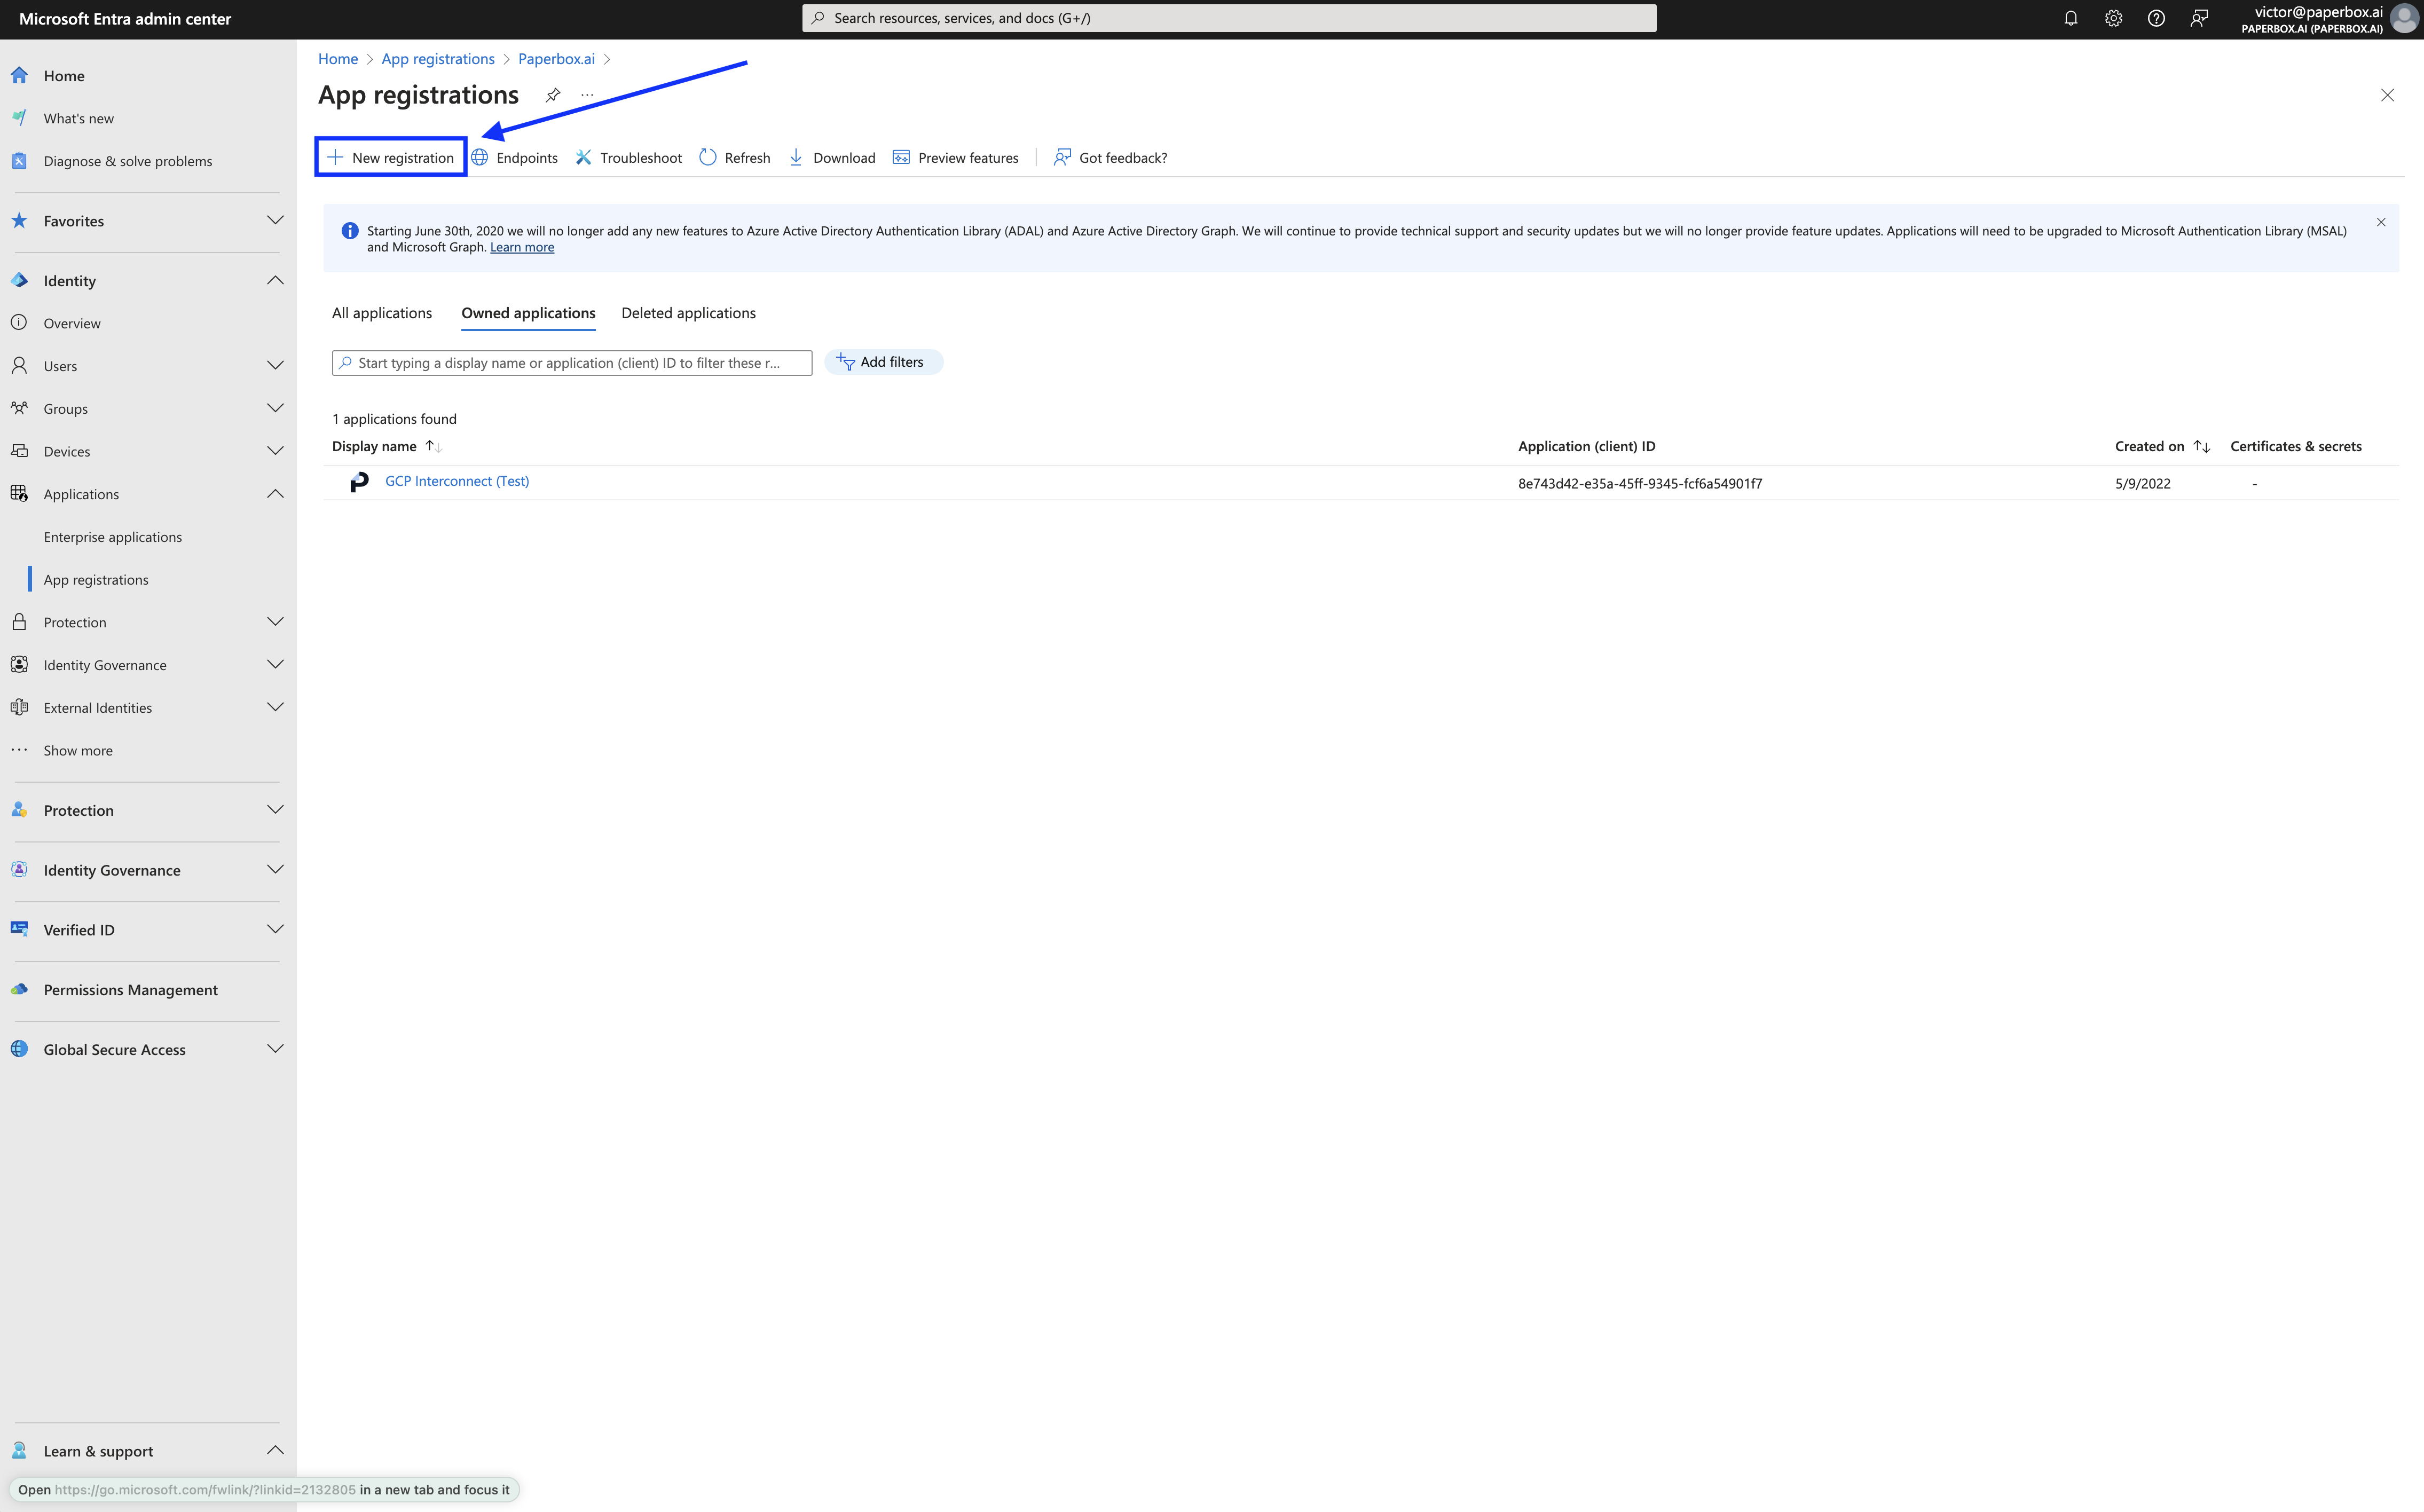
Click on New registration, this will open a new window.
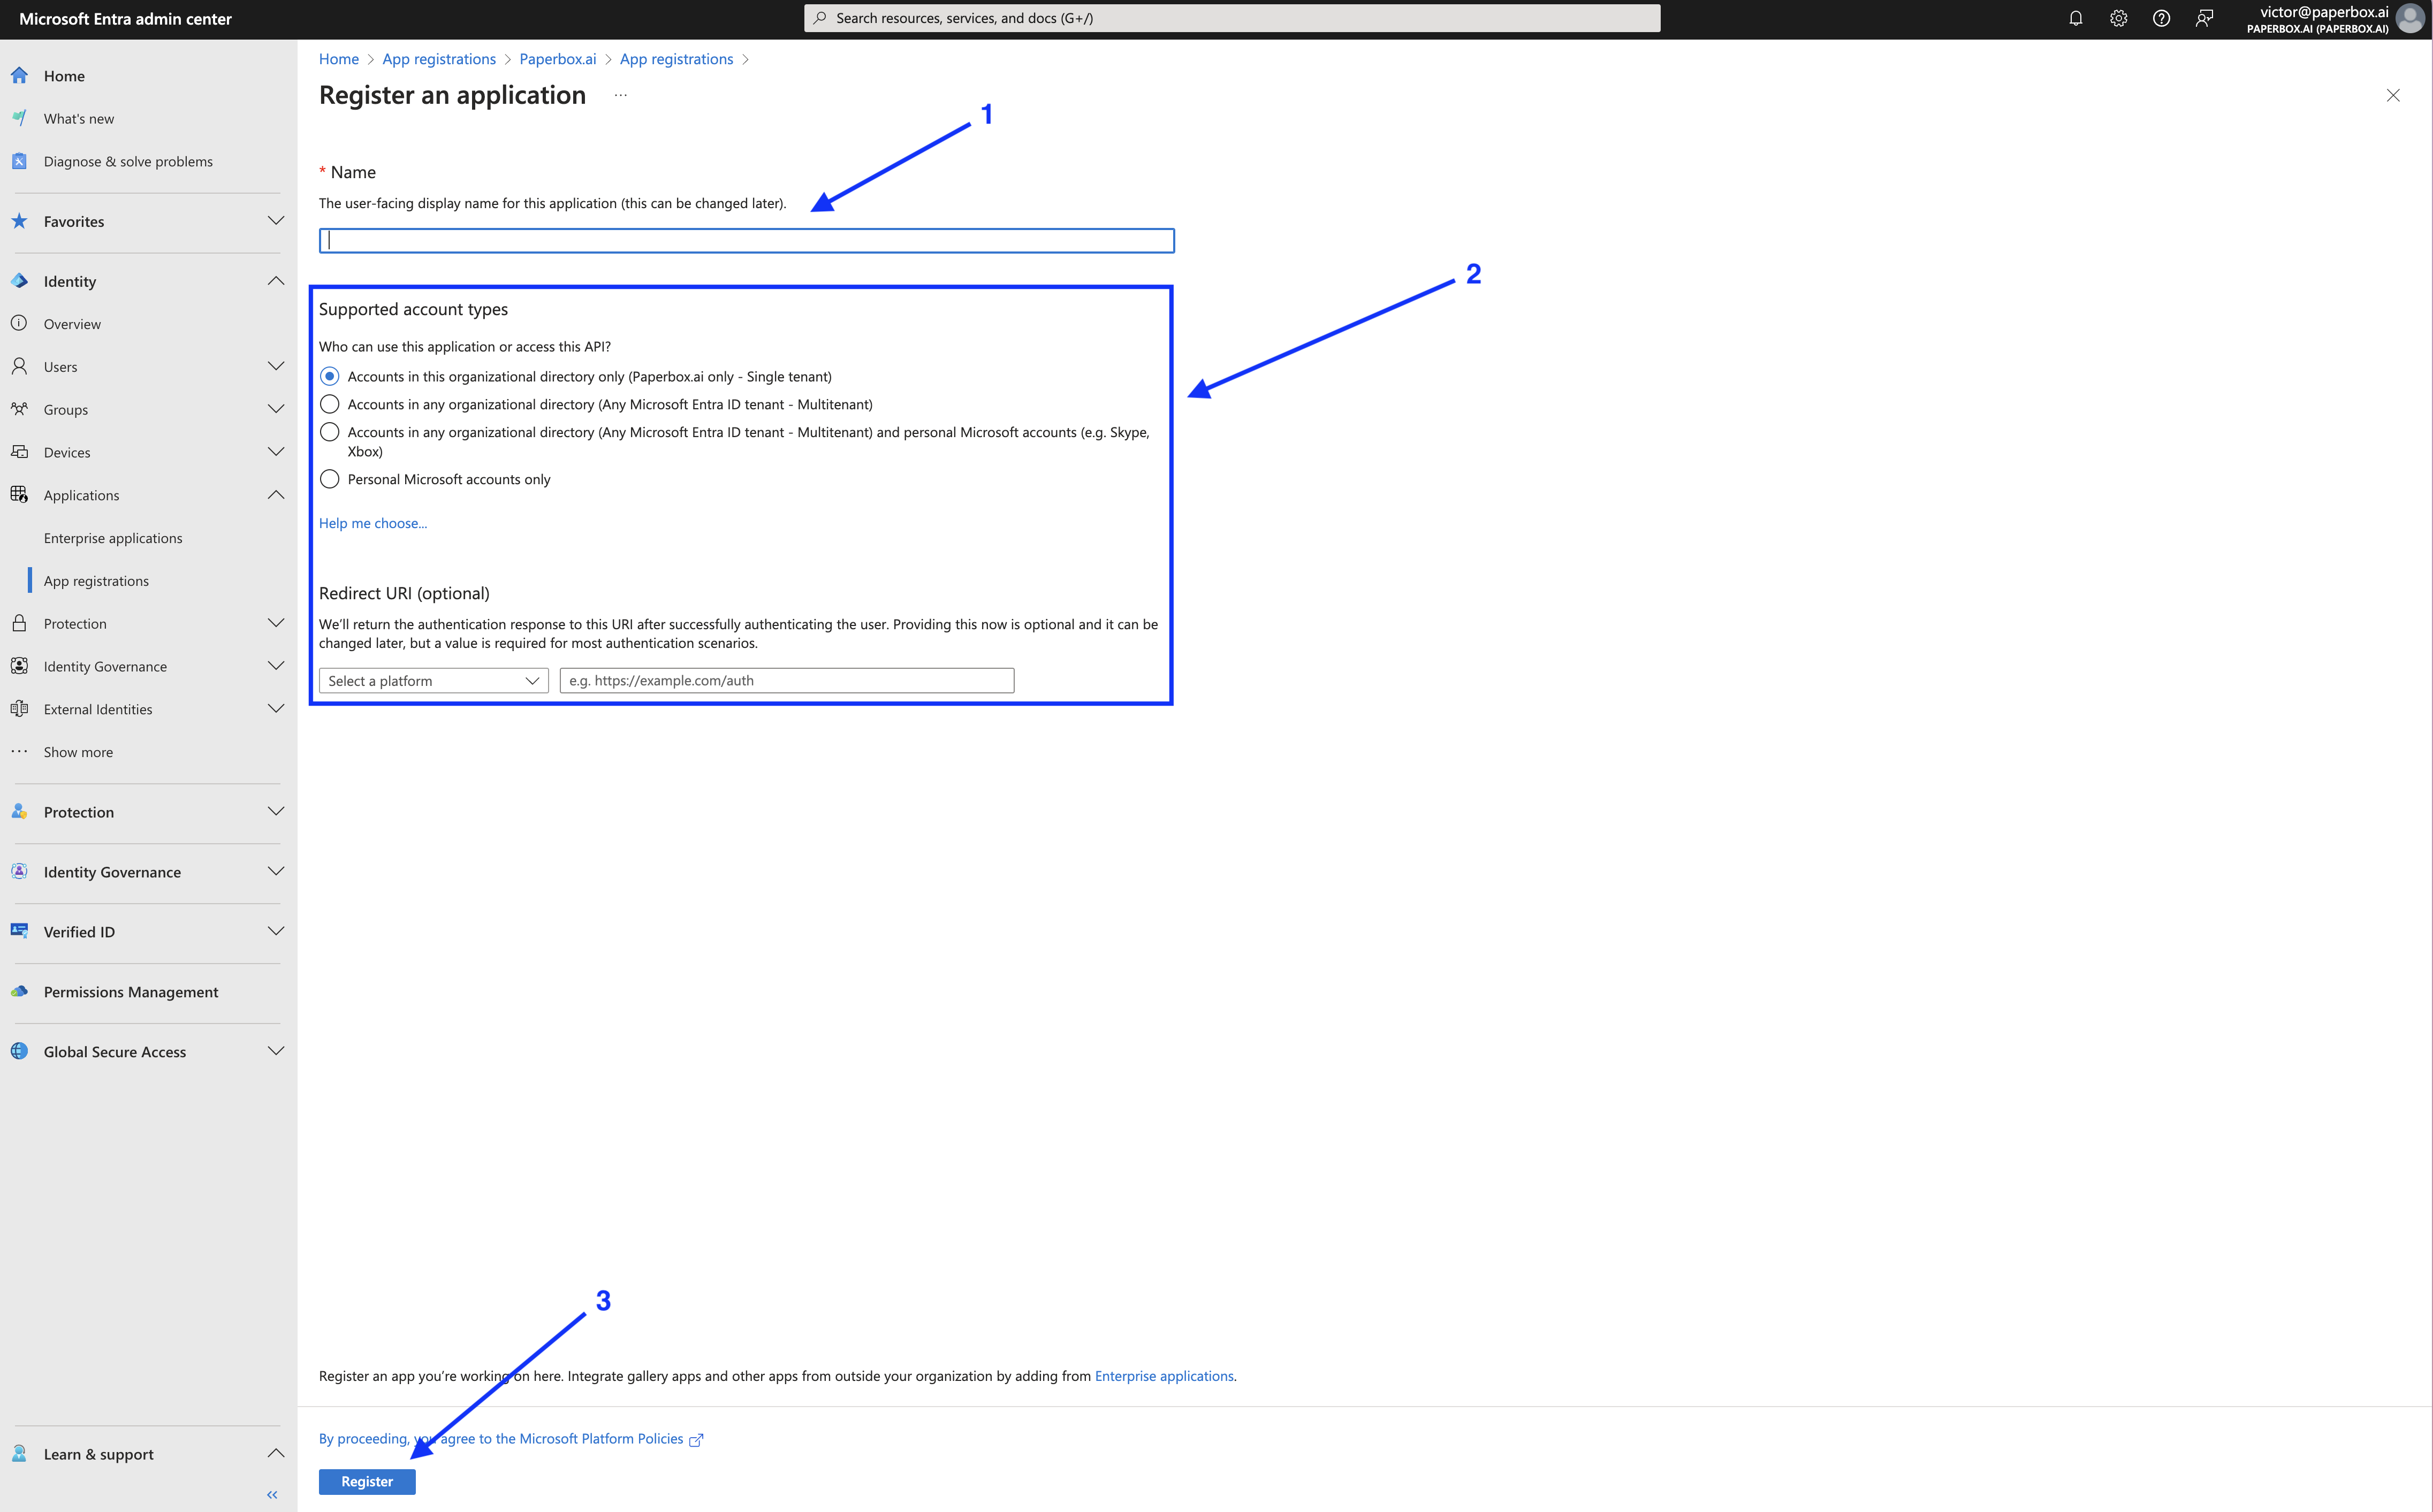
- Name the new App registration, ideally including the word "Paperbox" for easy identification.
- Leave all settings on default
- Click on register
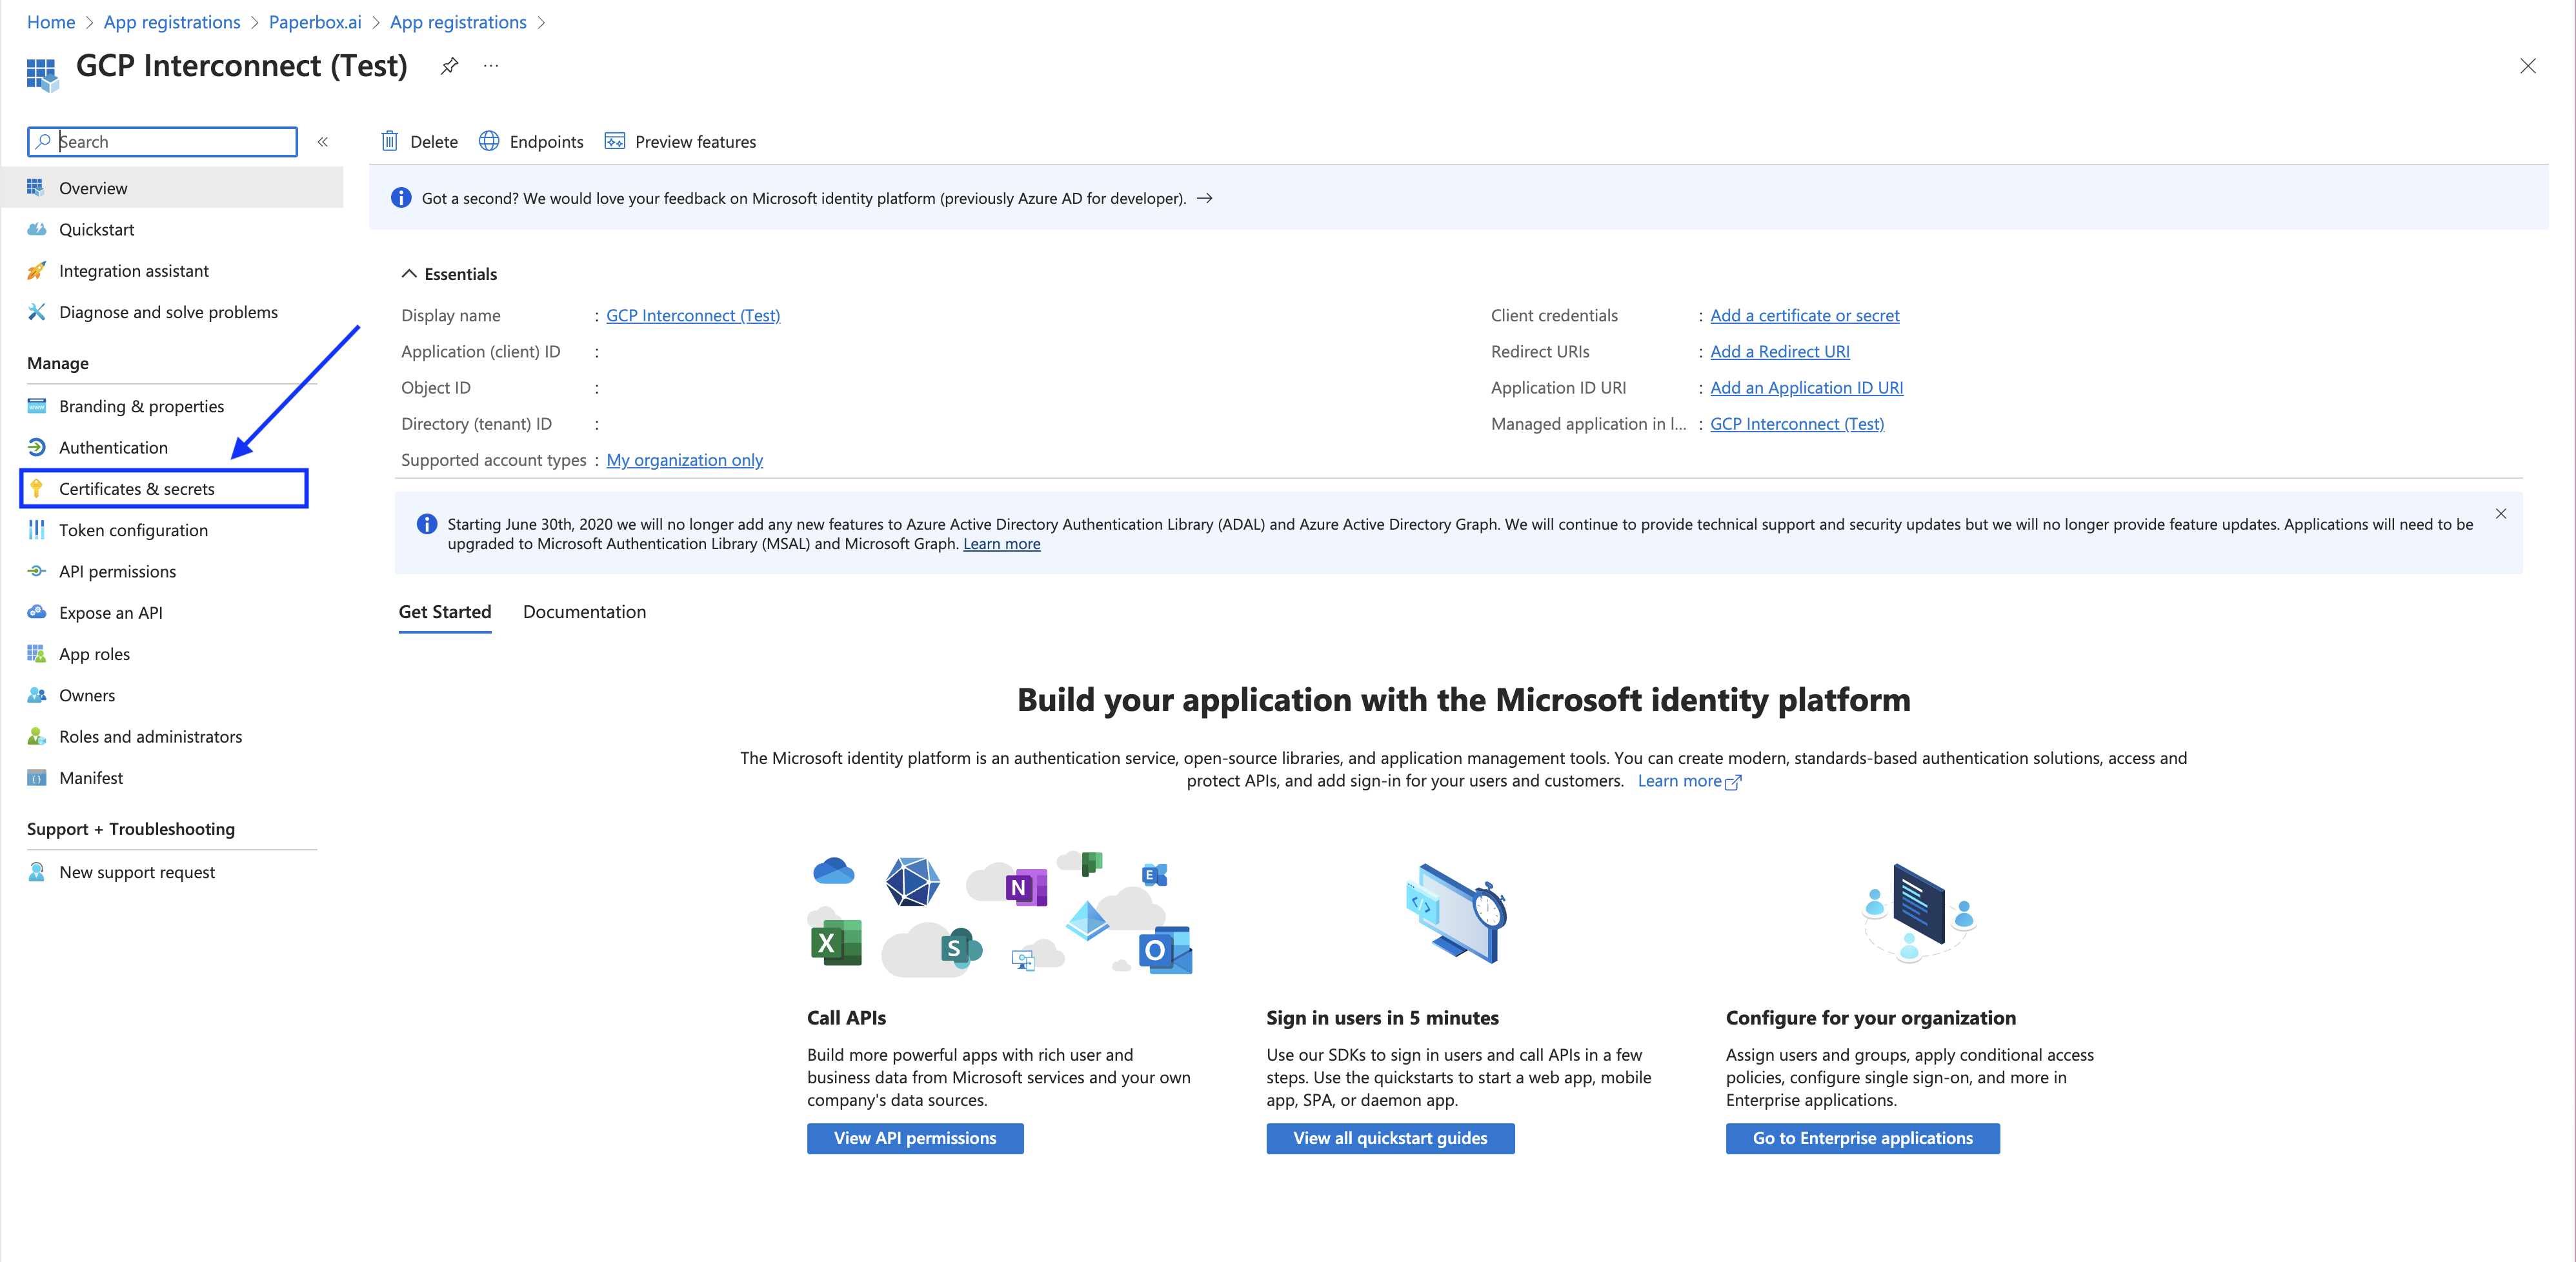
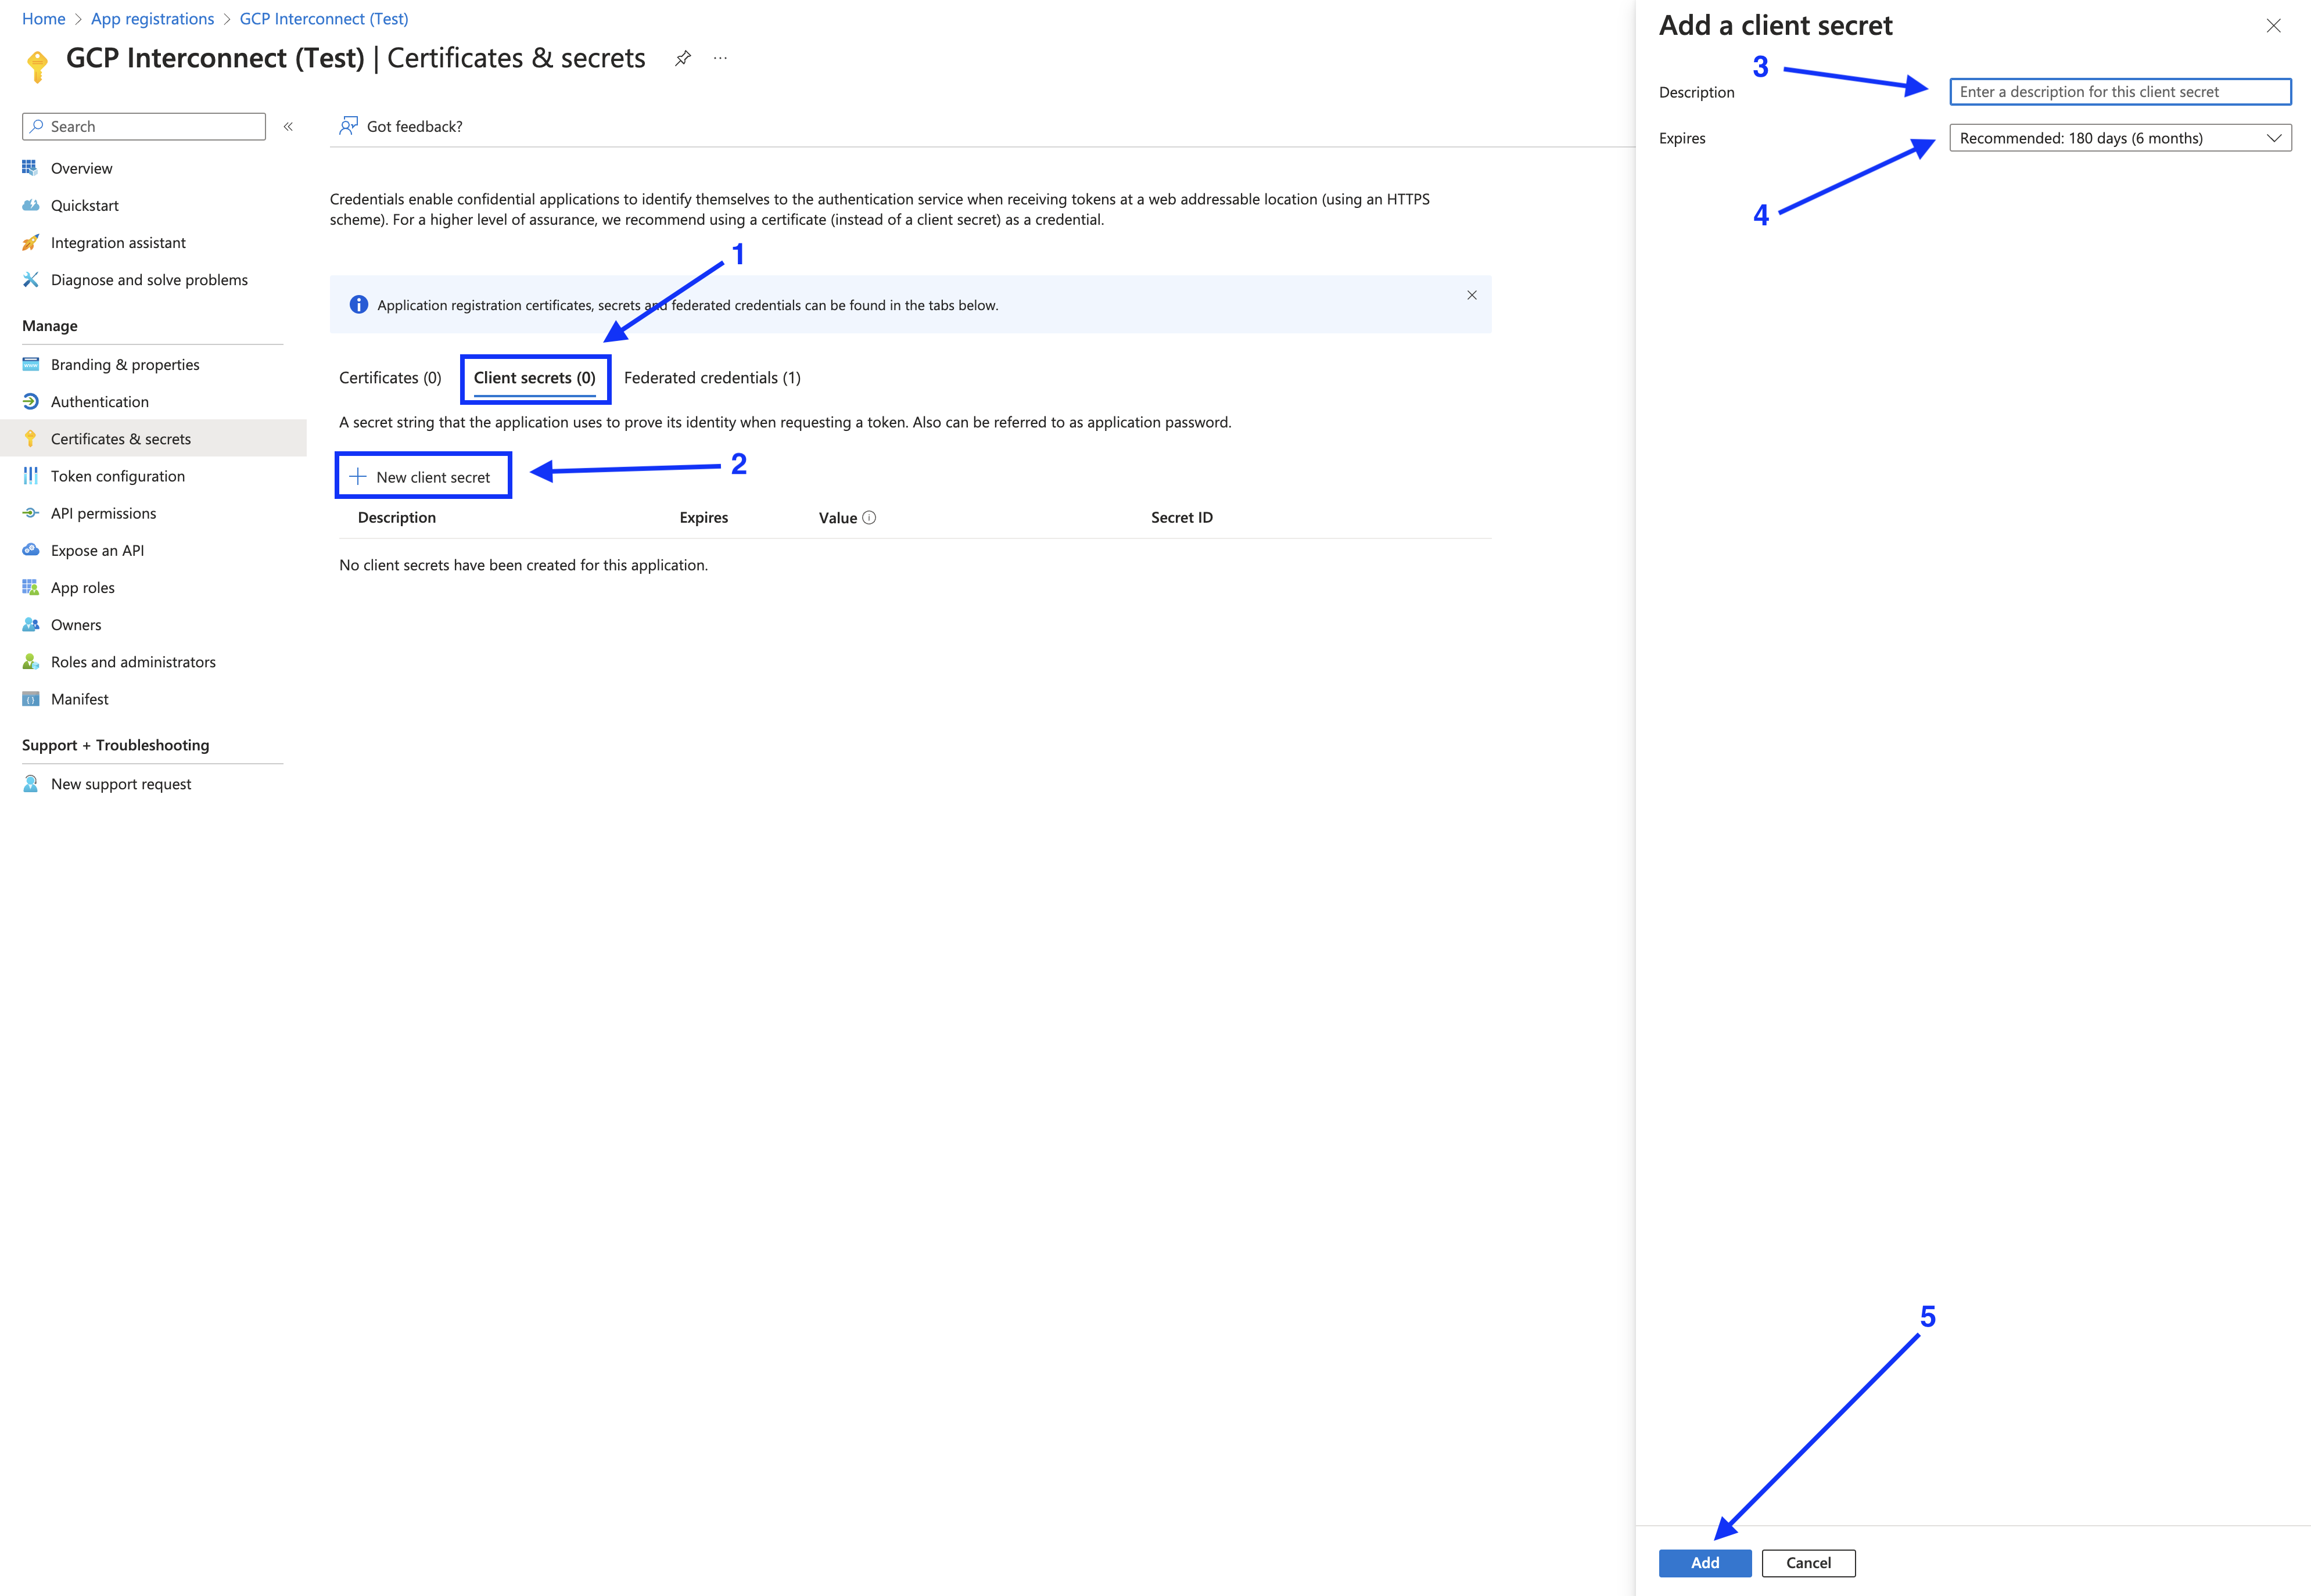
Add a new "Client Secret"
- Go to Manage and click on Certificates and Secrets
- Go to the Client secrets tab and create a new client secret with the button New Client Secret
- Give it an appropriate description
- Select an expiration date (at least 6 months)
- Important !Save the Client Secret Value immediately after creation! (This will not be visible anymore once you leave this page.)
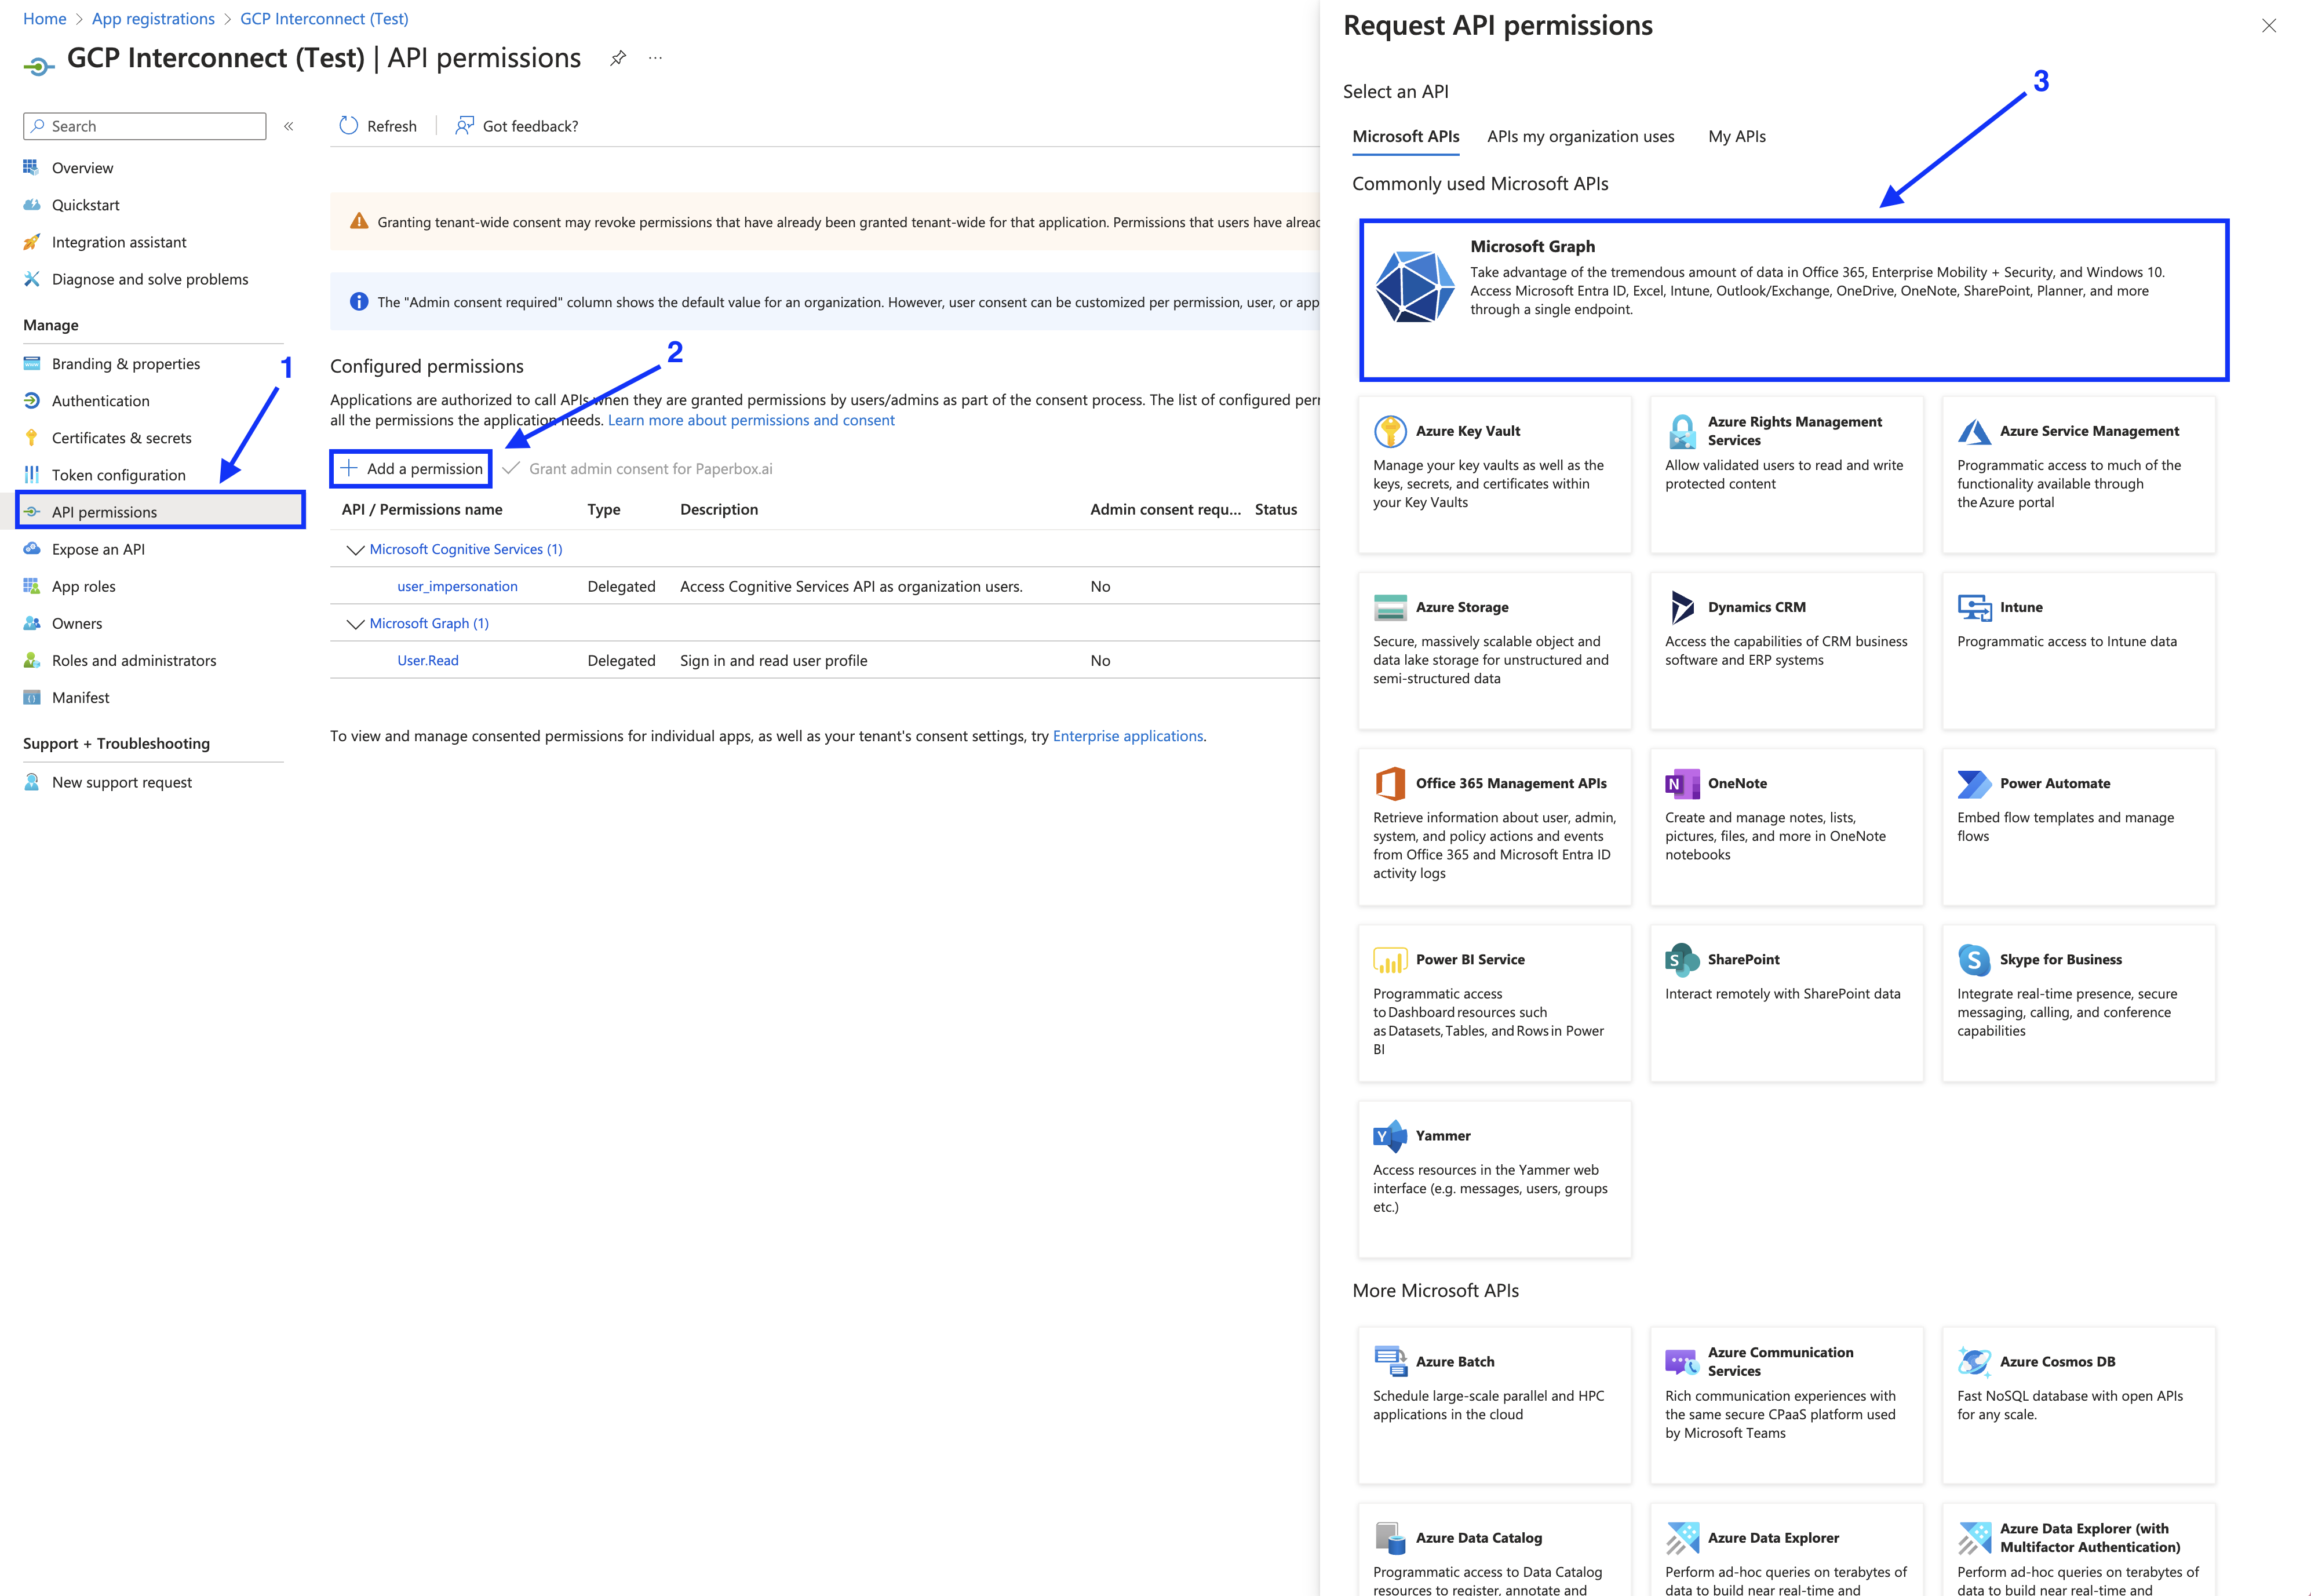
Give the correct permissions
Paperbox requires Microsoft Graph permissions to securely access the inbox and manage email inflow for your organization.
Go to API permissions, click on the Add permission button and search for Microsoft Graph
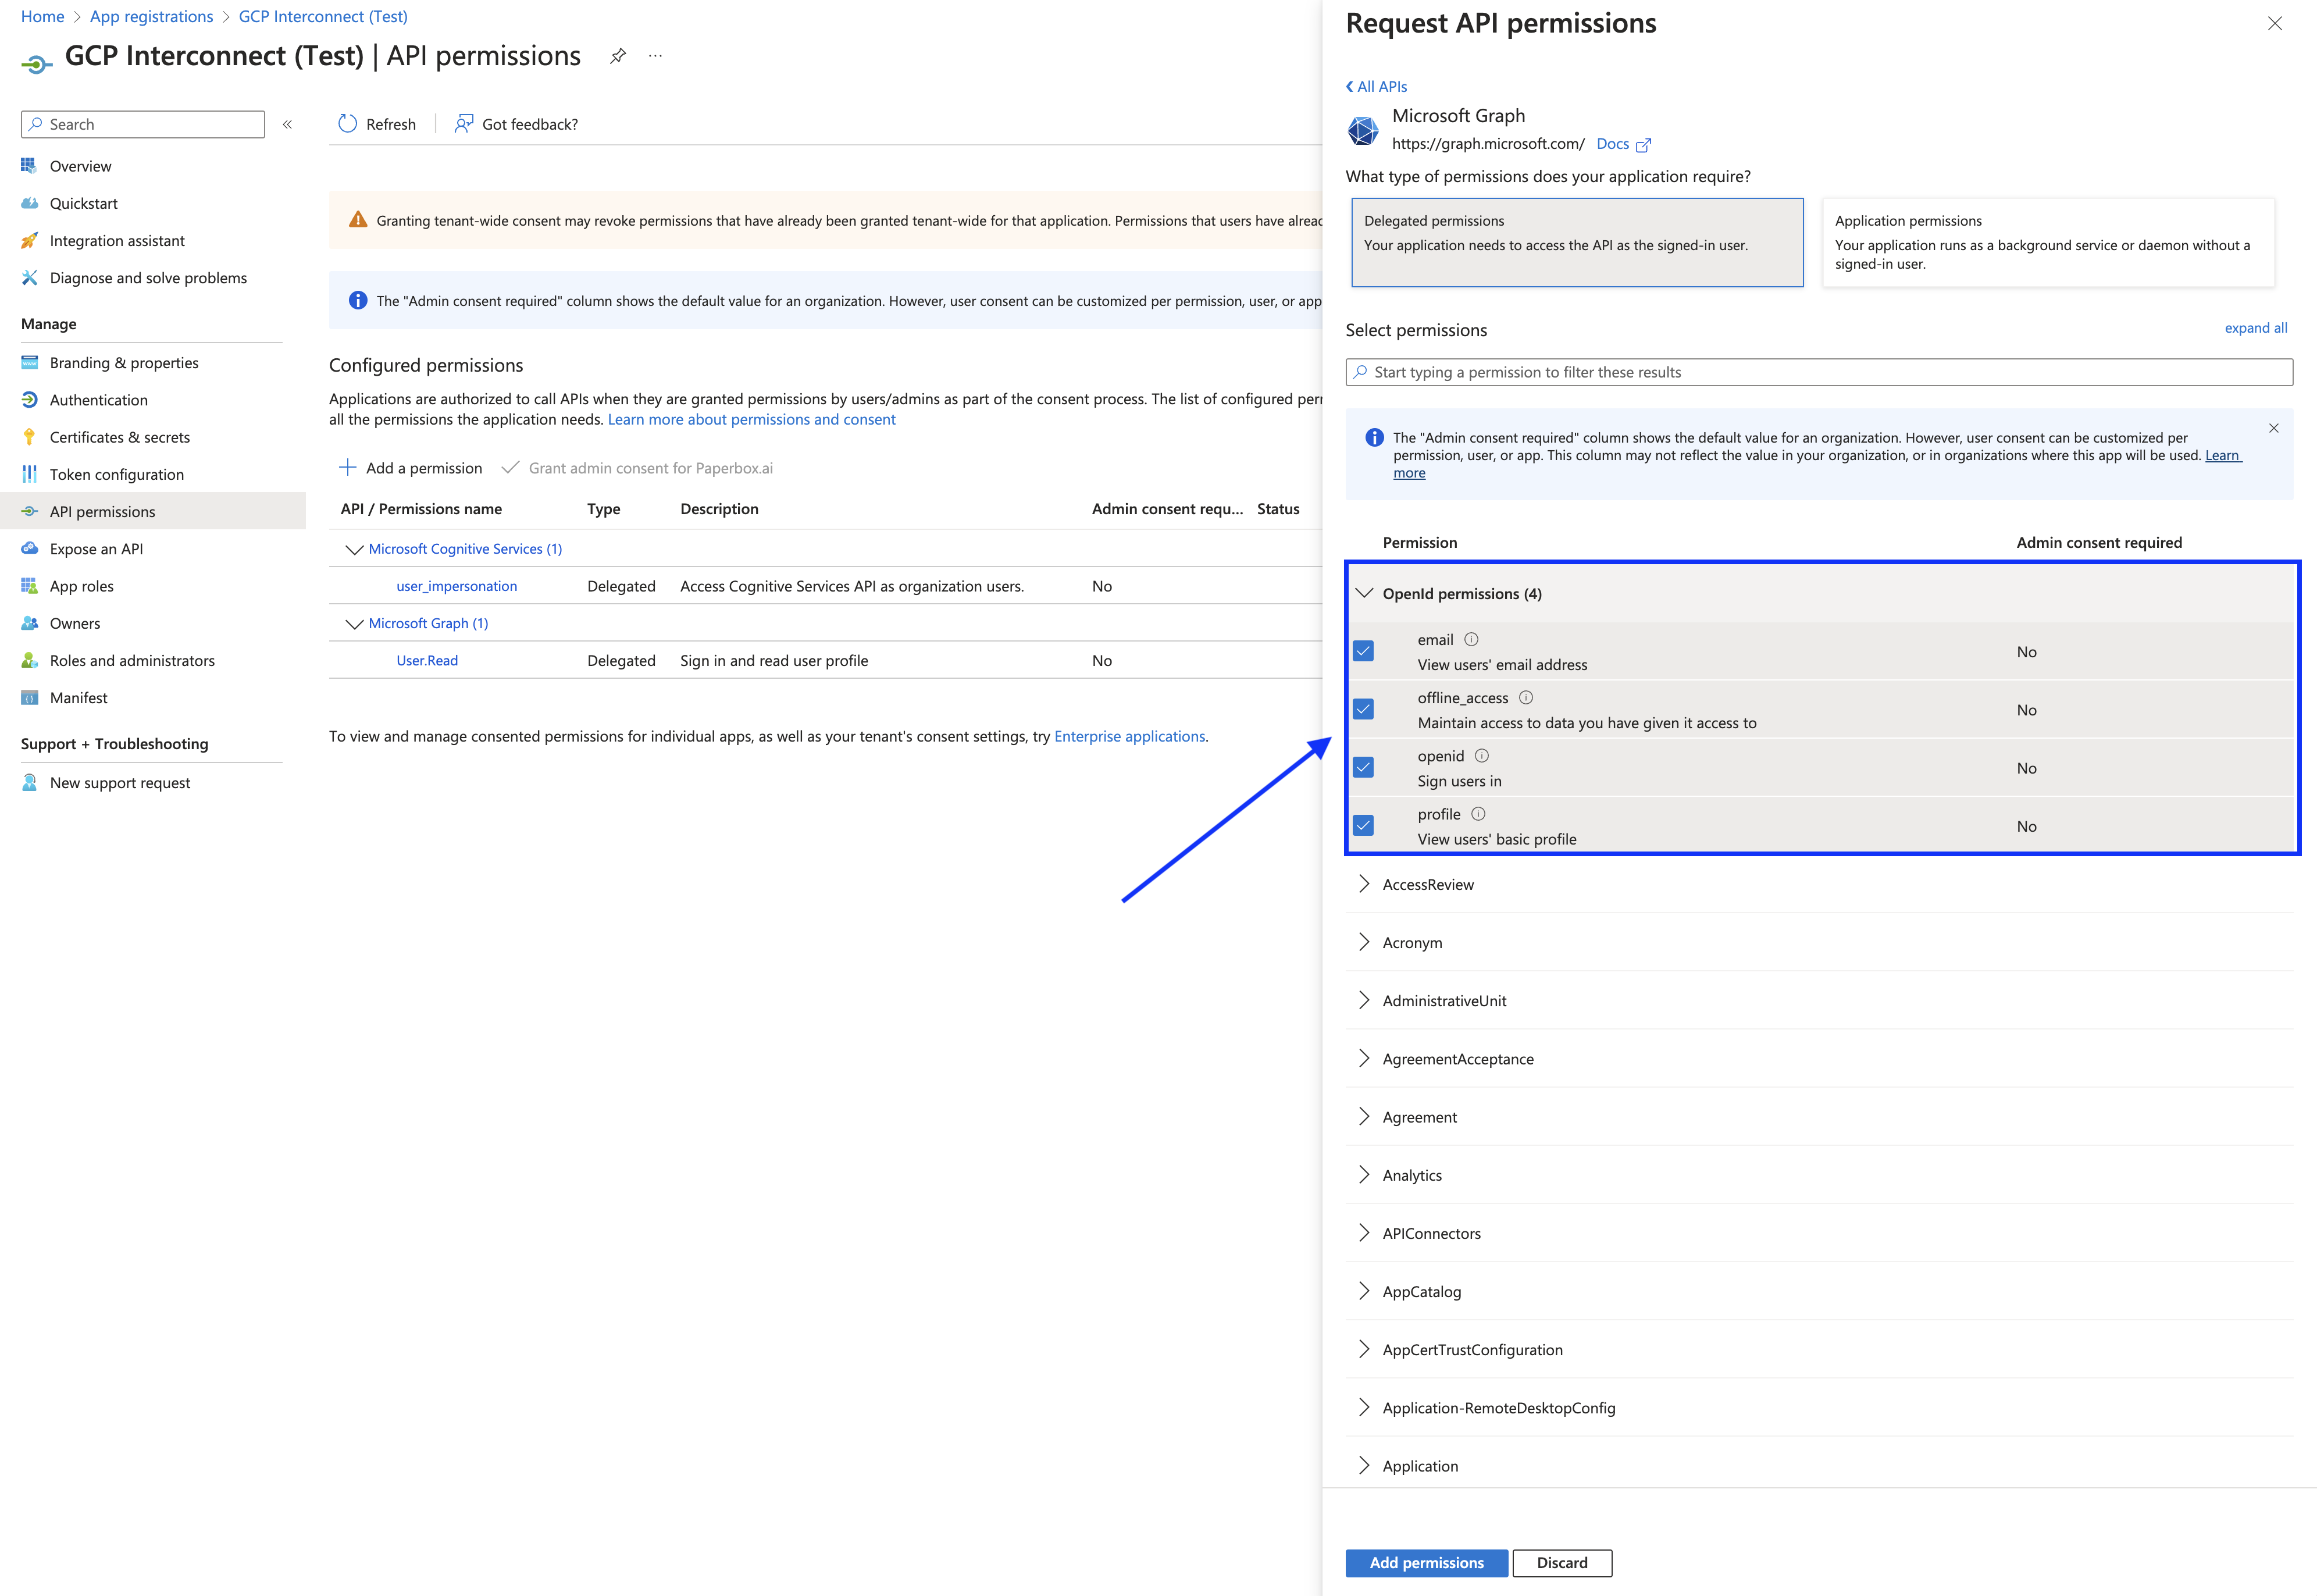
Click on Delegated Permissions
Search for Openid permissions
- Select email
- Select offline.access
- Select openid
- Select profile
Search for User
- Select User.Read
- Select User.Read.All (read the tenant's user directory, e.g. for mailbox selection)
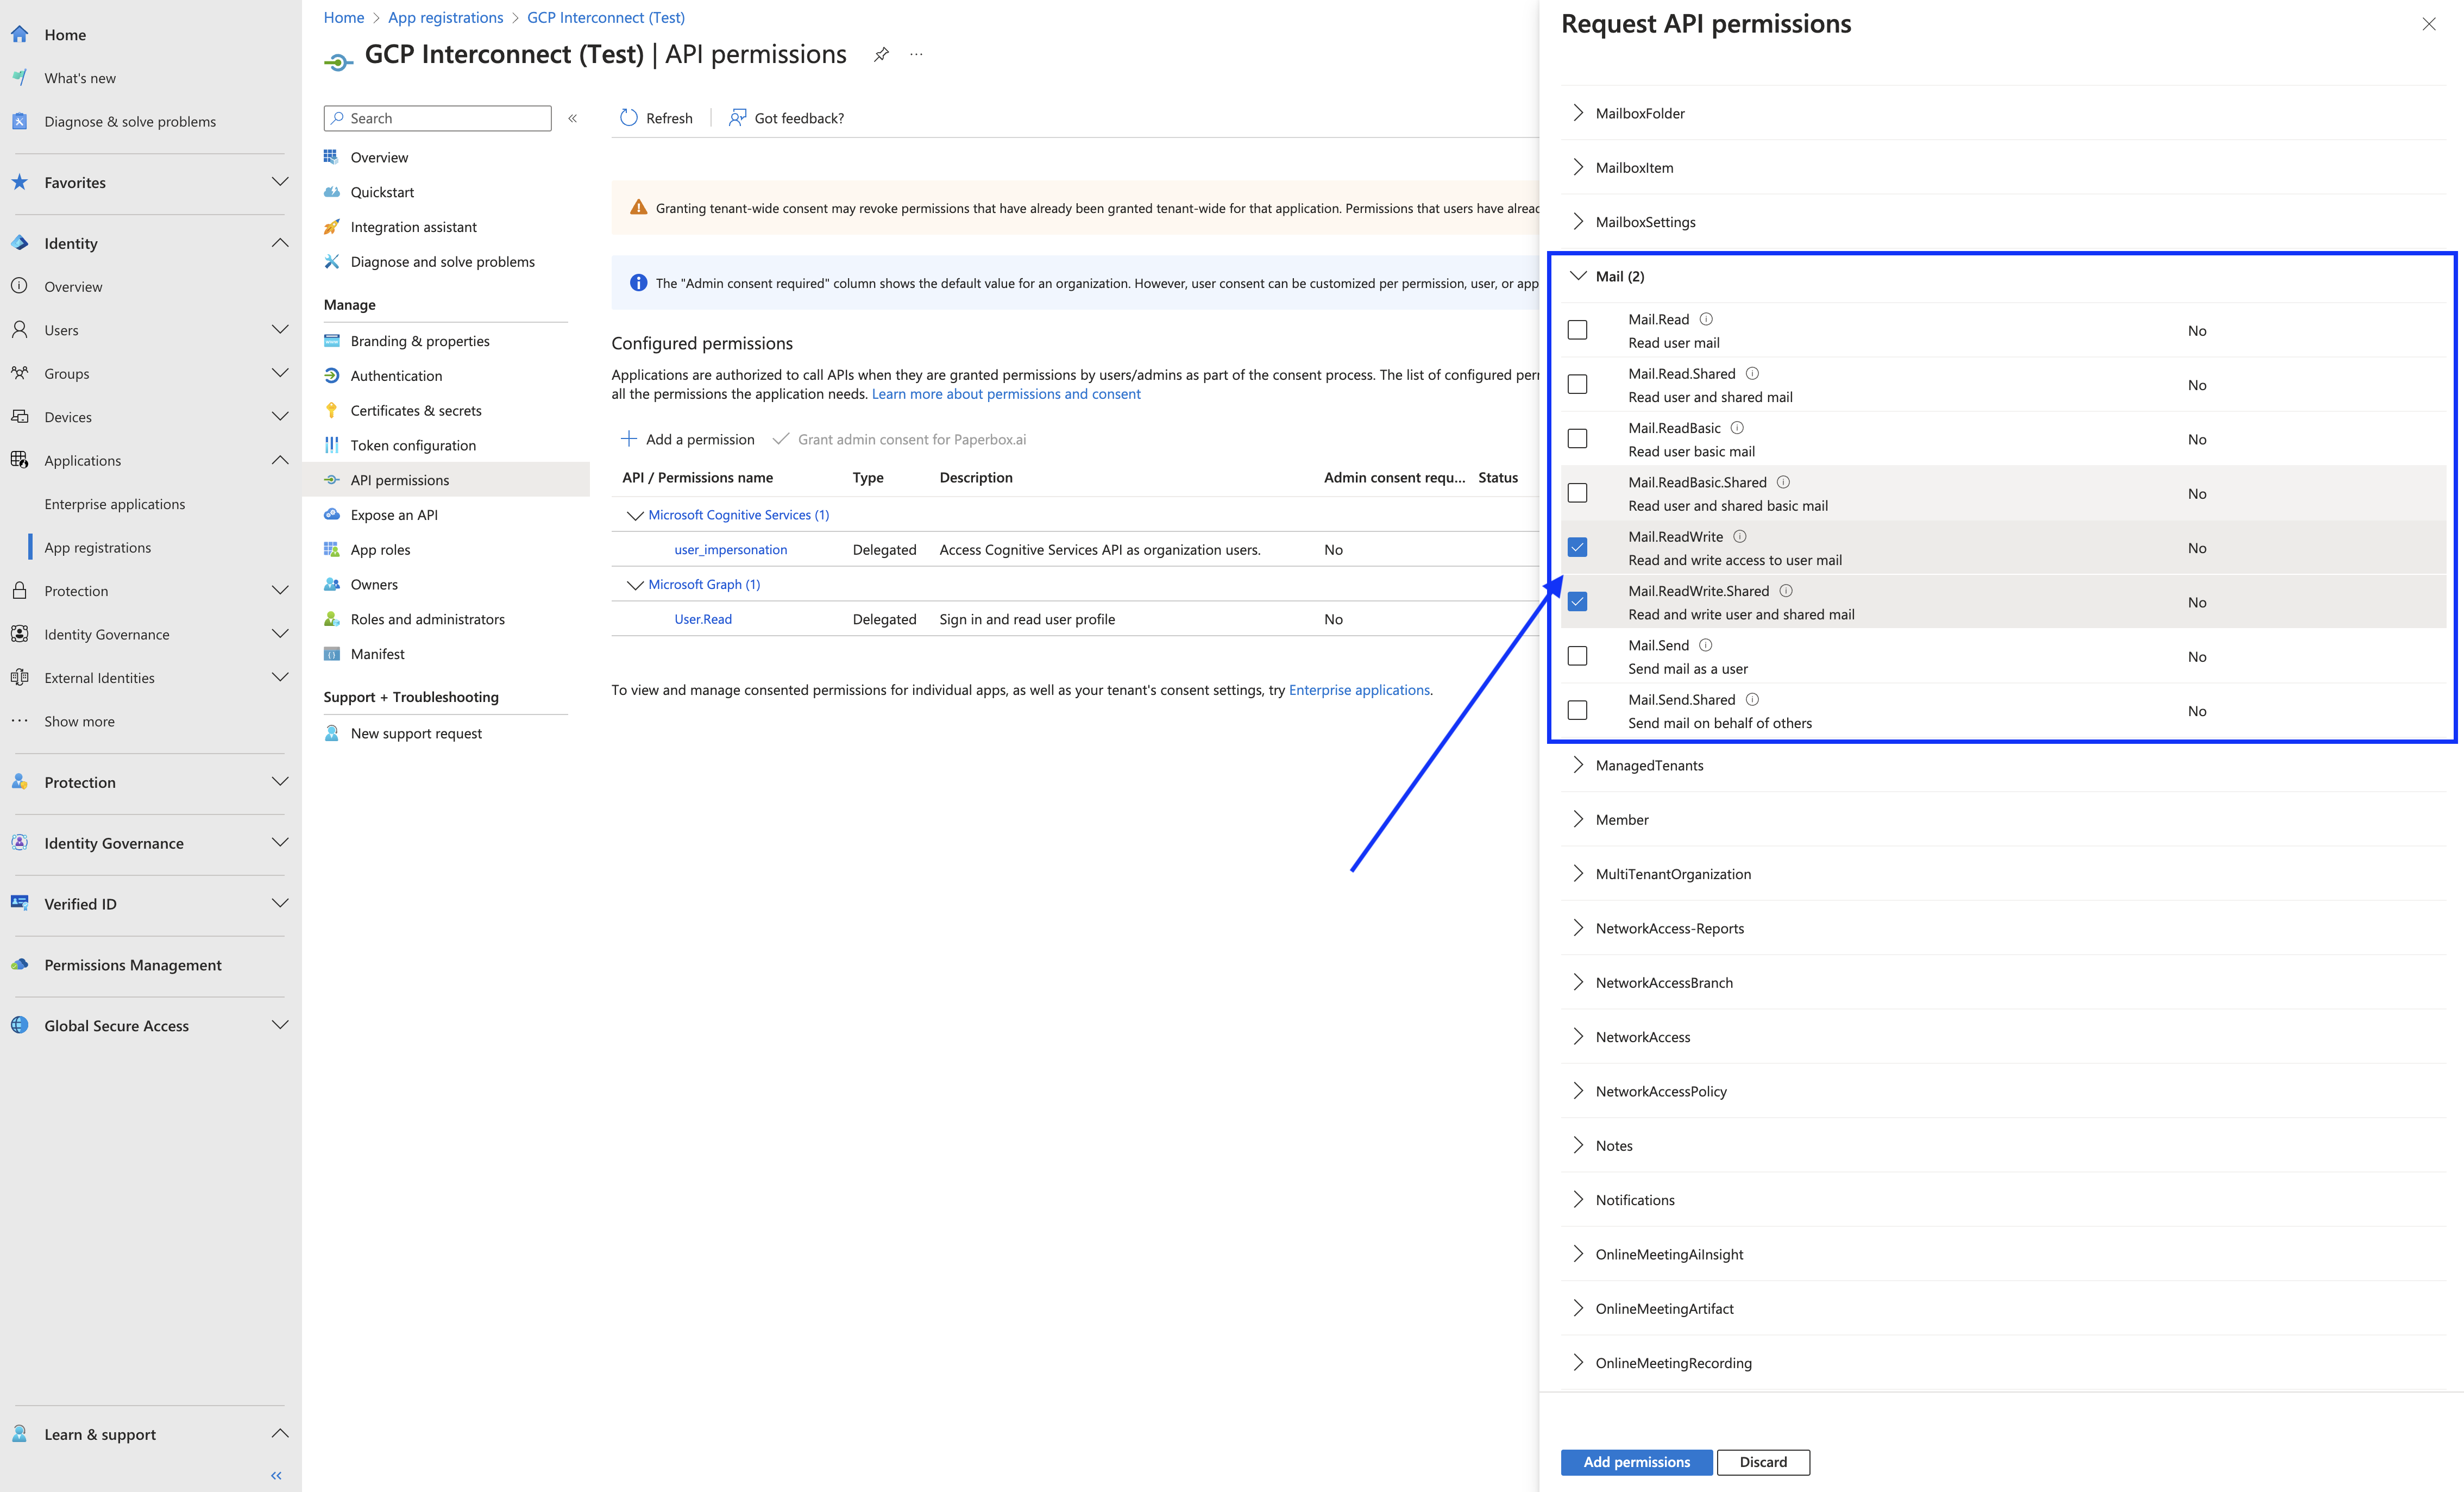
Search for Mail
- Select Mail.ReadWrite
- If applicable also select Mail.ReadWrite.Shared
- Select Mail.Send (allows Paperbox to forward emails as part of outflow actions)
- If applicable also select Mail.Send.Shared
Search for MailboxSettings
- Select MailboxSettings.ReadWrite (used to set Paperbox processing categories on emails)
For SharePoint document inflow (only needed if Paperbox should ingest documents from a SharePoint library)
- Search for Sites
- Select Sites.ReadWrite.All
- Search for Files
- Select Files.ReadWrite.All
Why write access? After Paperbox ingests a document it moves the file into an archive folder (by default a "Paperbox Processed" folder it creates in the same library), so the source folder stays a clean to-process queue. Read-only access is not enough for this move, so the SharePoint scopes are
ReadWrite.- Search for Sites
Click on Add permission
What does Paperbox need at the end?
- Application (client) ID
- Directory (Tenant) ID
- Client Secret Value (So not the secret ID!)
- Expiration Date of the Client Secret
Once you’ve gathered the required details, please send them securely to Paperbox to complete the setup.