General Annotation Guidelines
In Machine Learning (ML) and Artificial Intelligence (AI), data annotation is the process of labeling data to show the outcome you want your ML model to predict. Generally speaking, you are labeling a dataset with the features you want your ML system to learn and recognize. Accurate and consistent labeling is key for a good performance of an ML model. The following guidelines will help you through the process of labeling your data in Paperbox.
Key Guidelines
Annotation Teams
It is important to note that both label accuracy and label detail should be consistent across all documents in the dataset. More specifically, context consistency should be kept in mind, which means that the same field in the same context should always be labeled in the same way. 100 correctly annotated documents are much more useful than 1000 documents of mixed quality. Every person in the annotation team needs to be aligned when starting with the annotation work. It is key that everyone in the annotation team labels the fields in the same structured way, so that context consistency is preserved.
General field Annotation
The process of annotating different fields inside a document can best be explained by using an example. Imagine the following field types that can be annotated inside a document:
- Factuurnummer
- Ordernummer
- IBAN
The following steps will explain how the annotator can annotate the correct IBANnummer
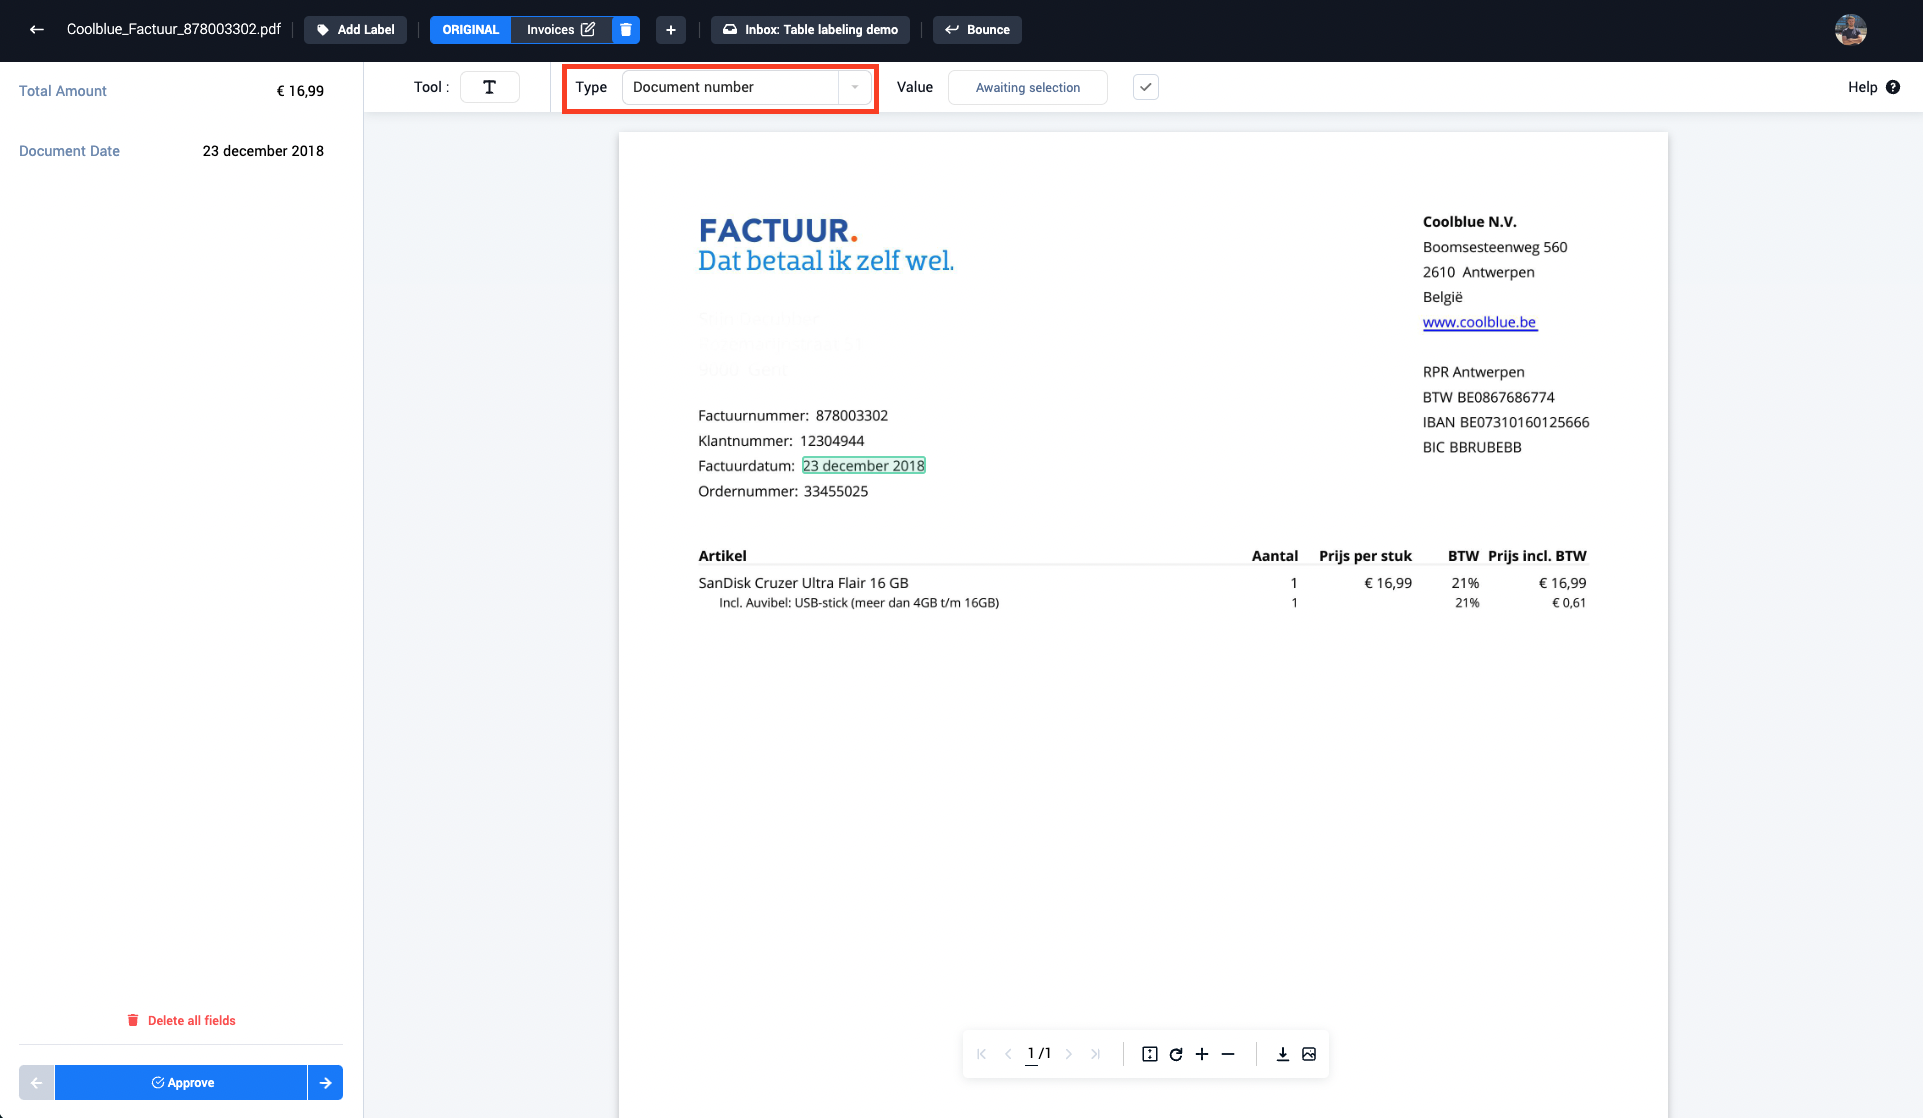
Step 1: Navigate to the field type drop down
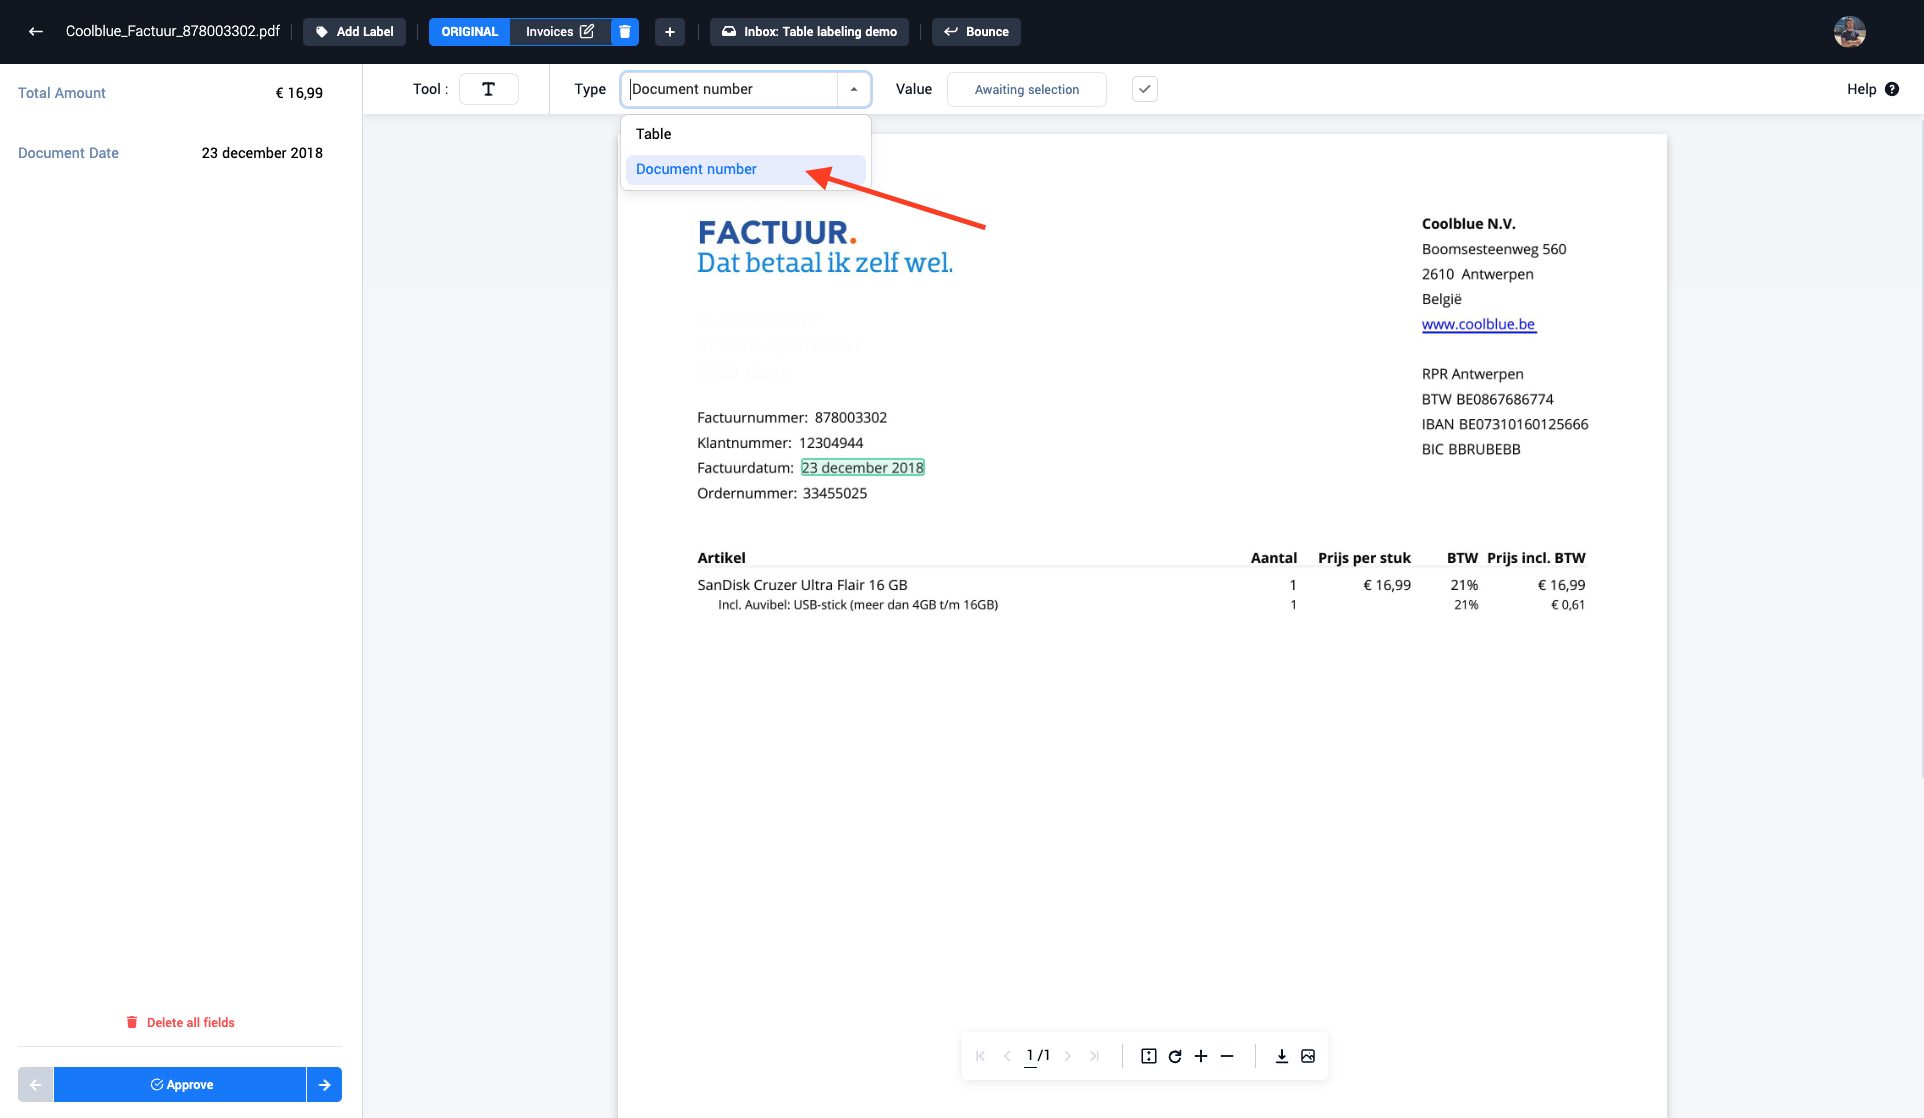
Step 2: Select the correct field type from the drop-down menu (IBANnummer)
Step 3: Select the IBAN number (IBANnummer) inside the document with the drag and select tool
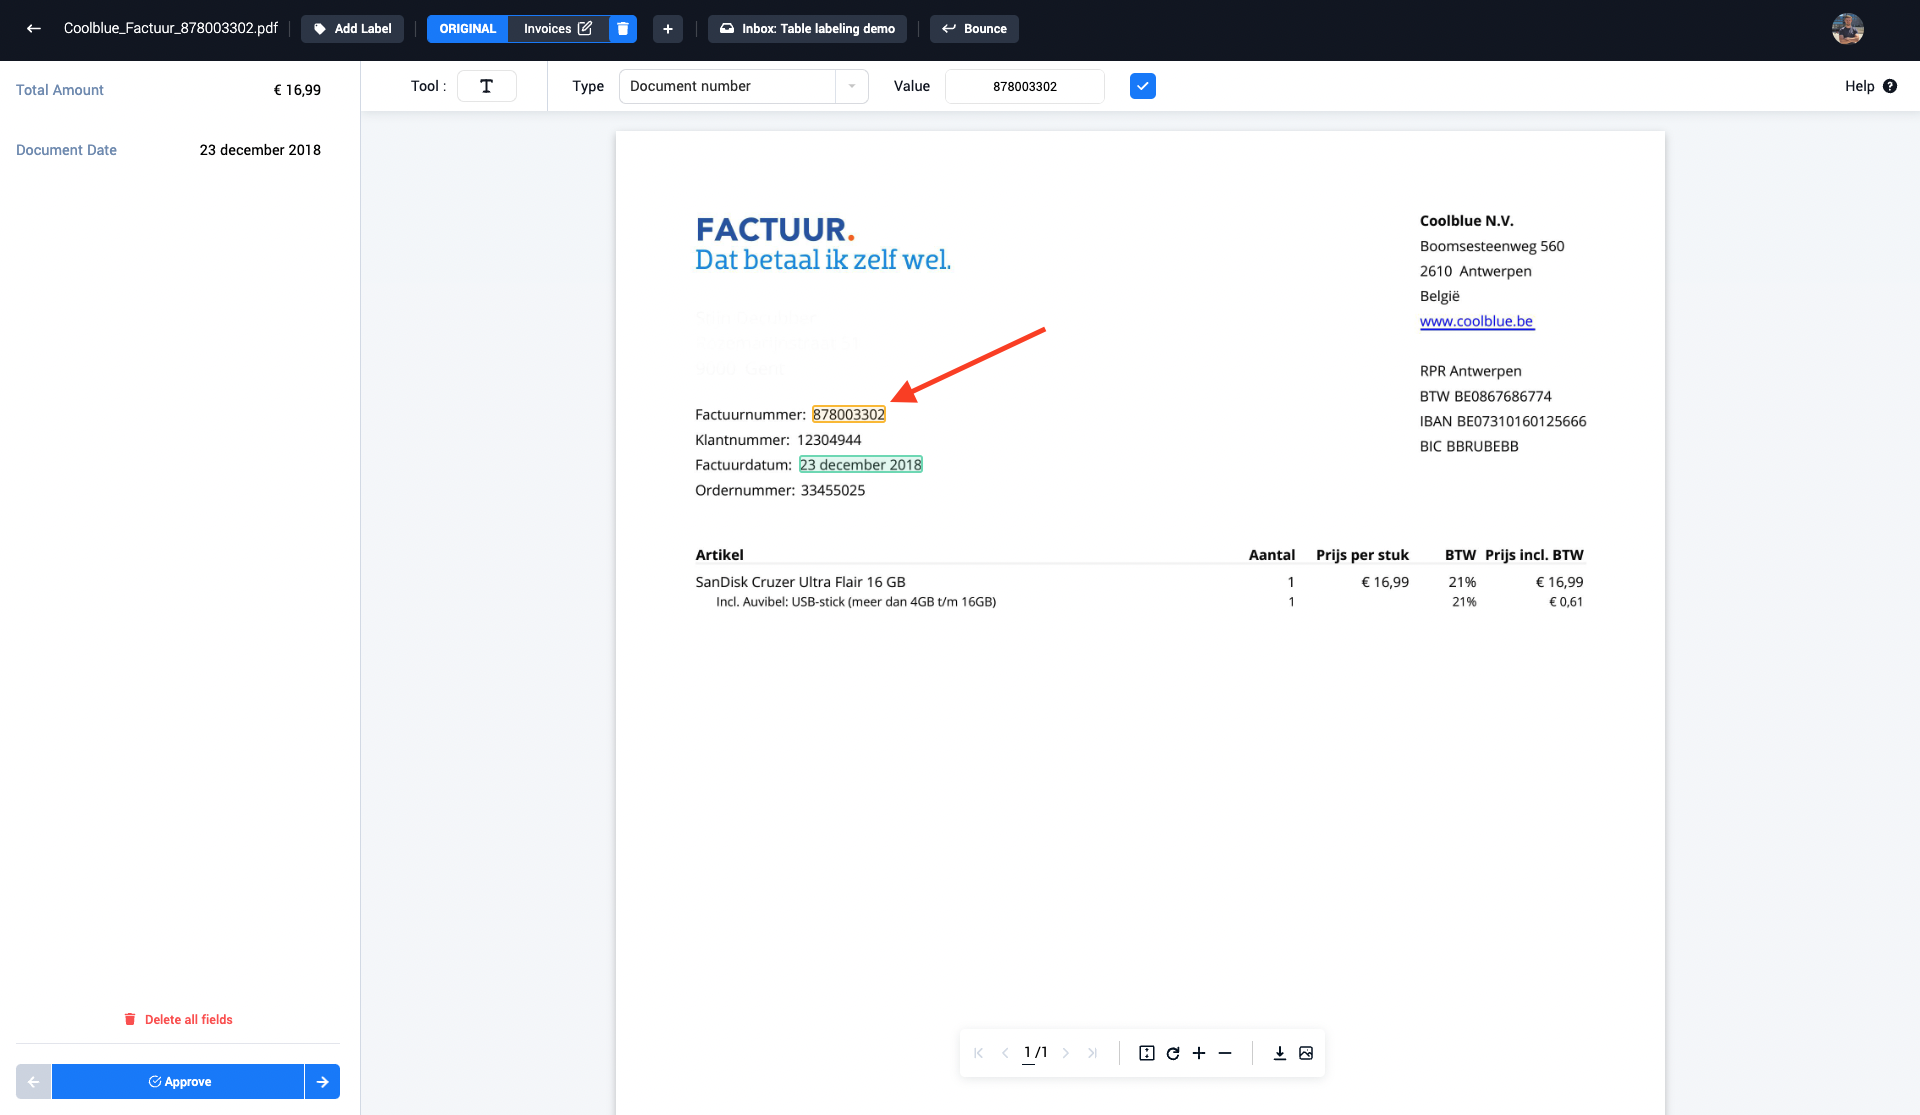
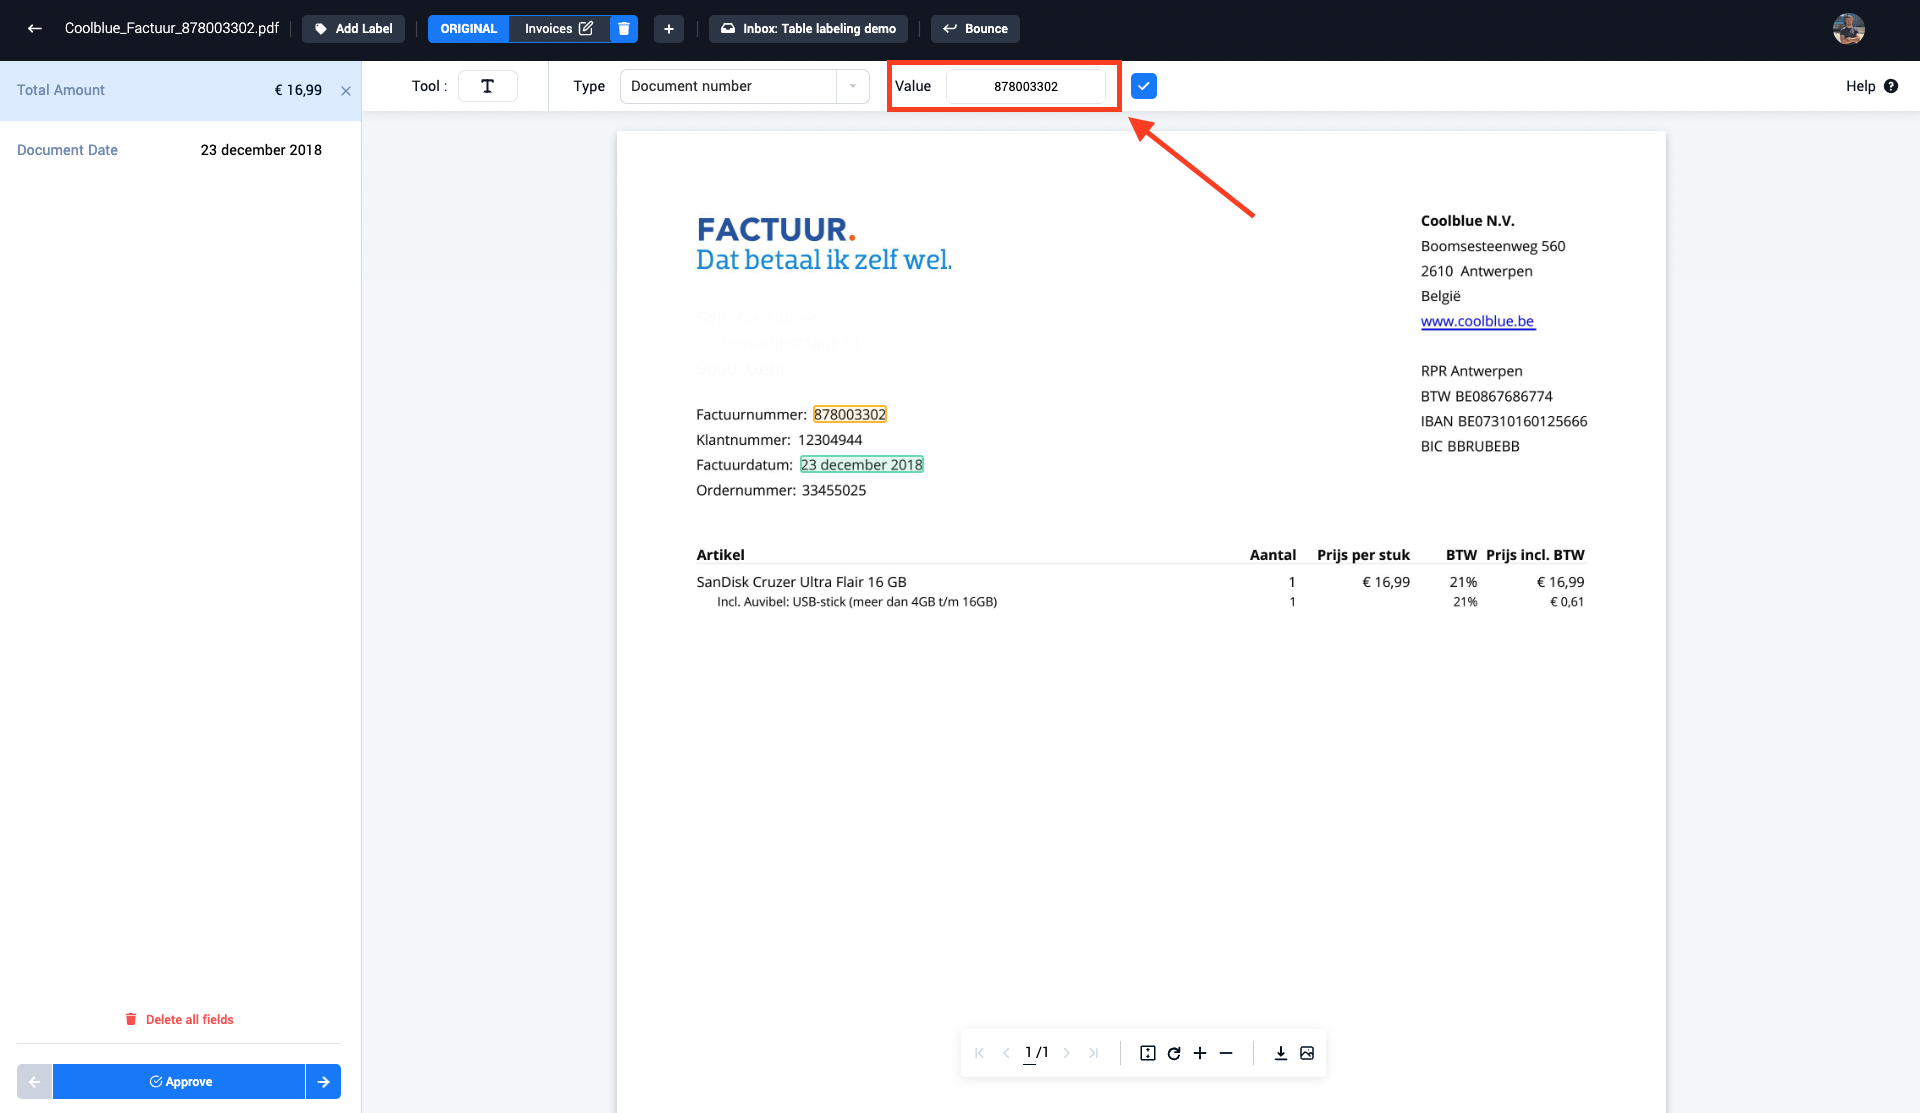
Step 4: The annotator can change the select value if necessary, after which the selected field can be accepted
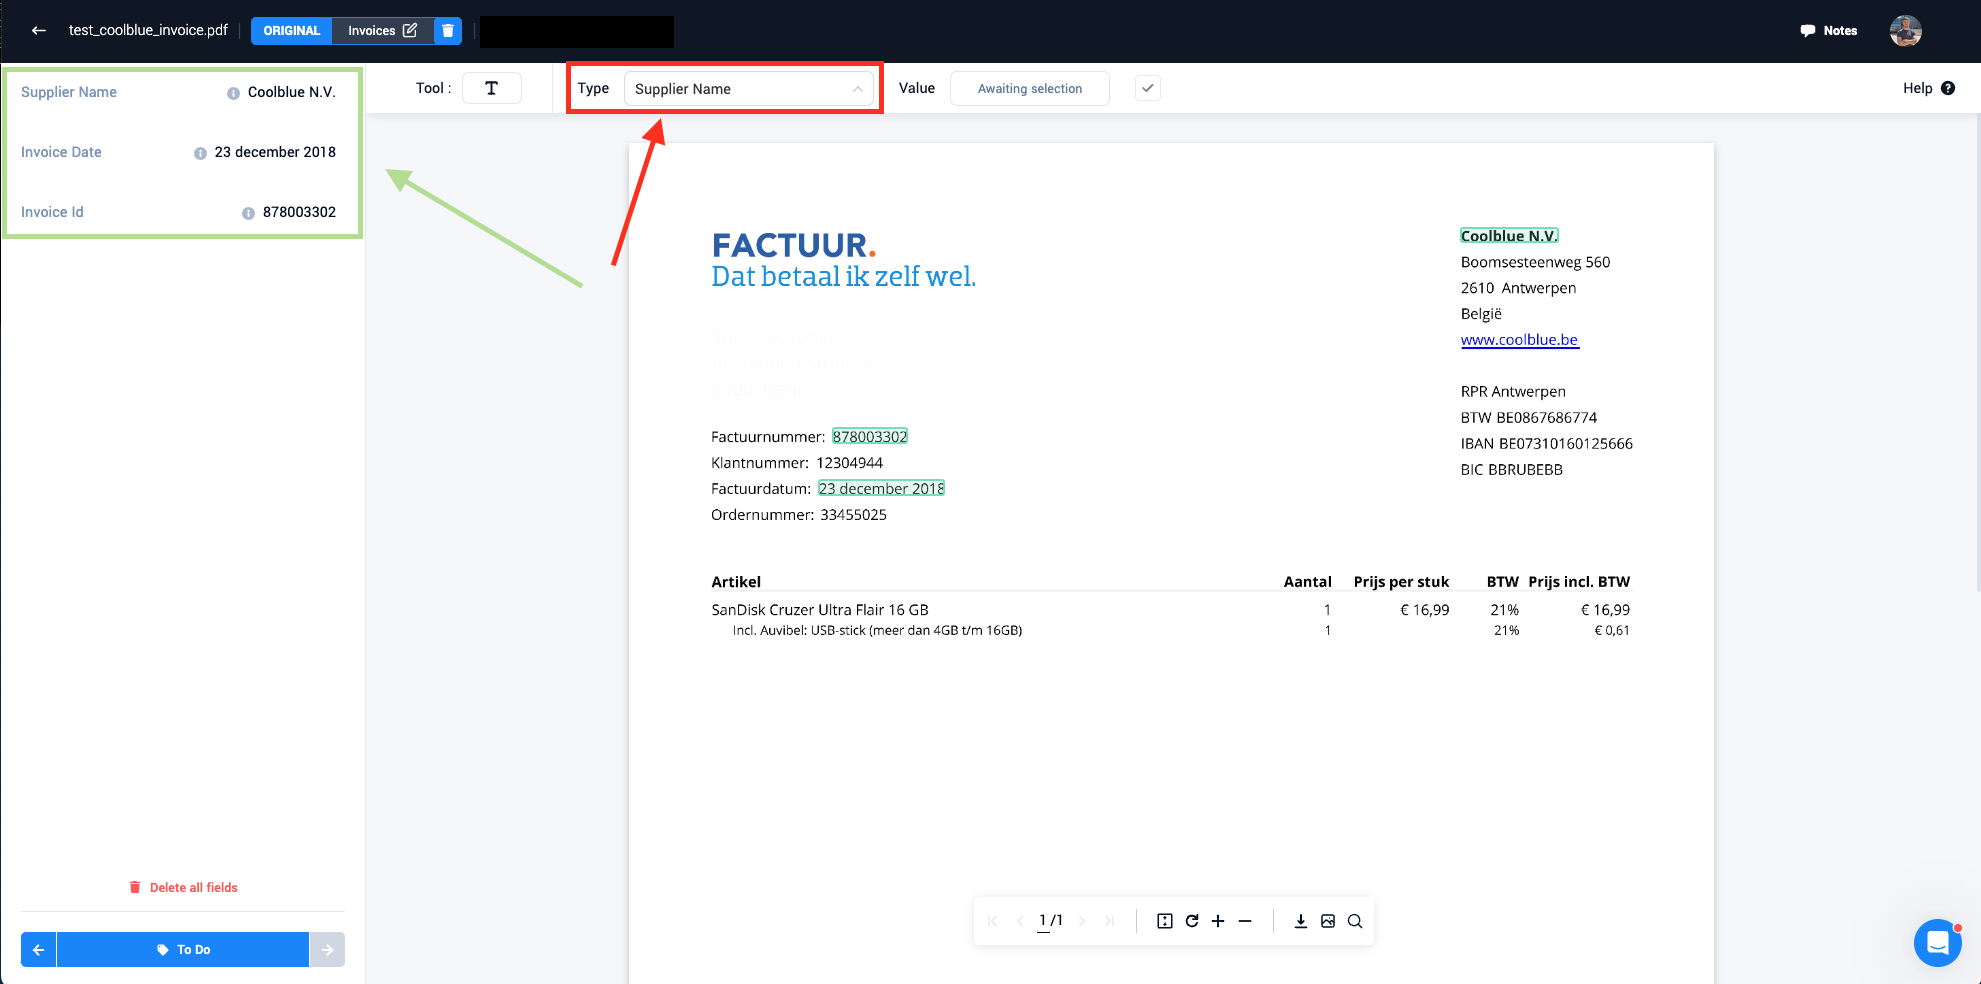
Step 5: The newly selected field is now visible inside the left field panel
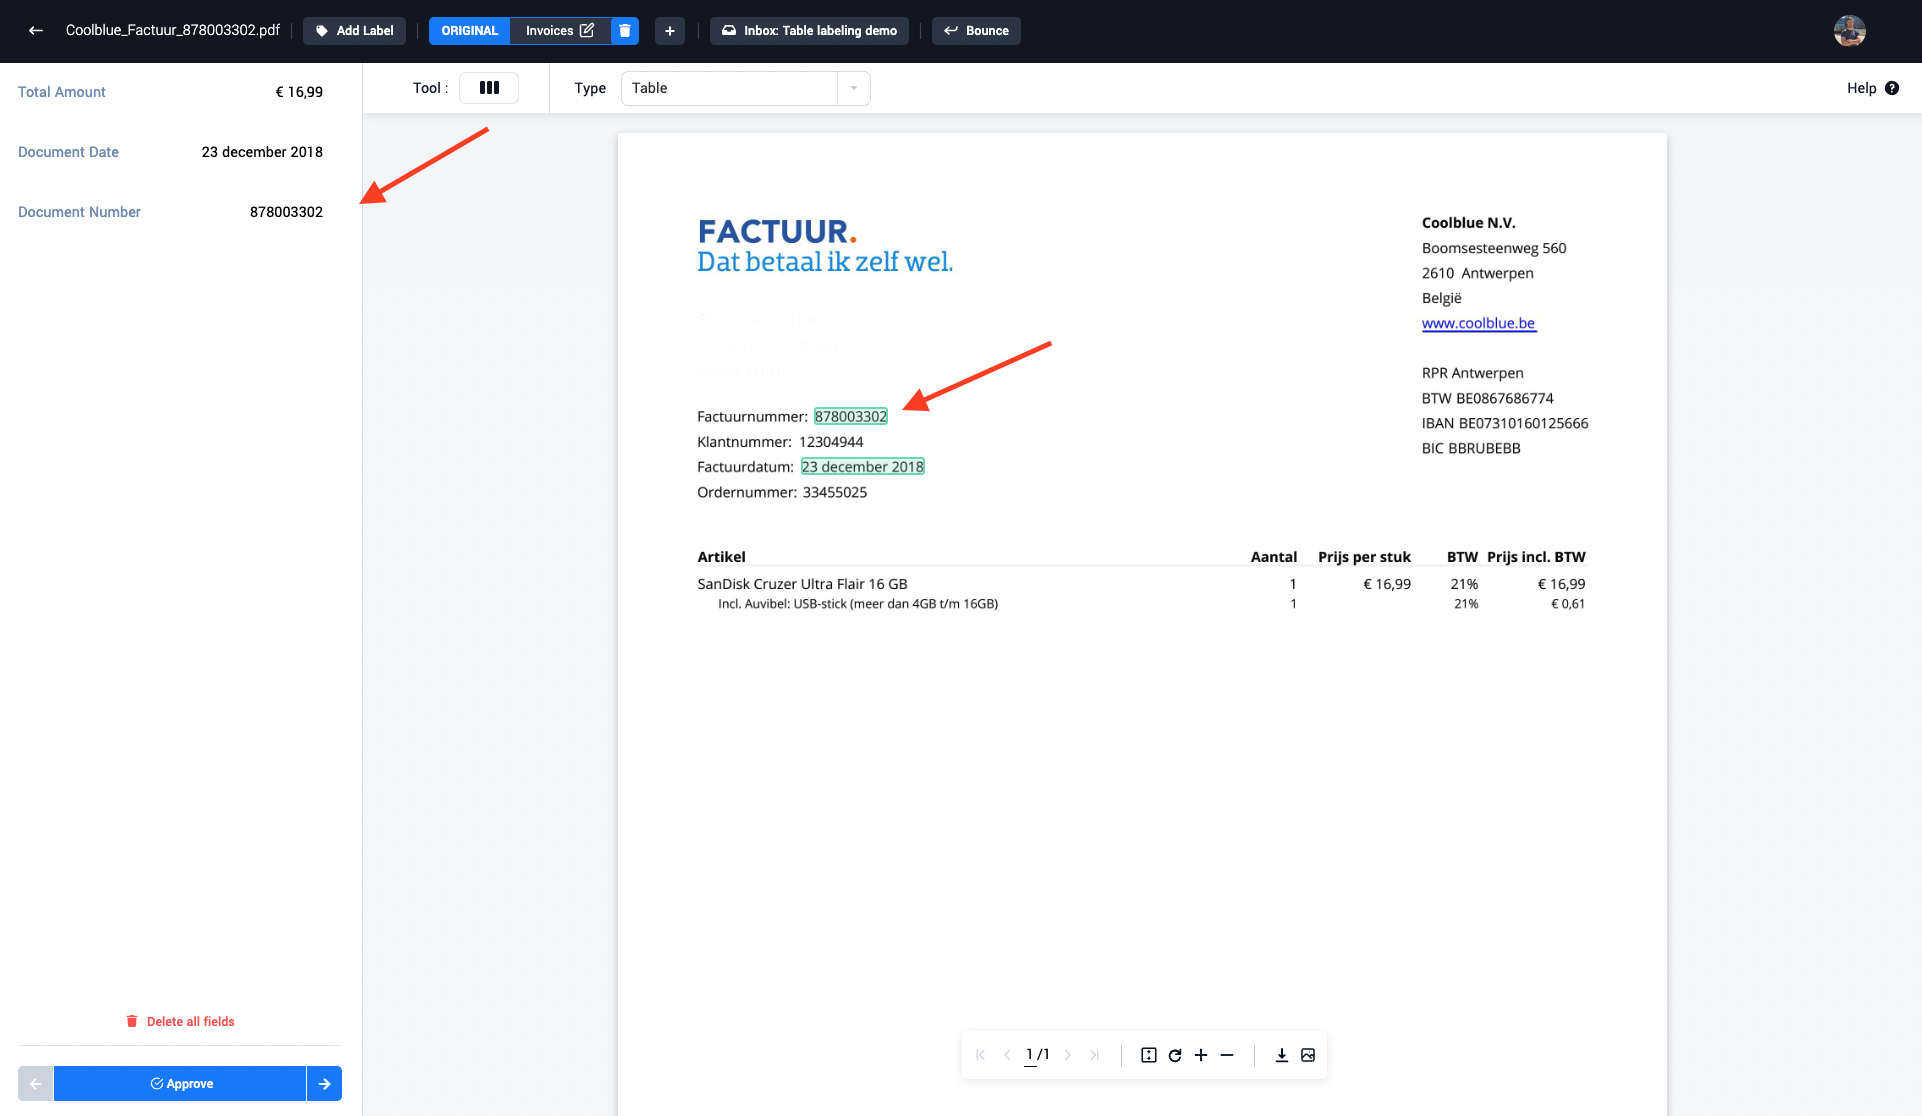
Table field Annotation (optional)
The following steps show how an annotator can correctly annotate a table inside a document:
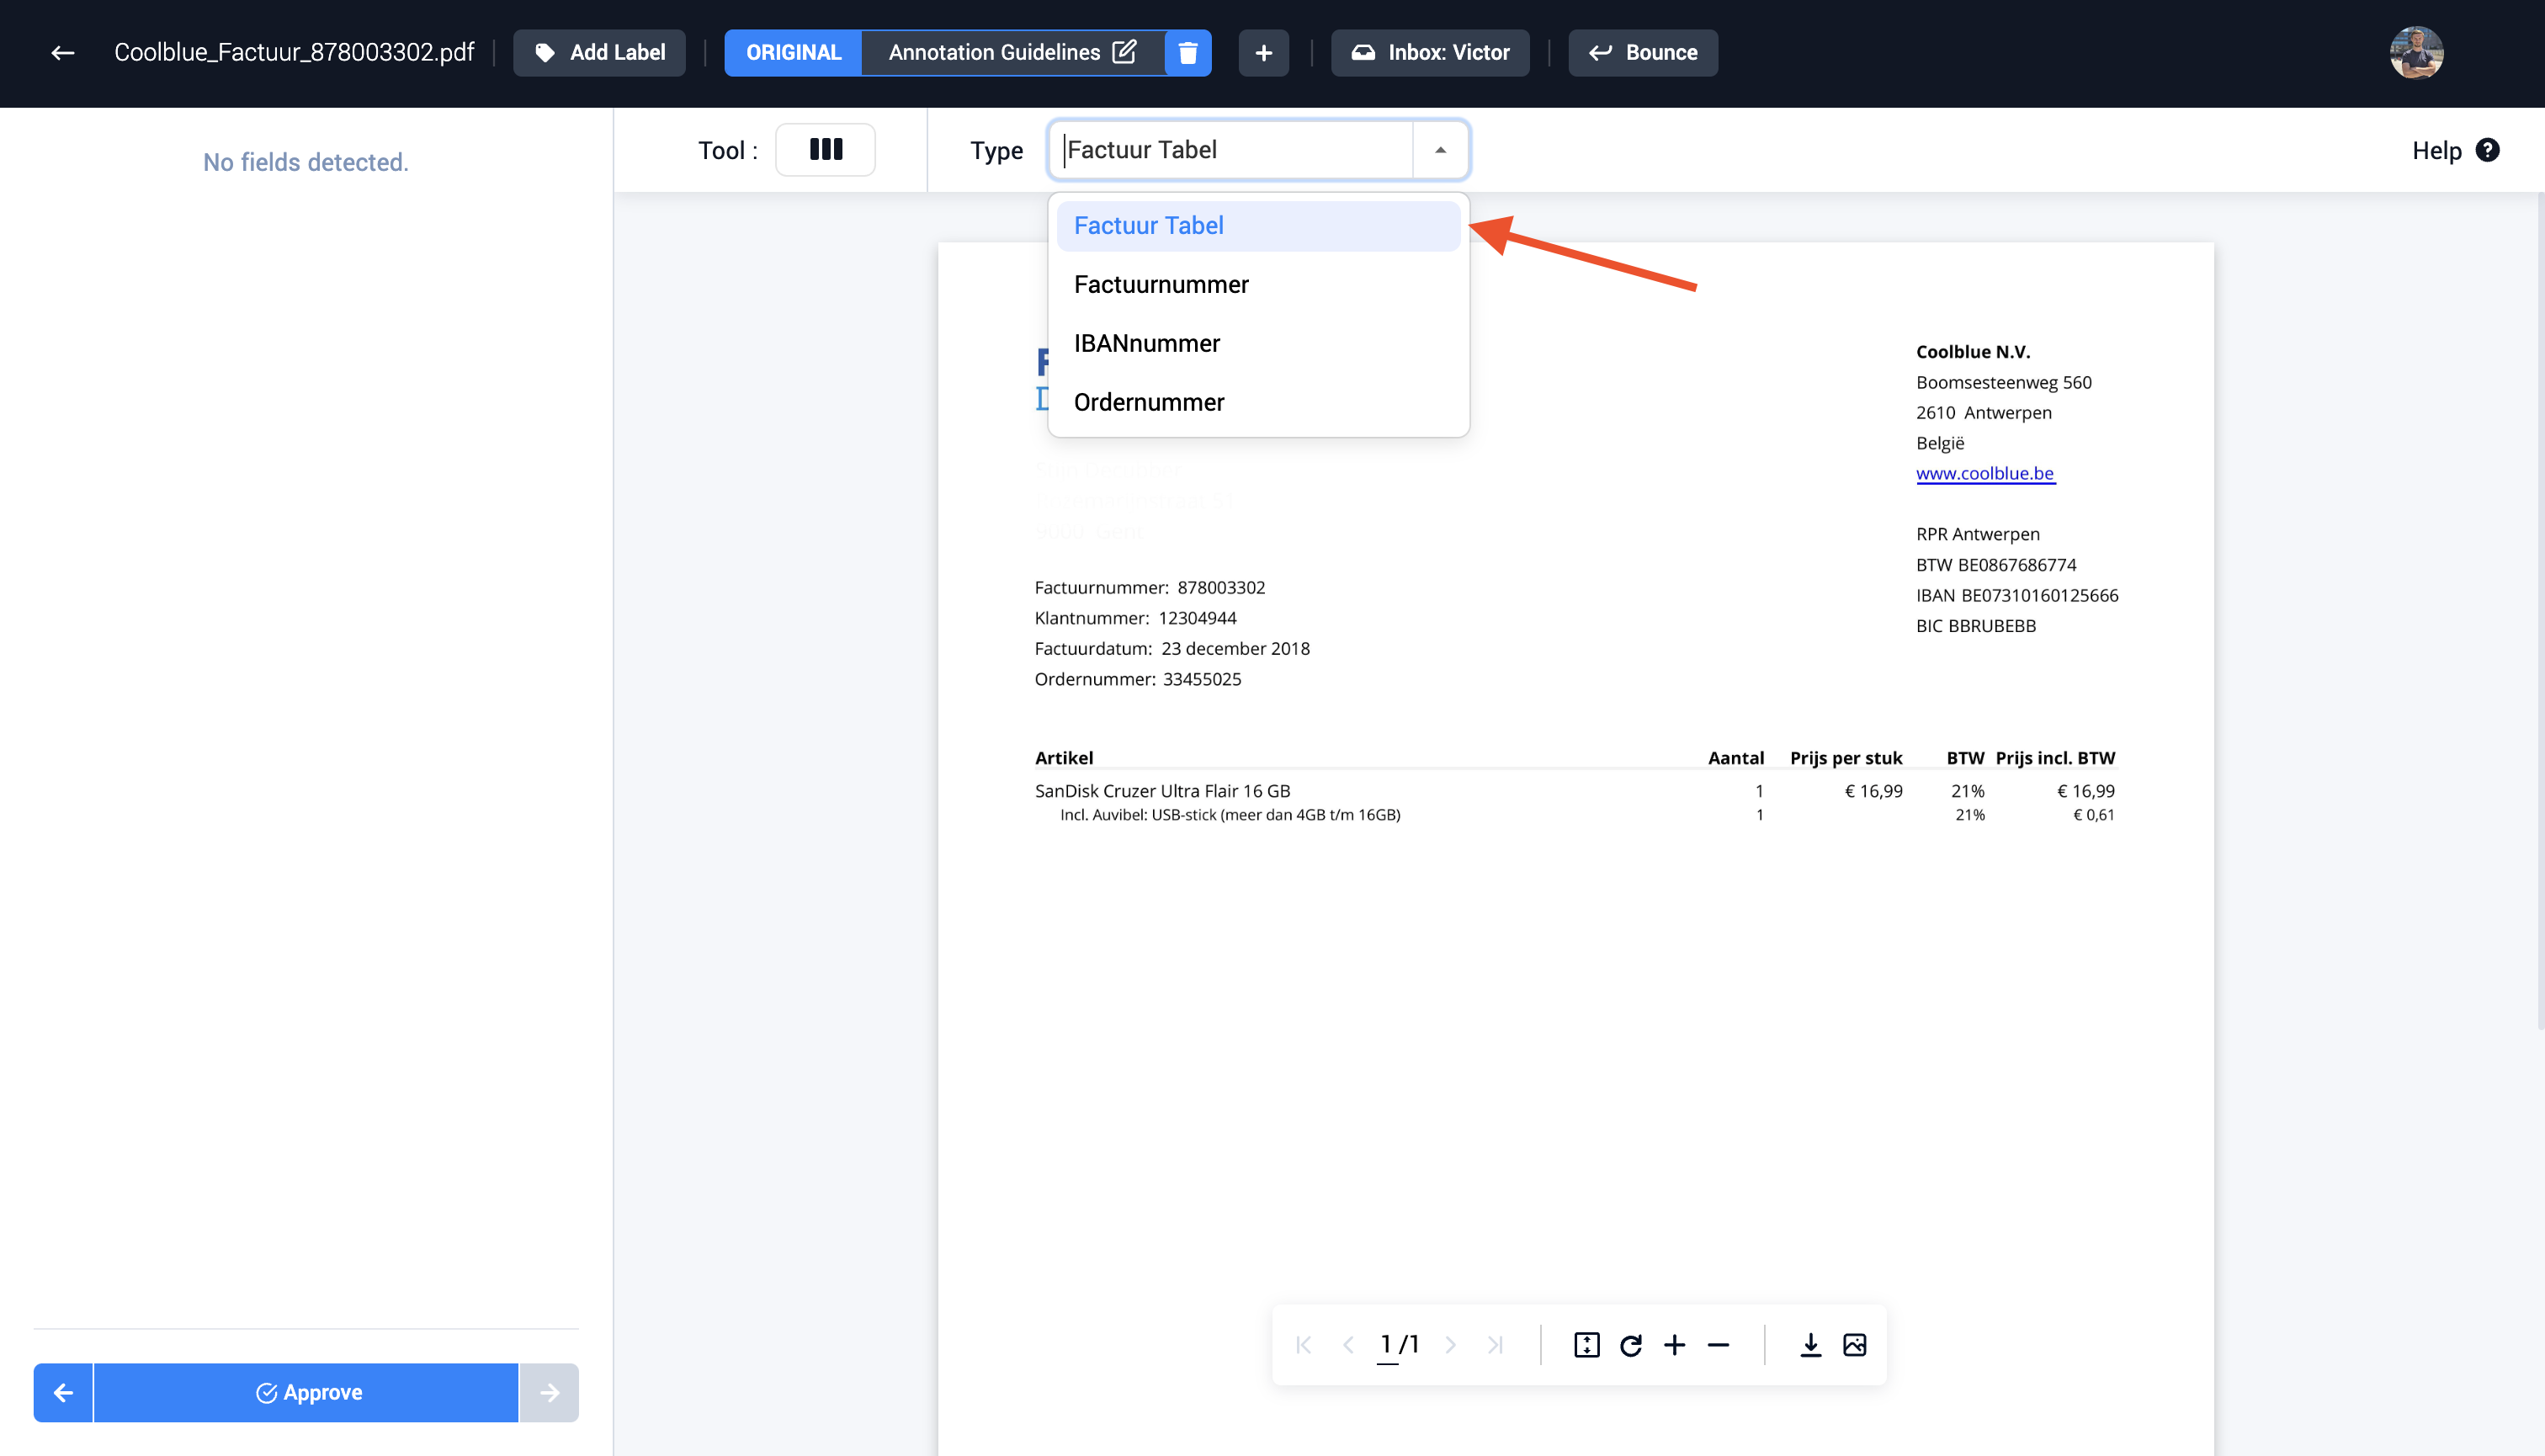
Step 1: Navigate to the field type drop down
Step 2: Select the table field type in the drop-down menu
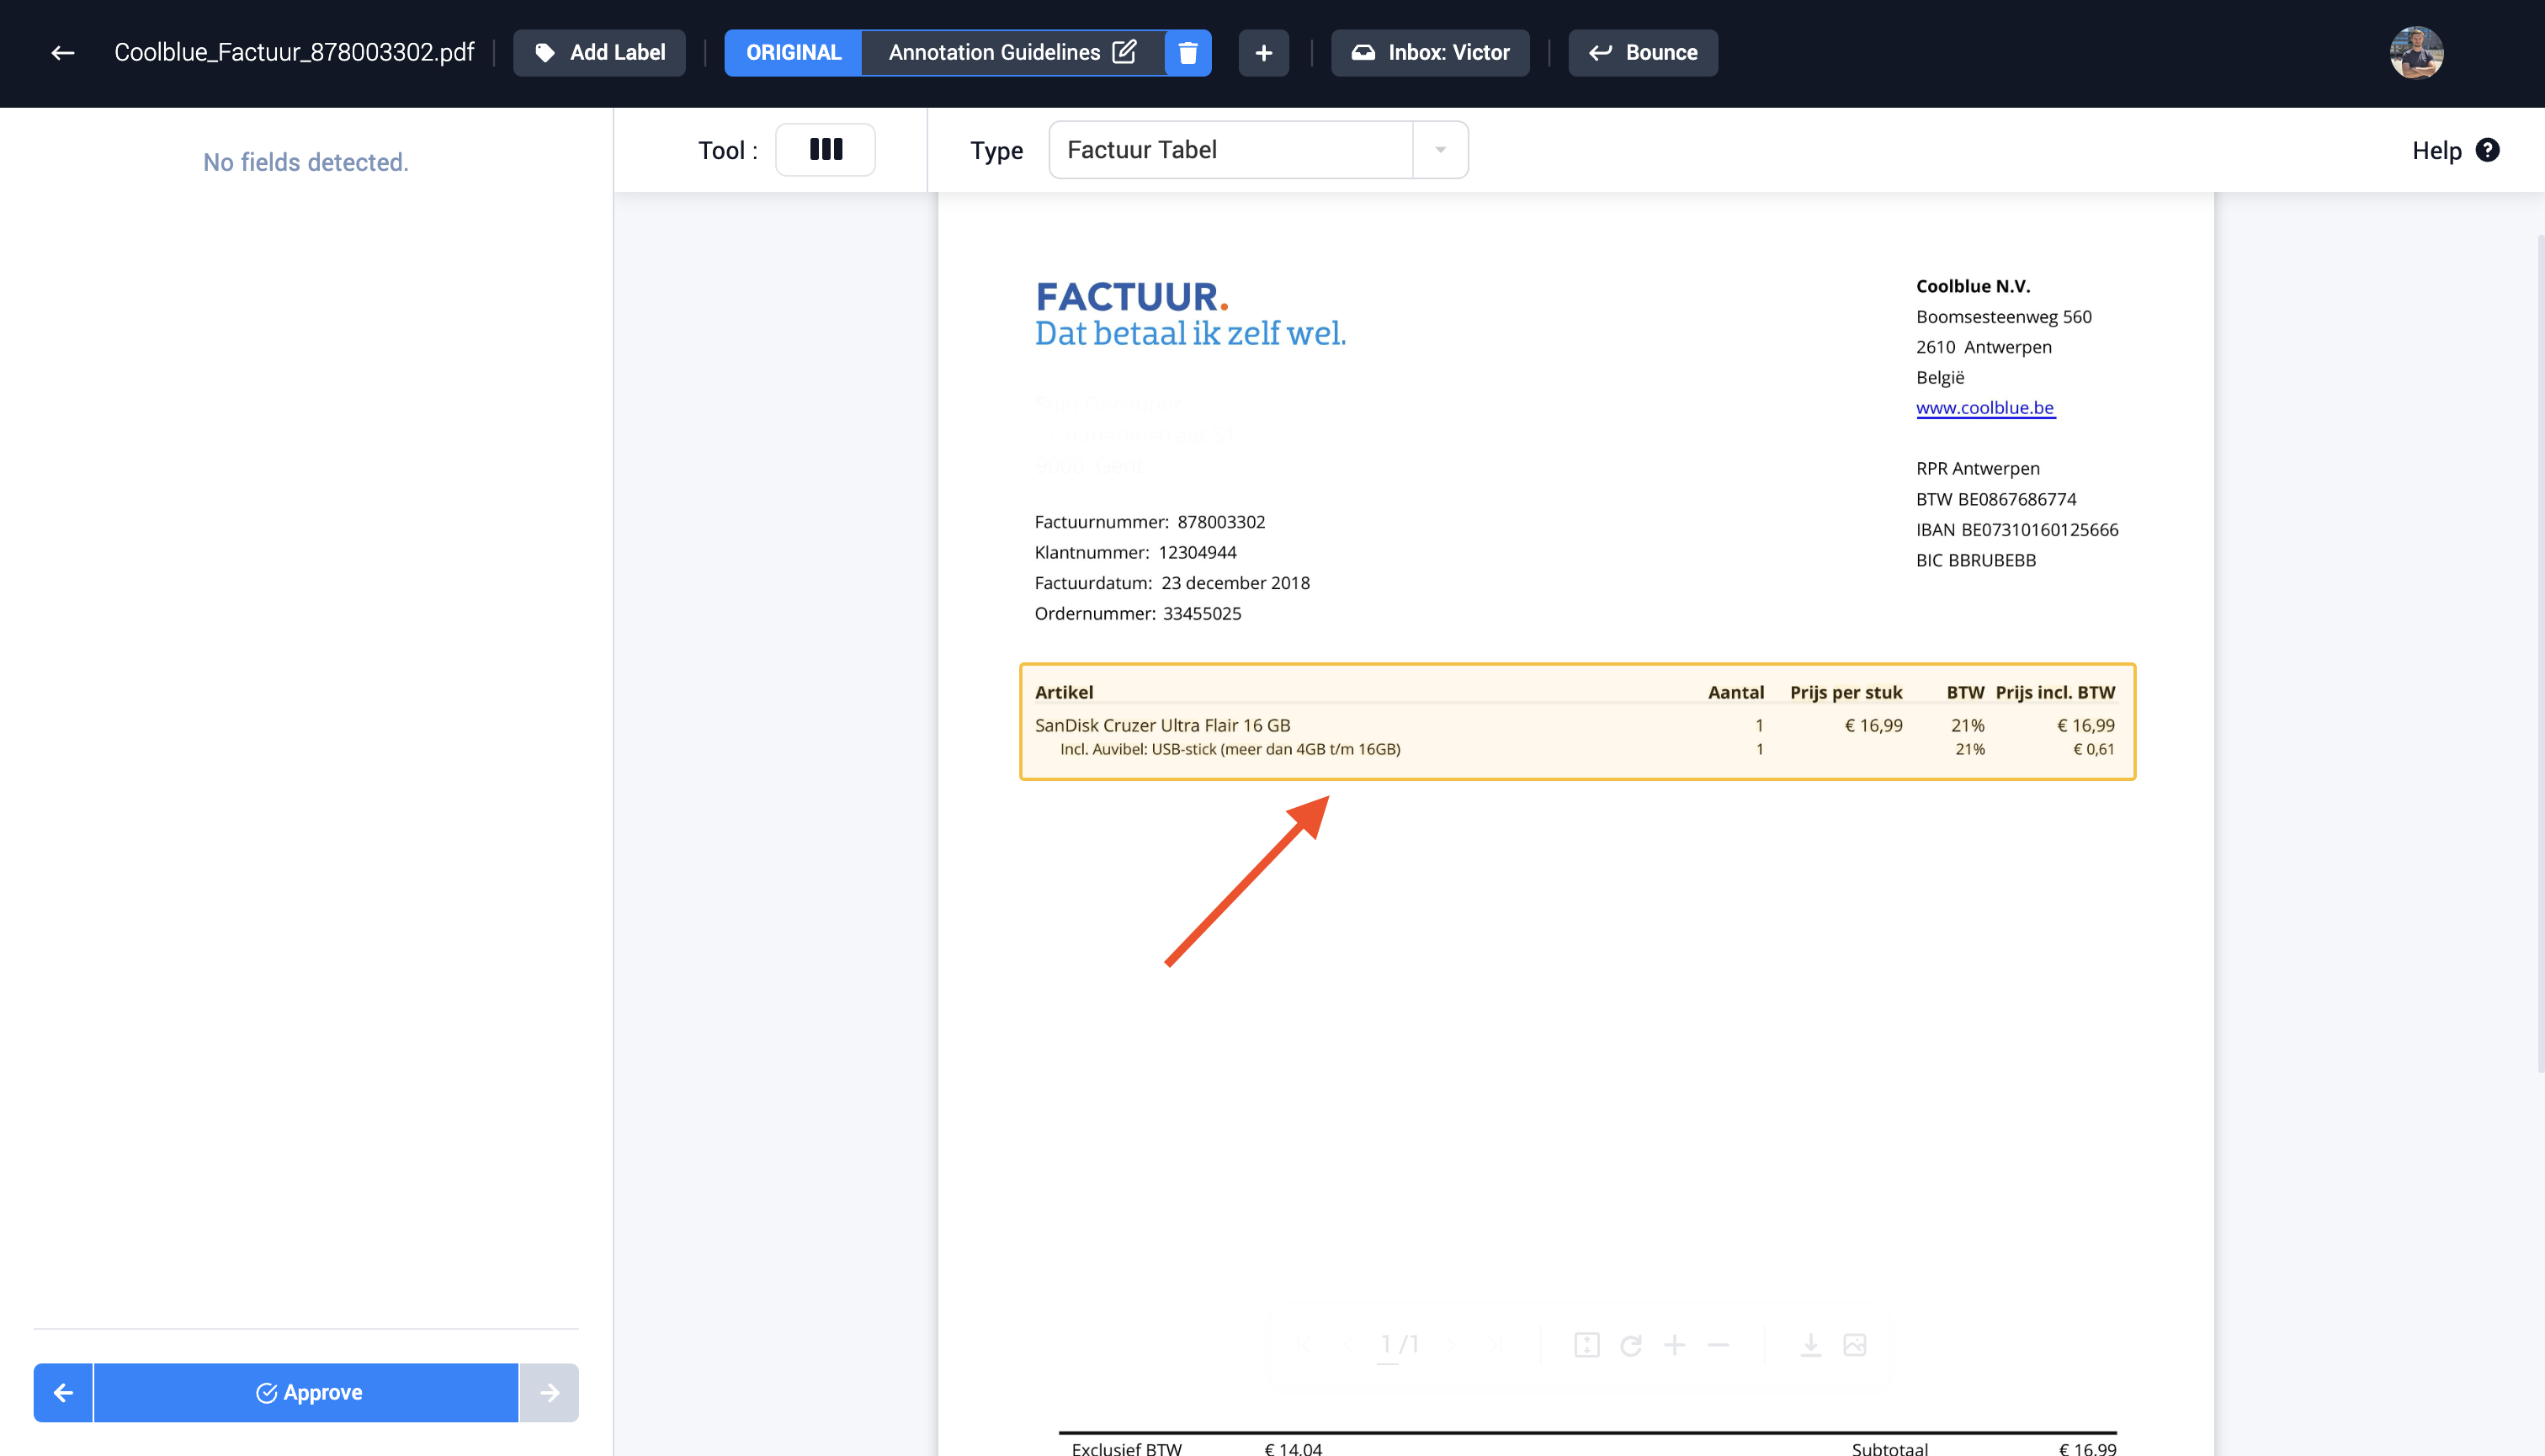
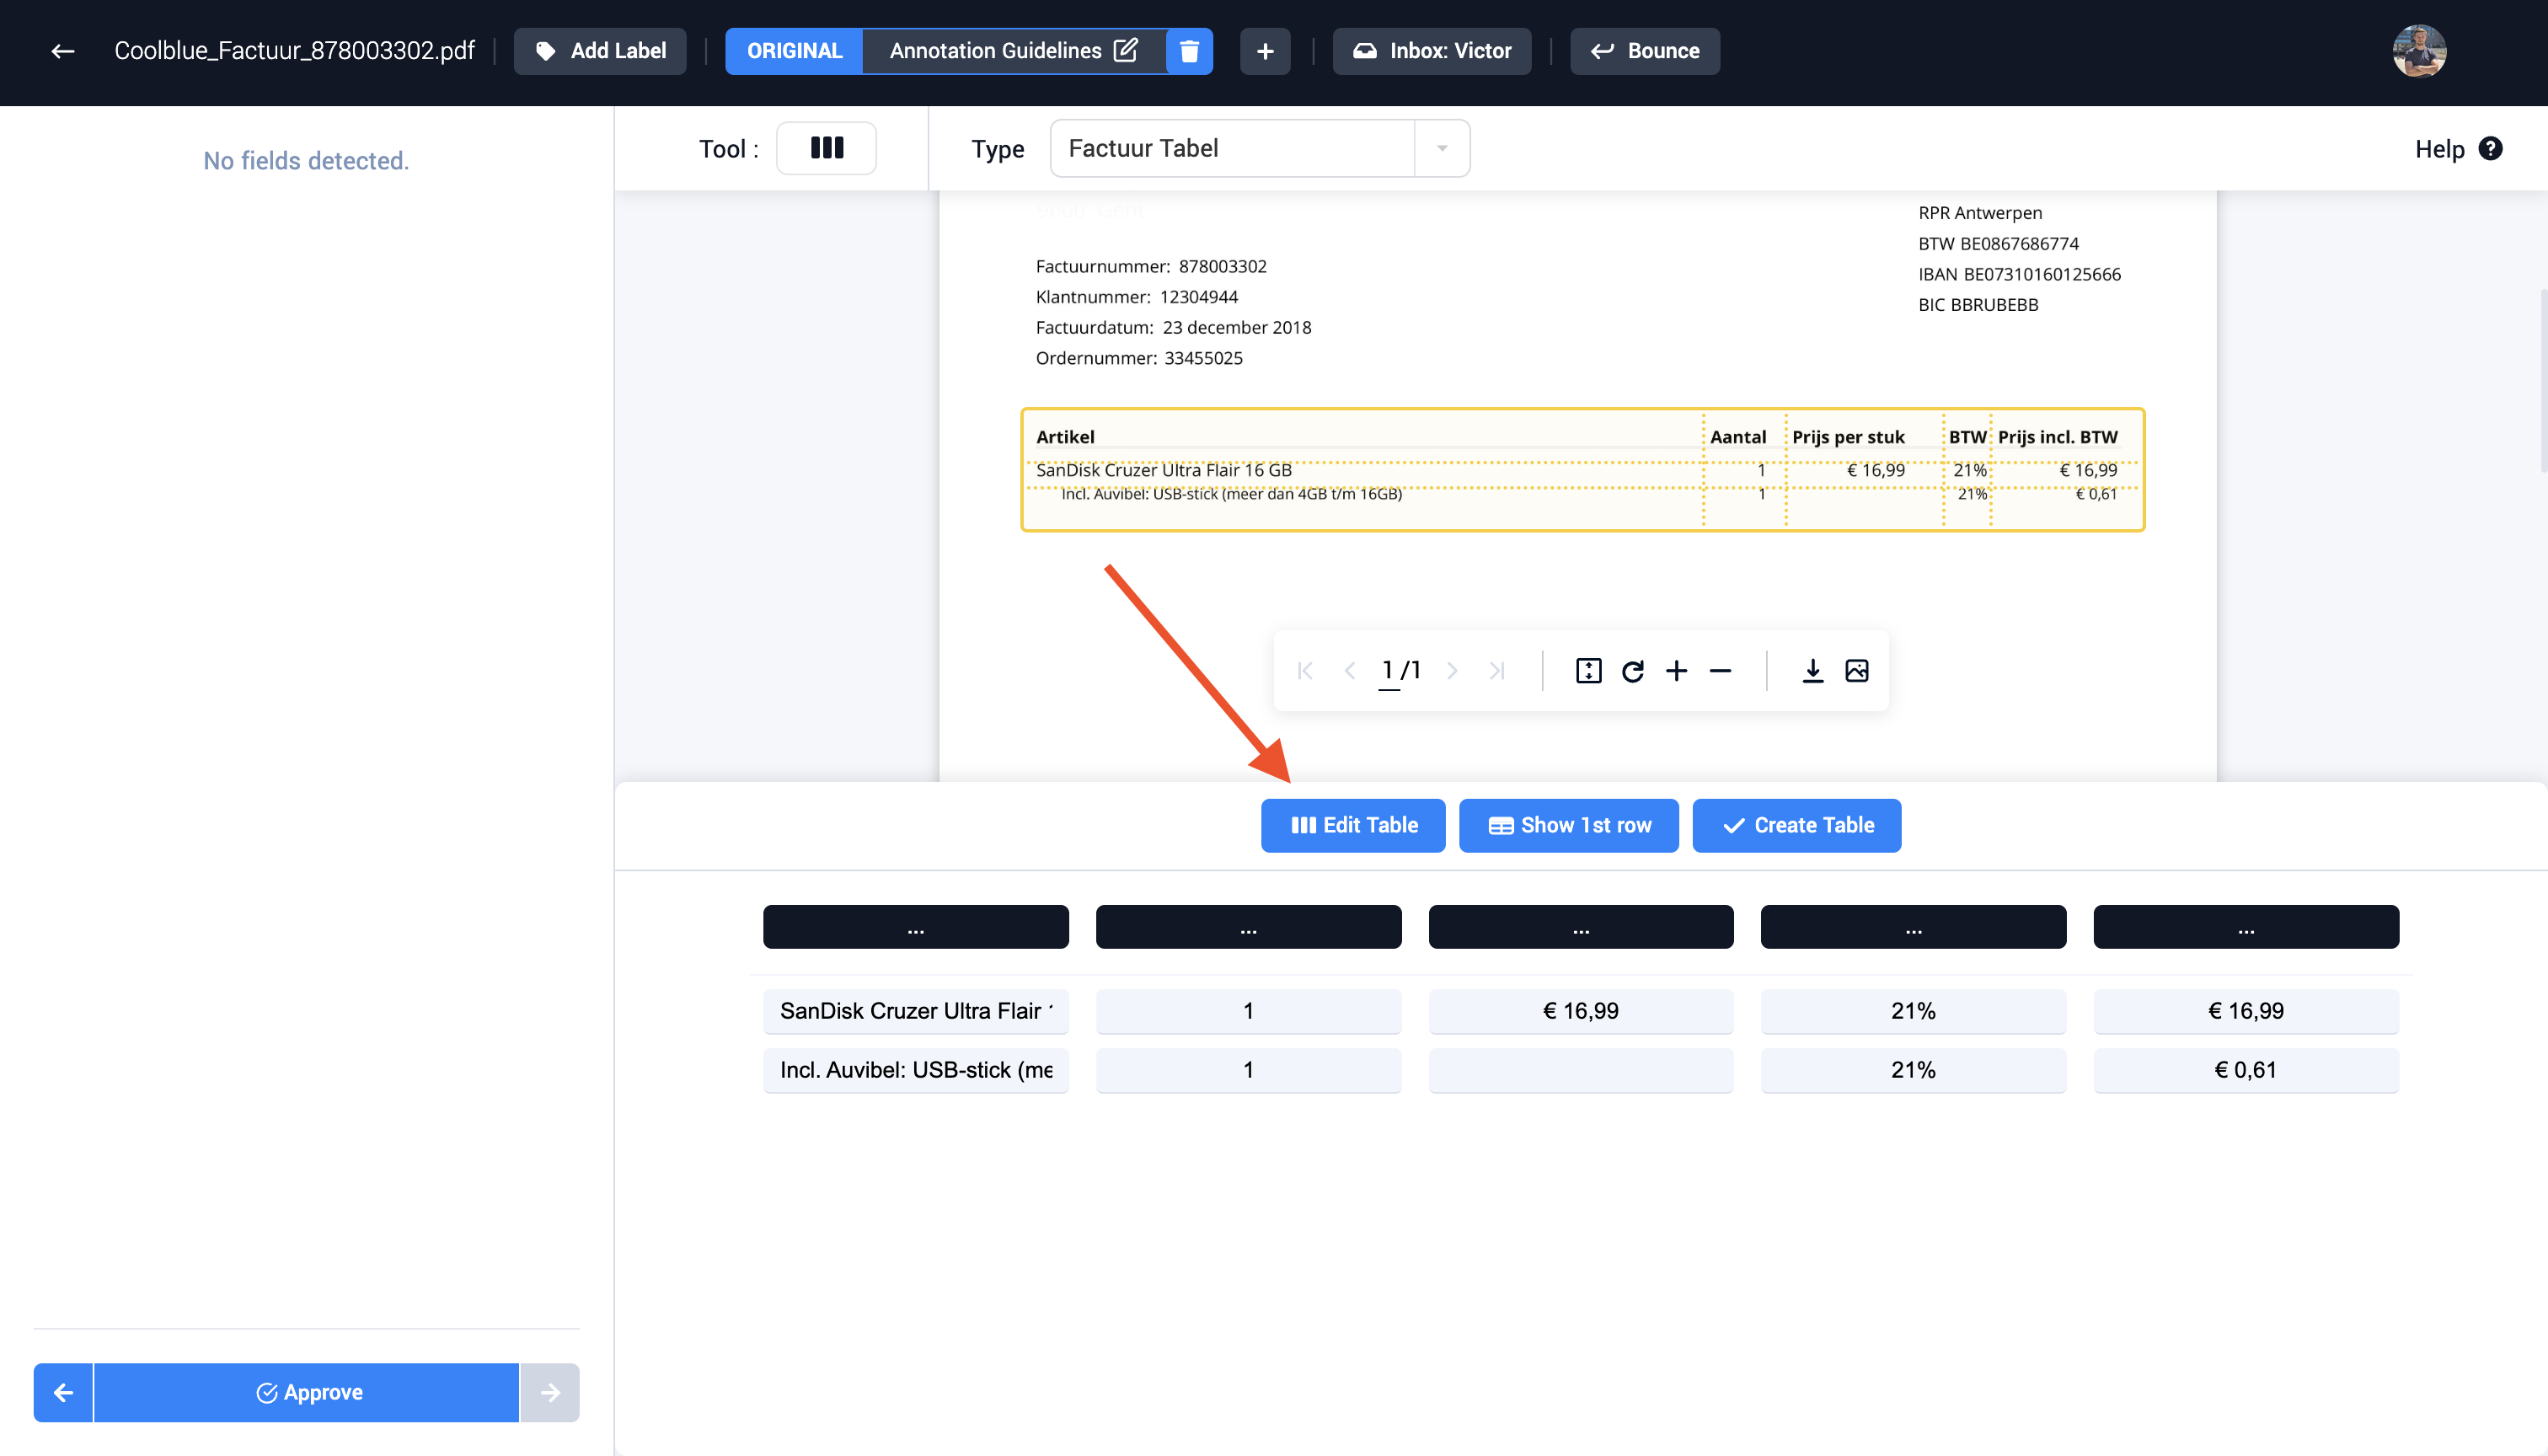
Step 3: Select the table inside the document with the drag functionality
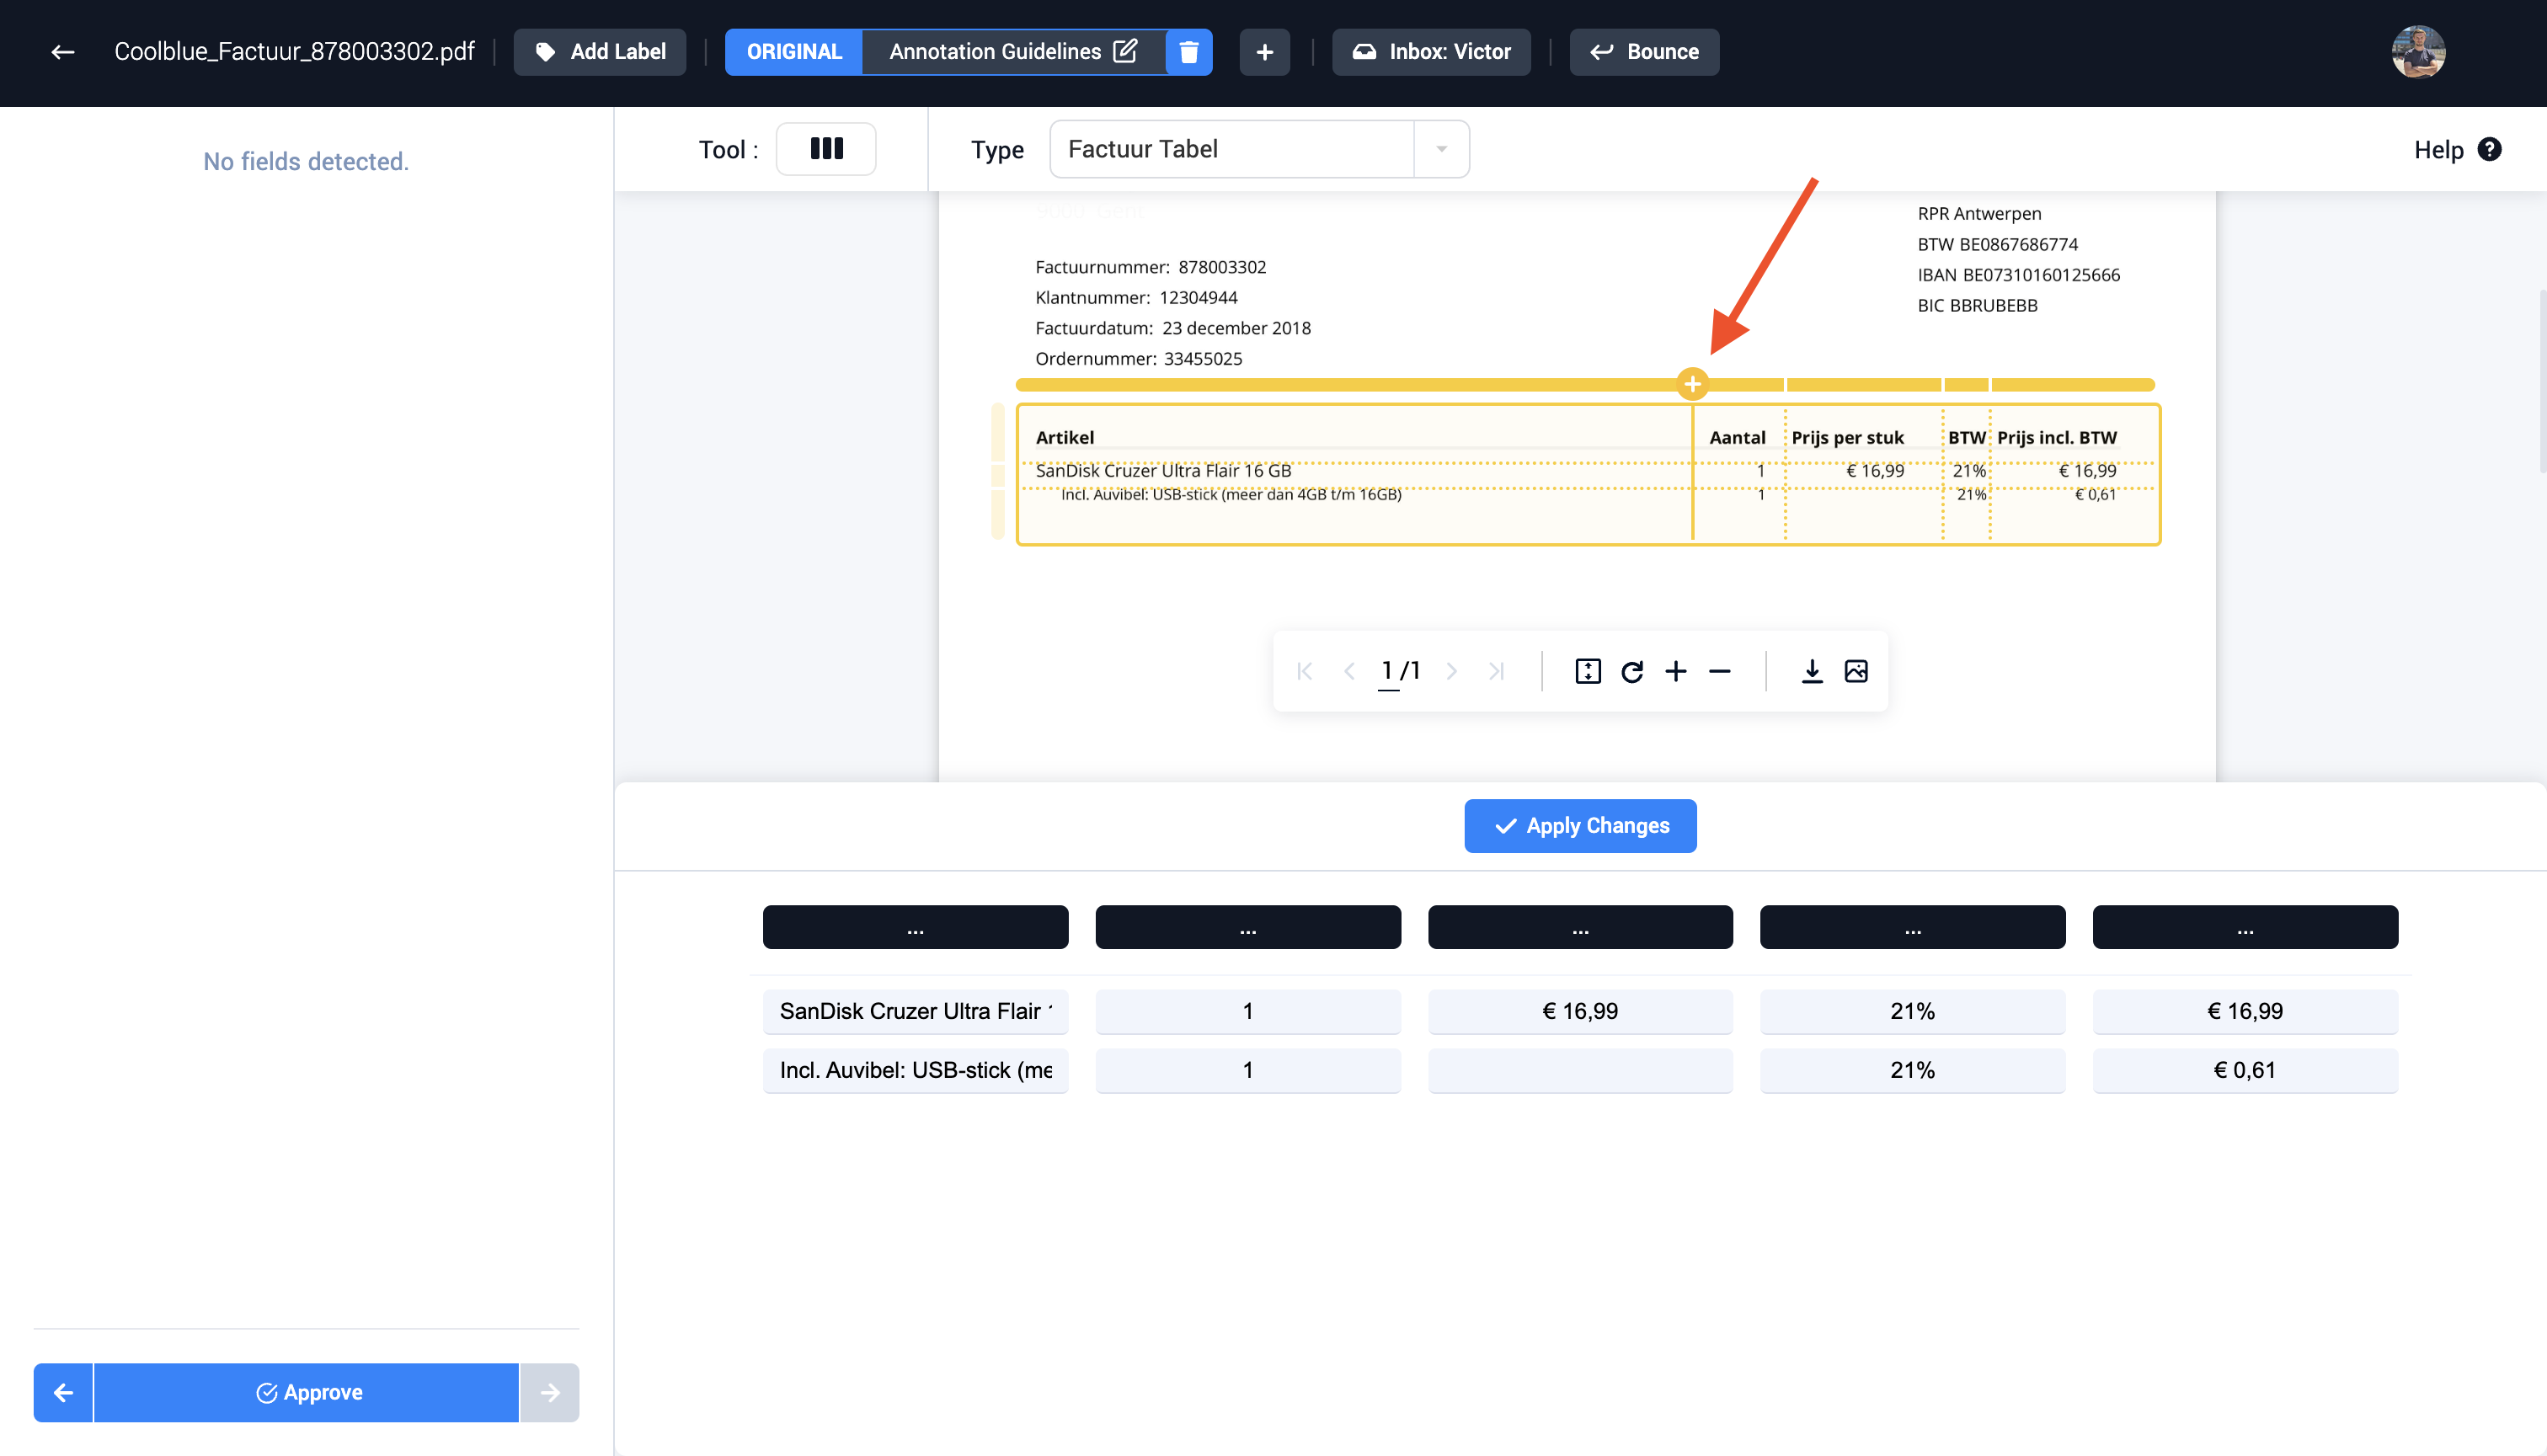
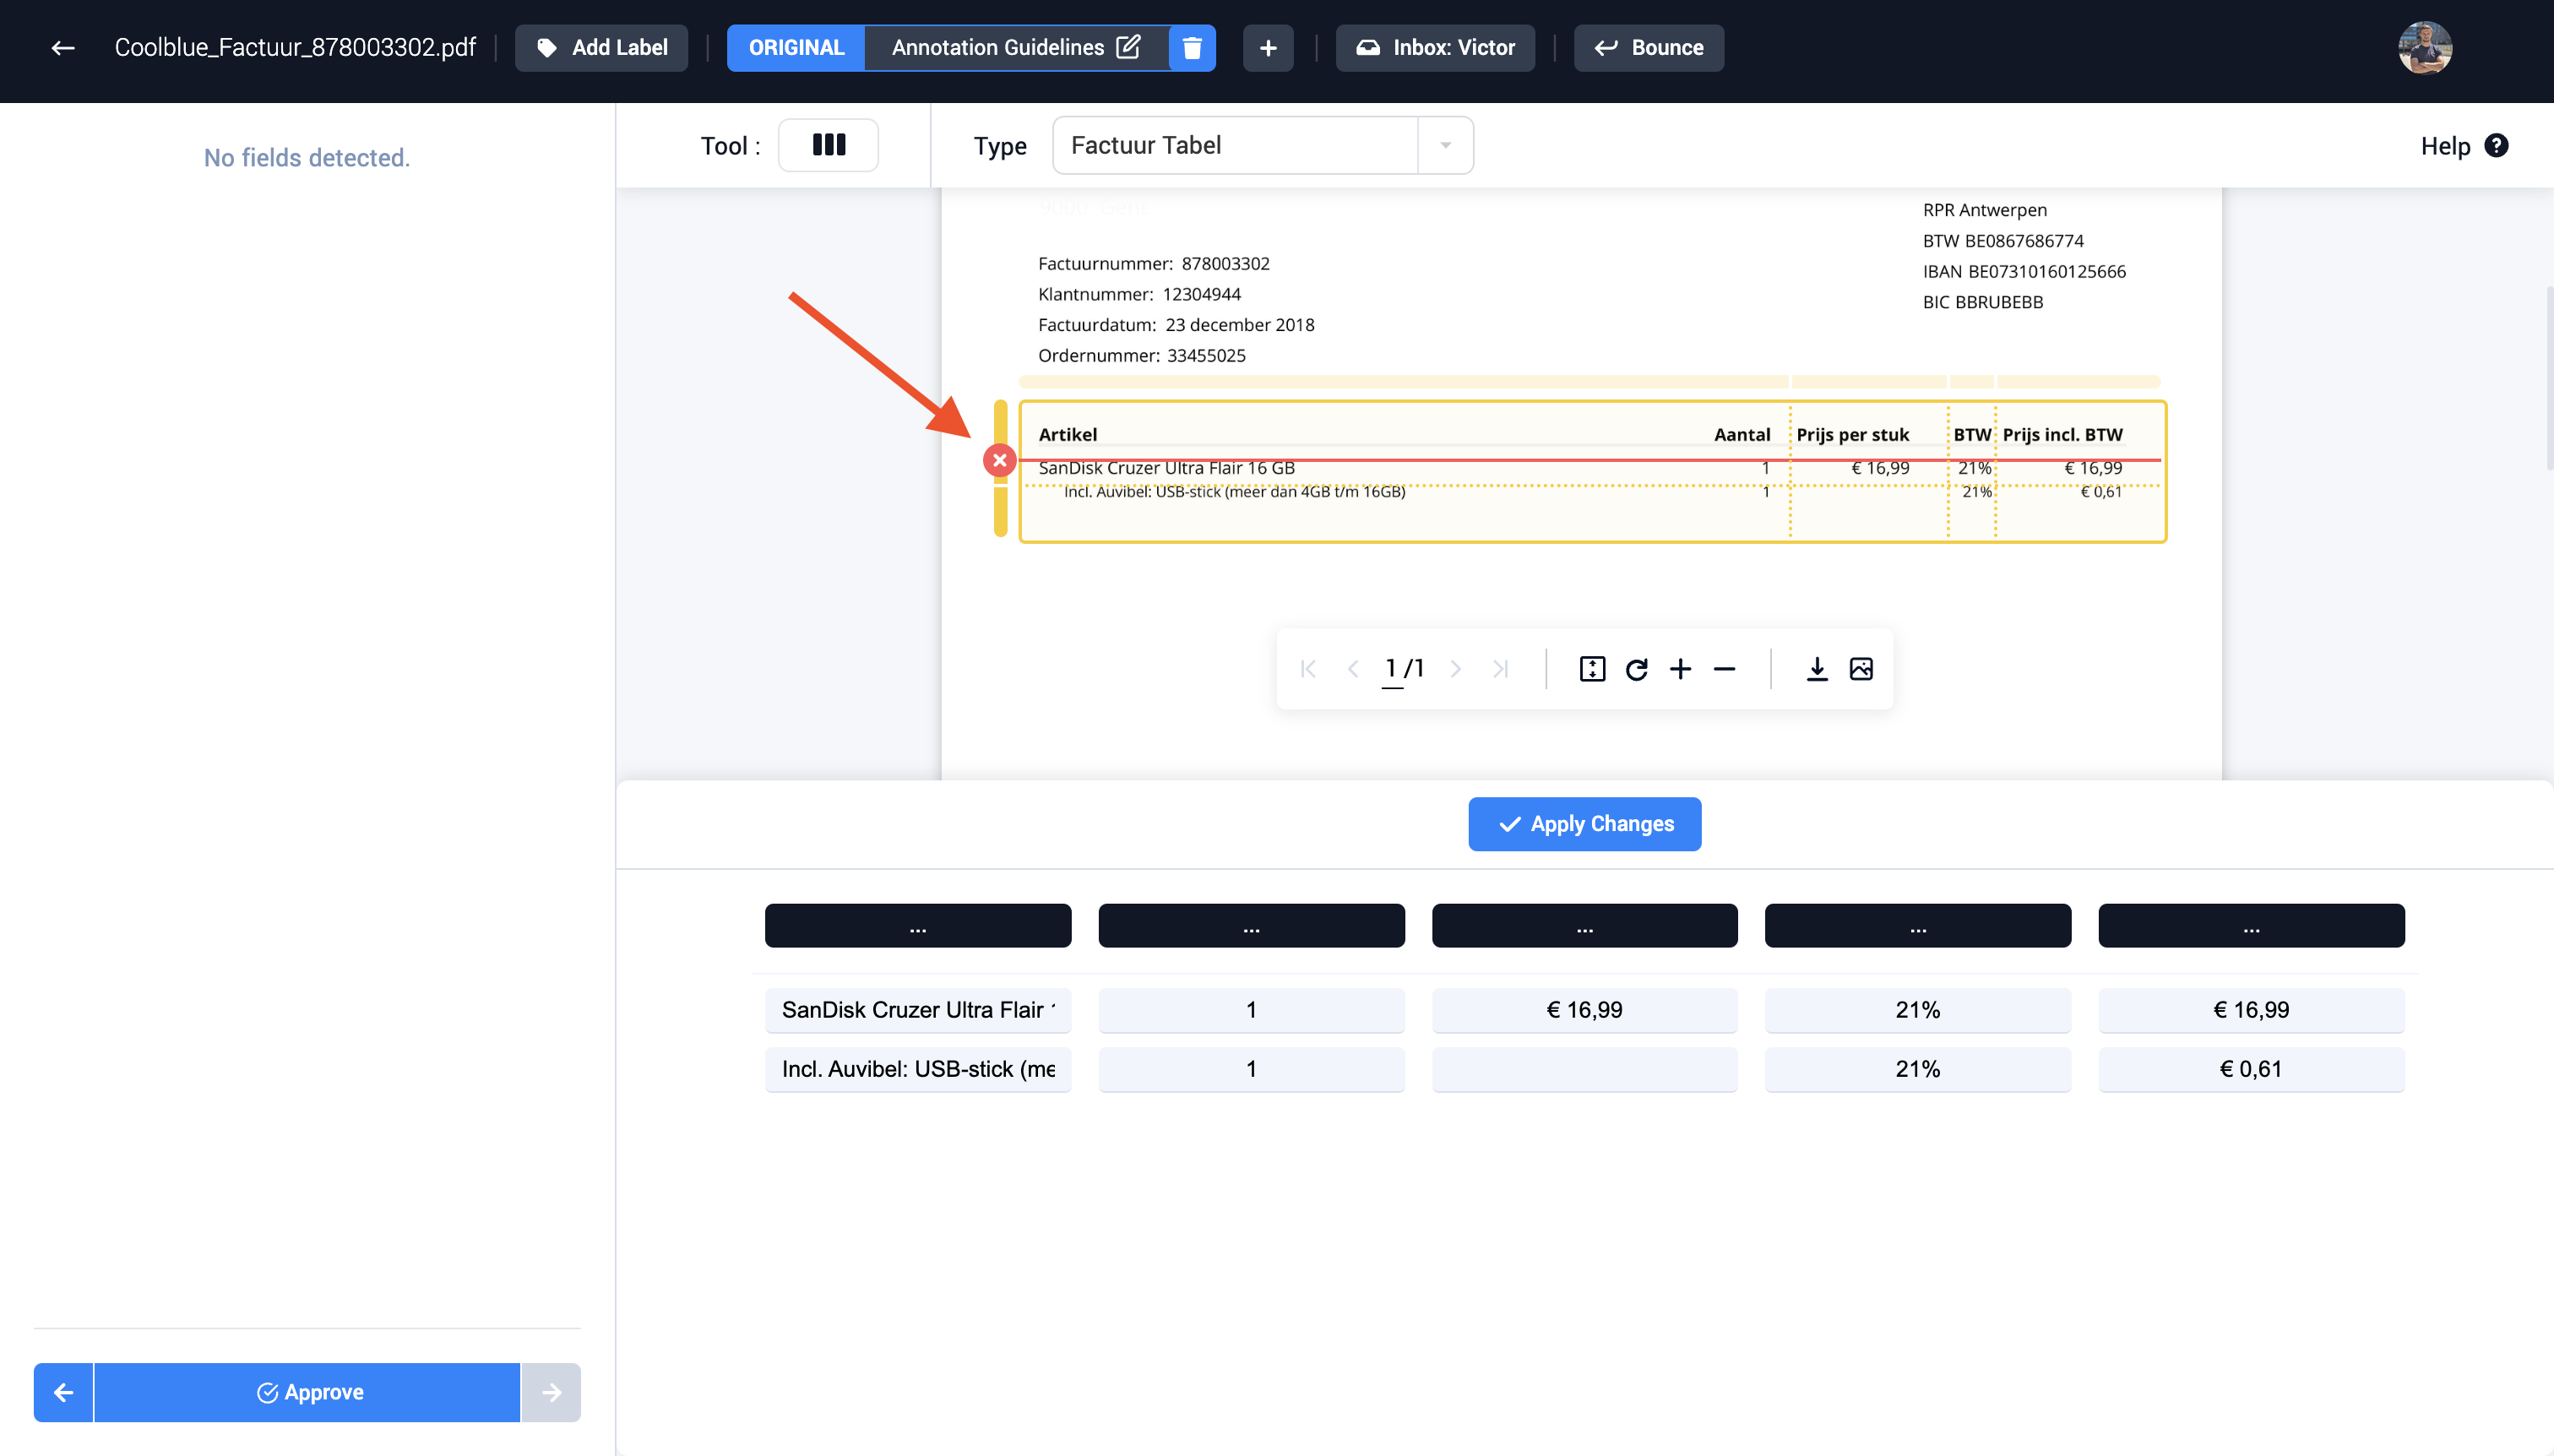
Step 4 (Optional): Edit the lines to create the correct columns and rows in the table. Lines can be added and removed to create the correct amount of columns and rows.
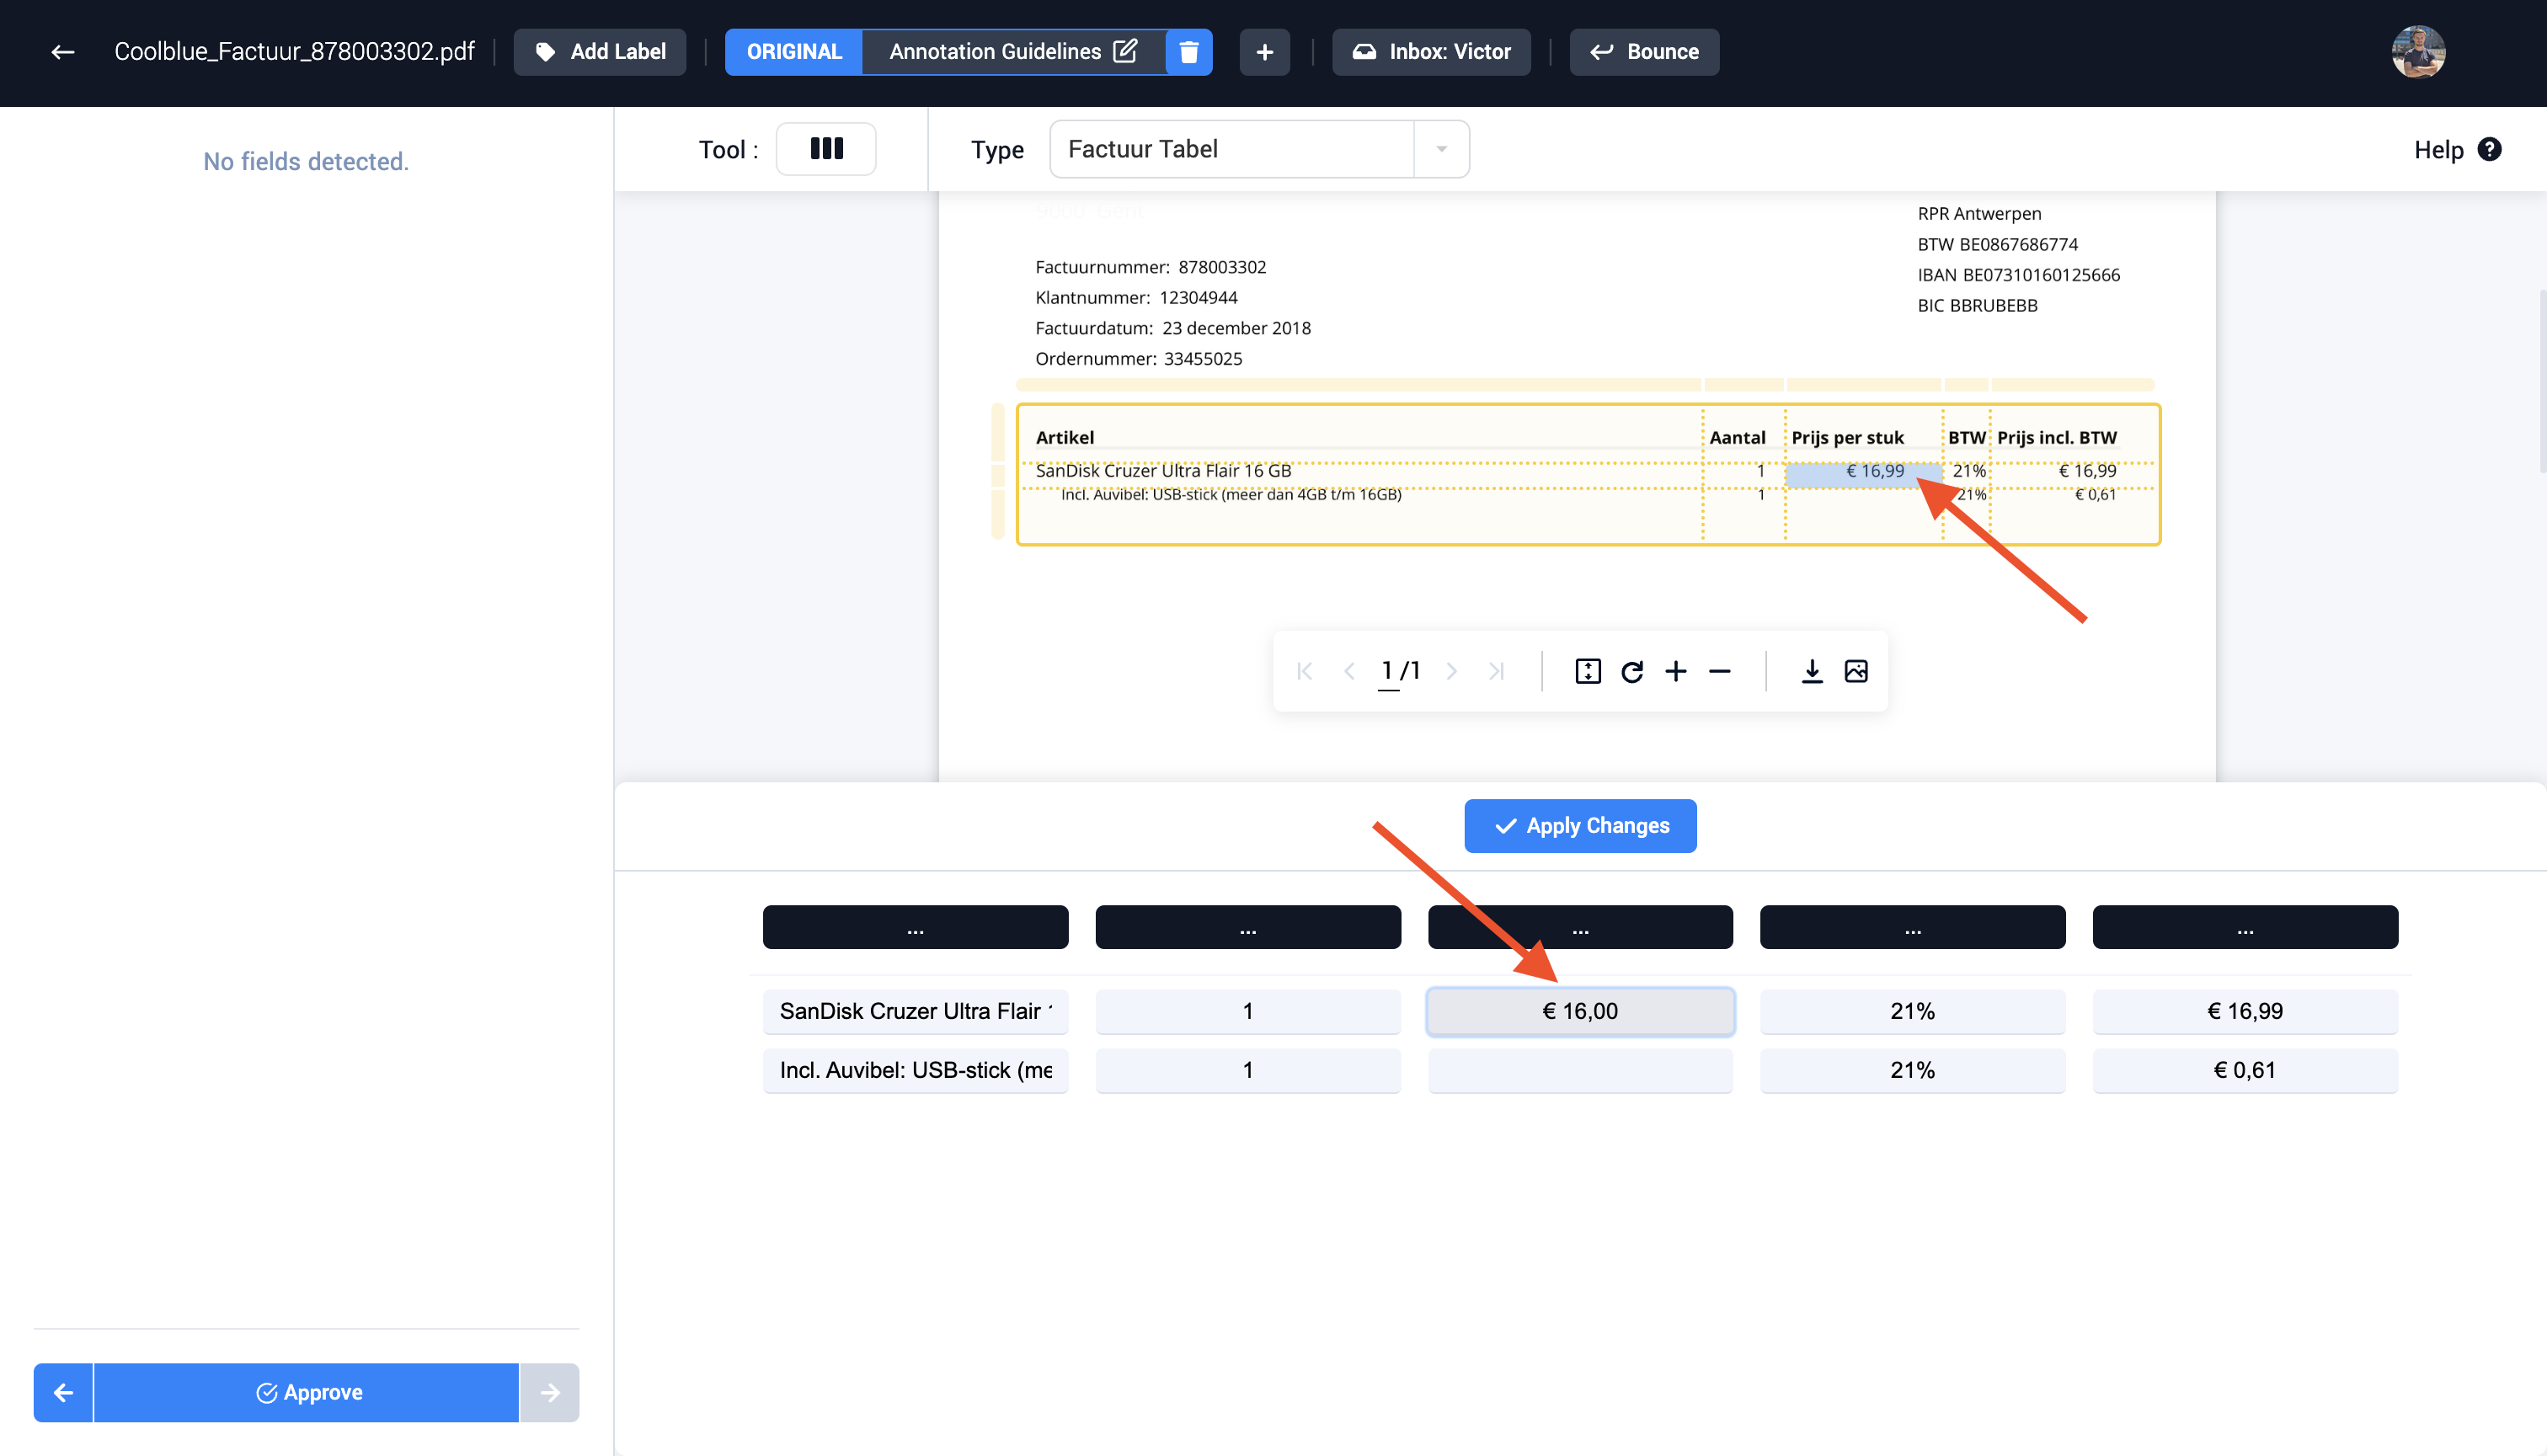
Step 5 (Optional): Edit multiple cells if the correct value isn't visible
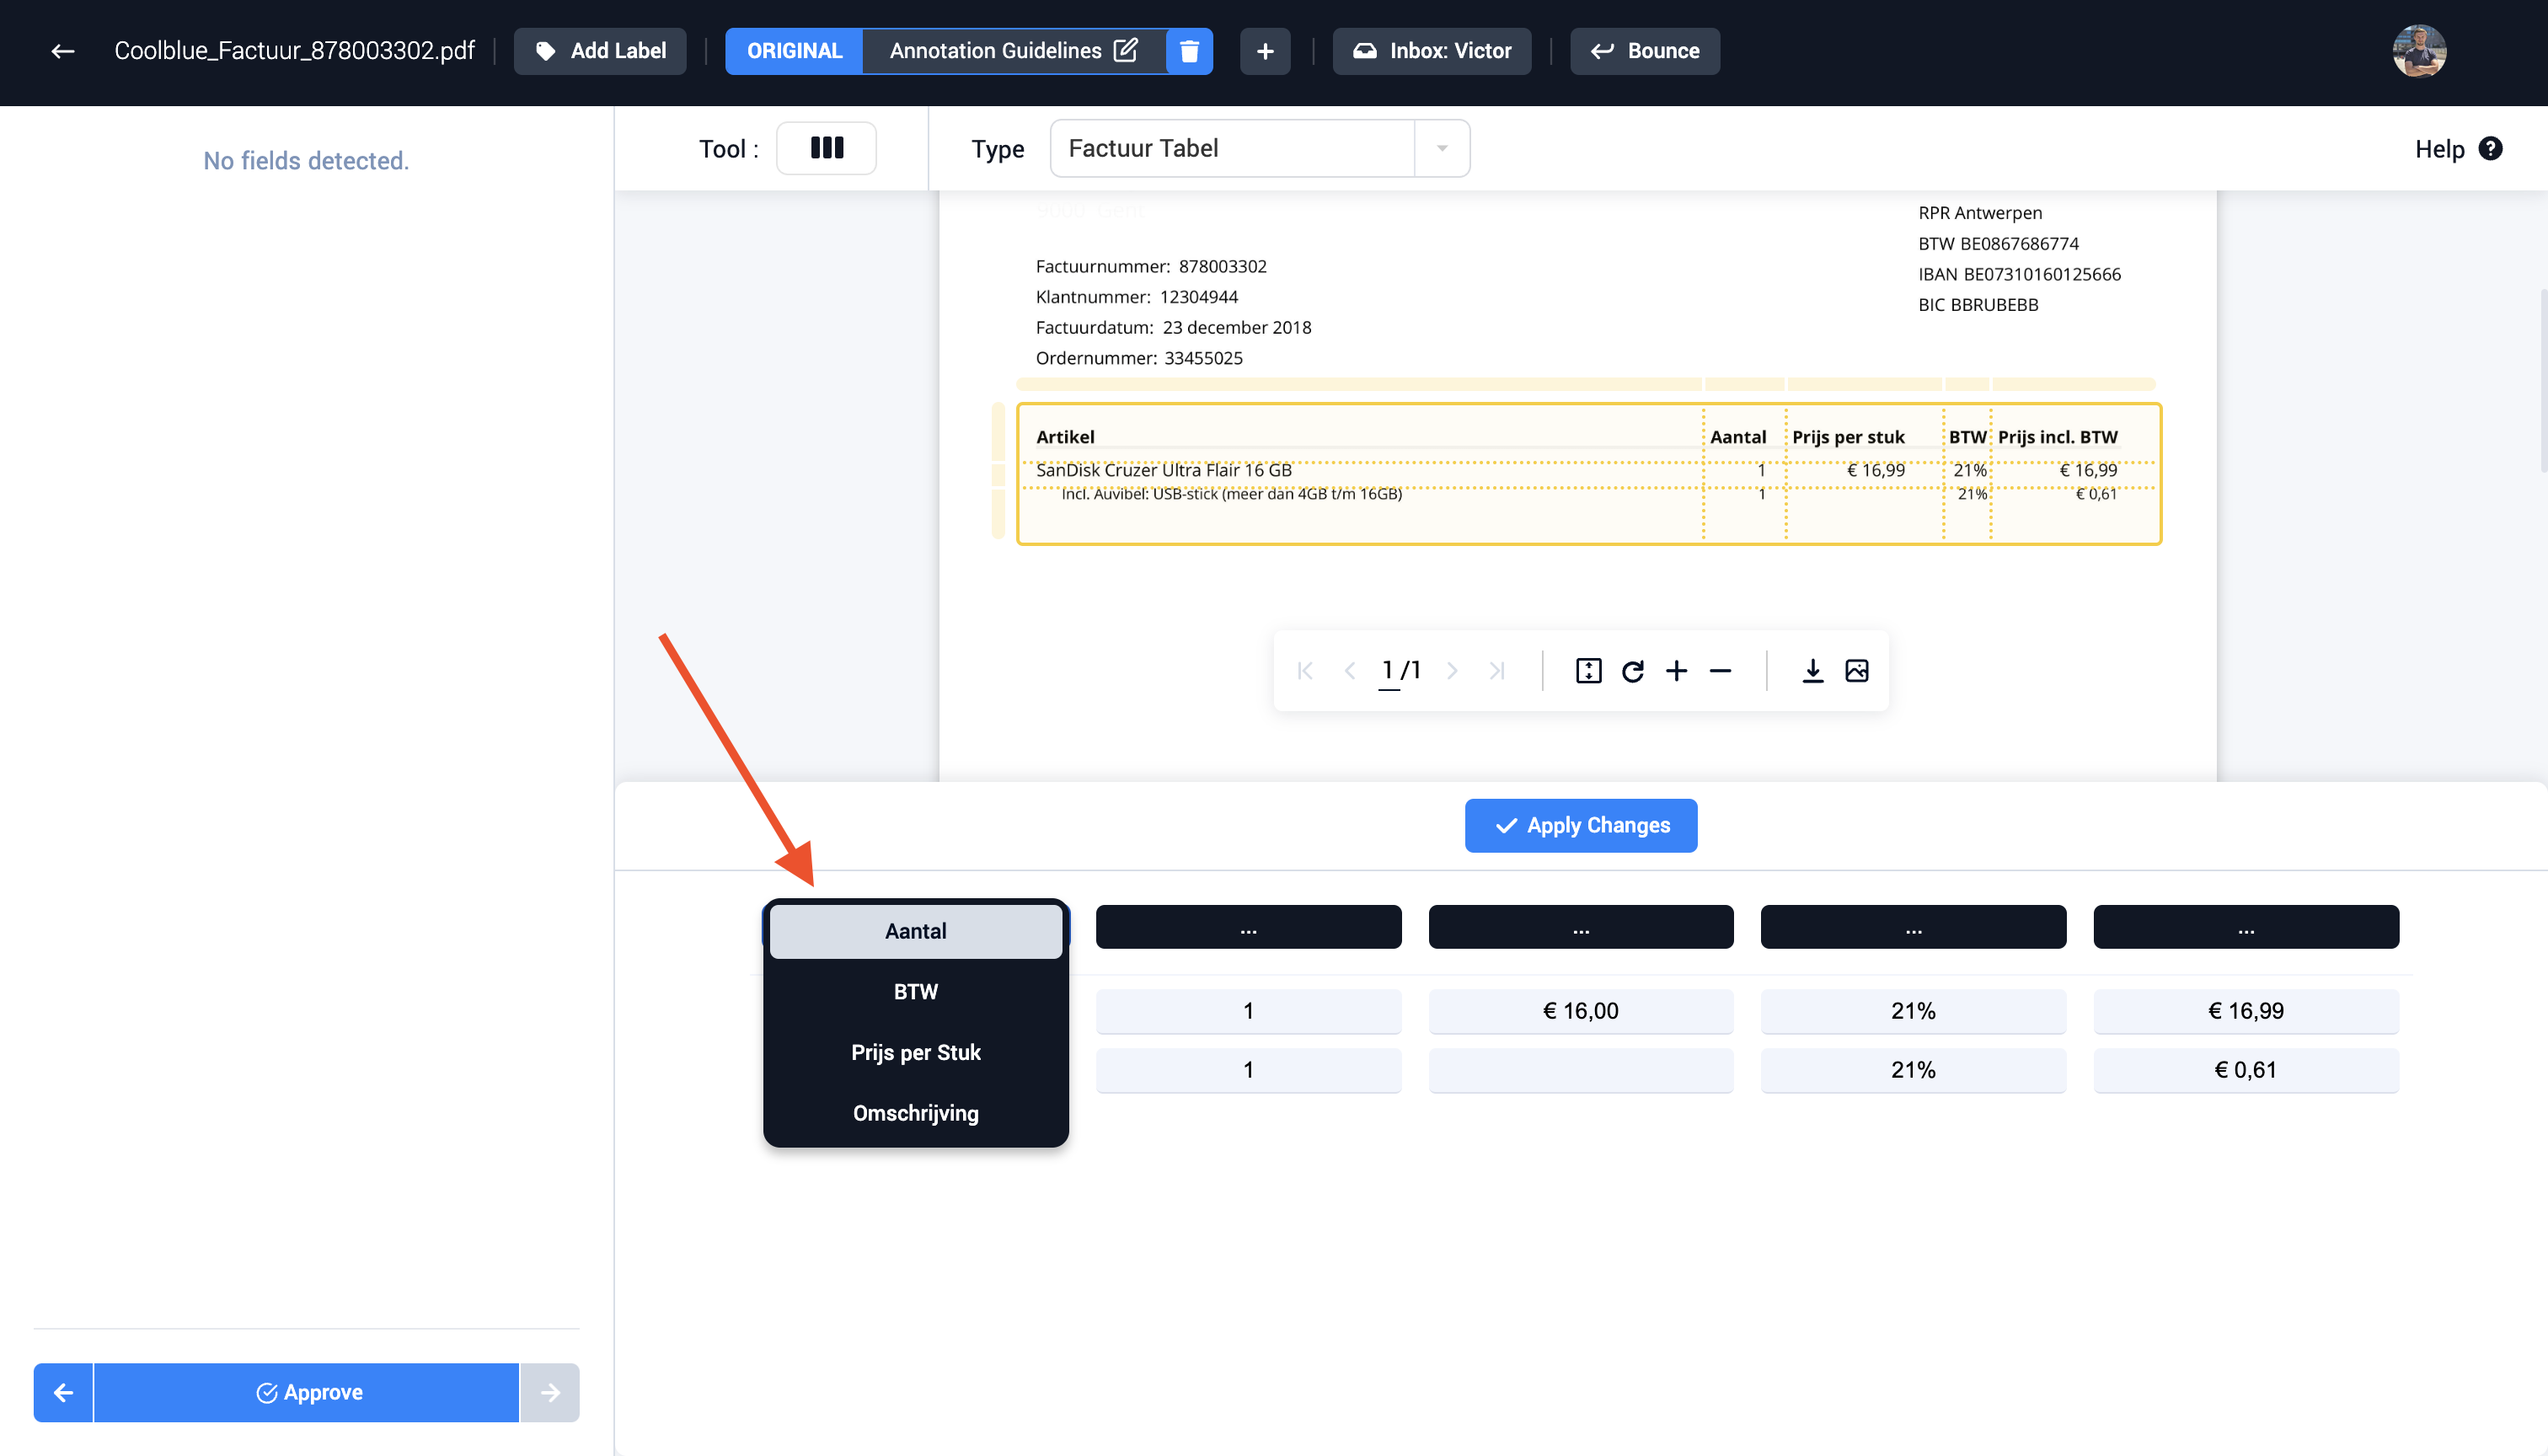
Step 6: Select the correct column field types in the table viewer
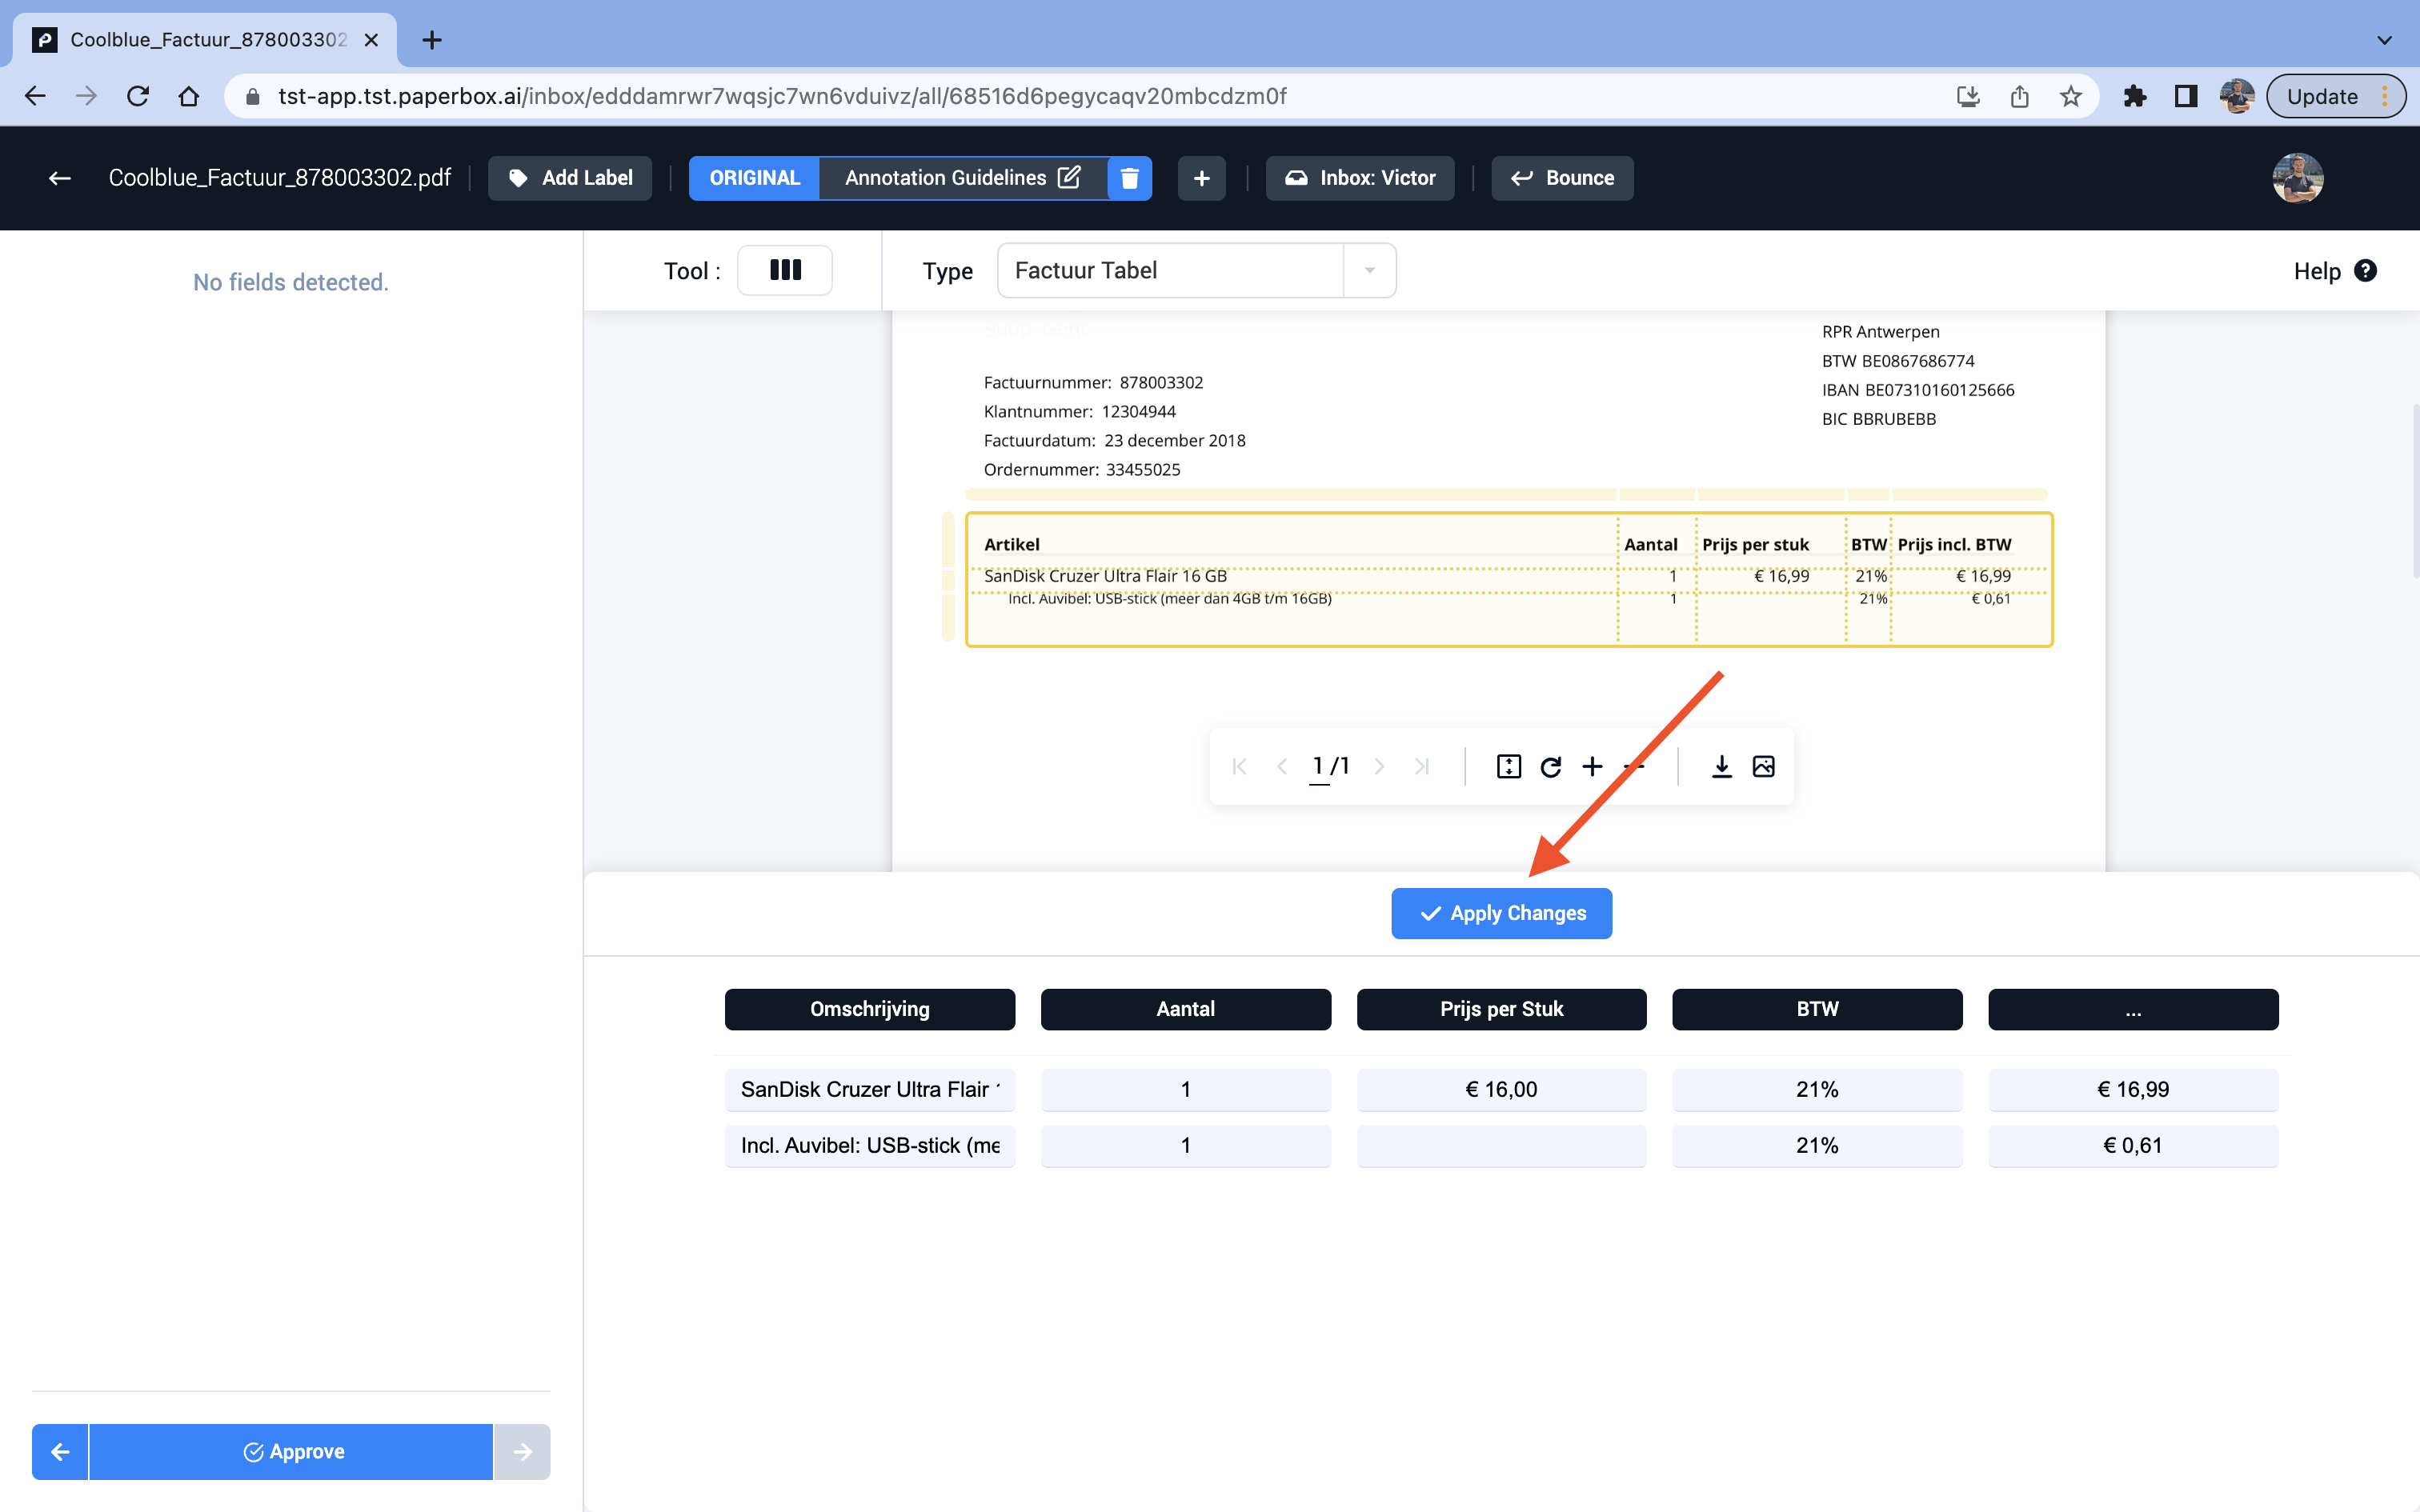
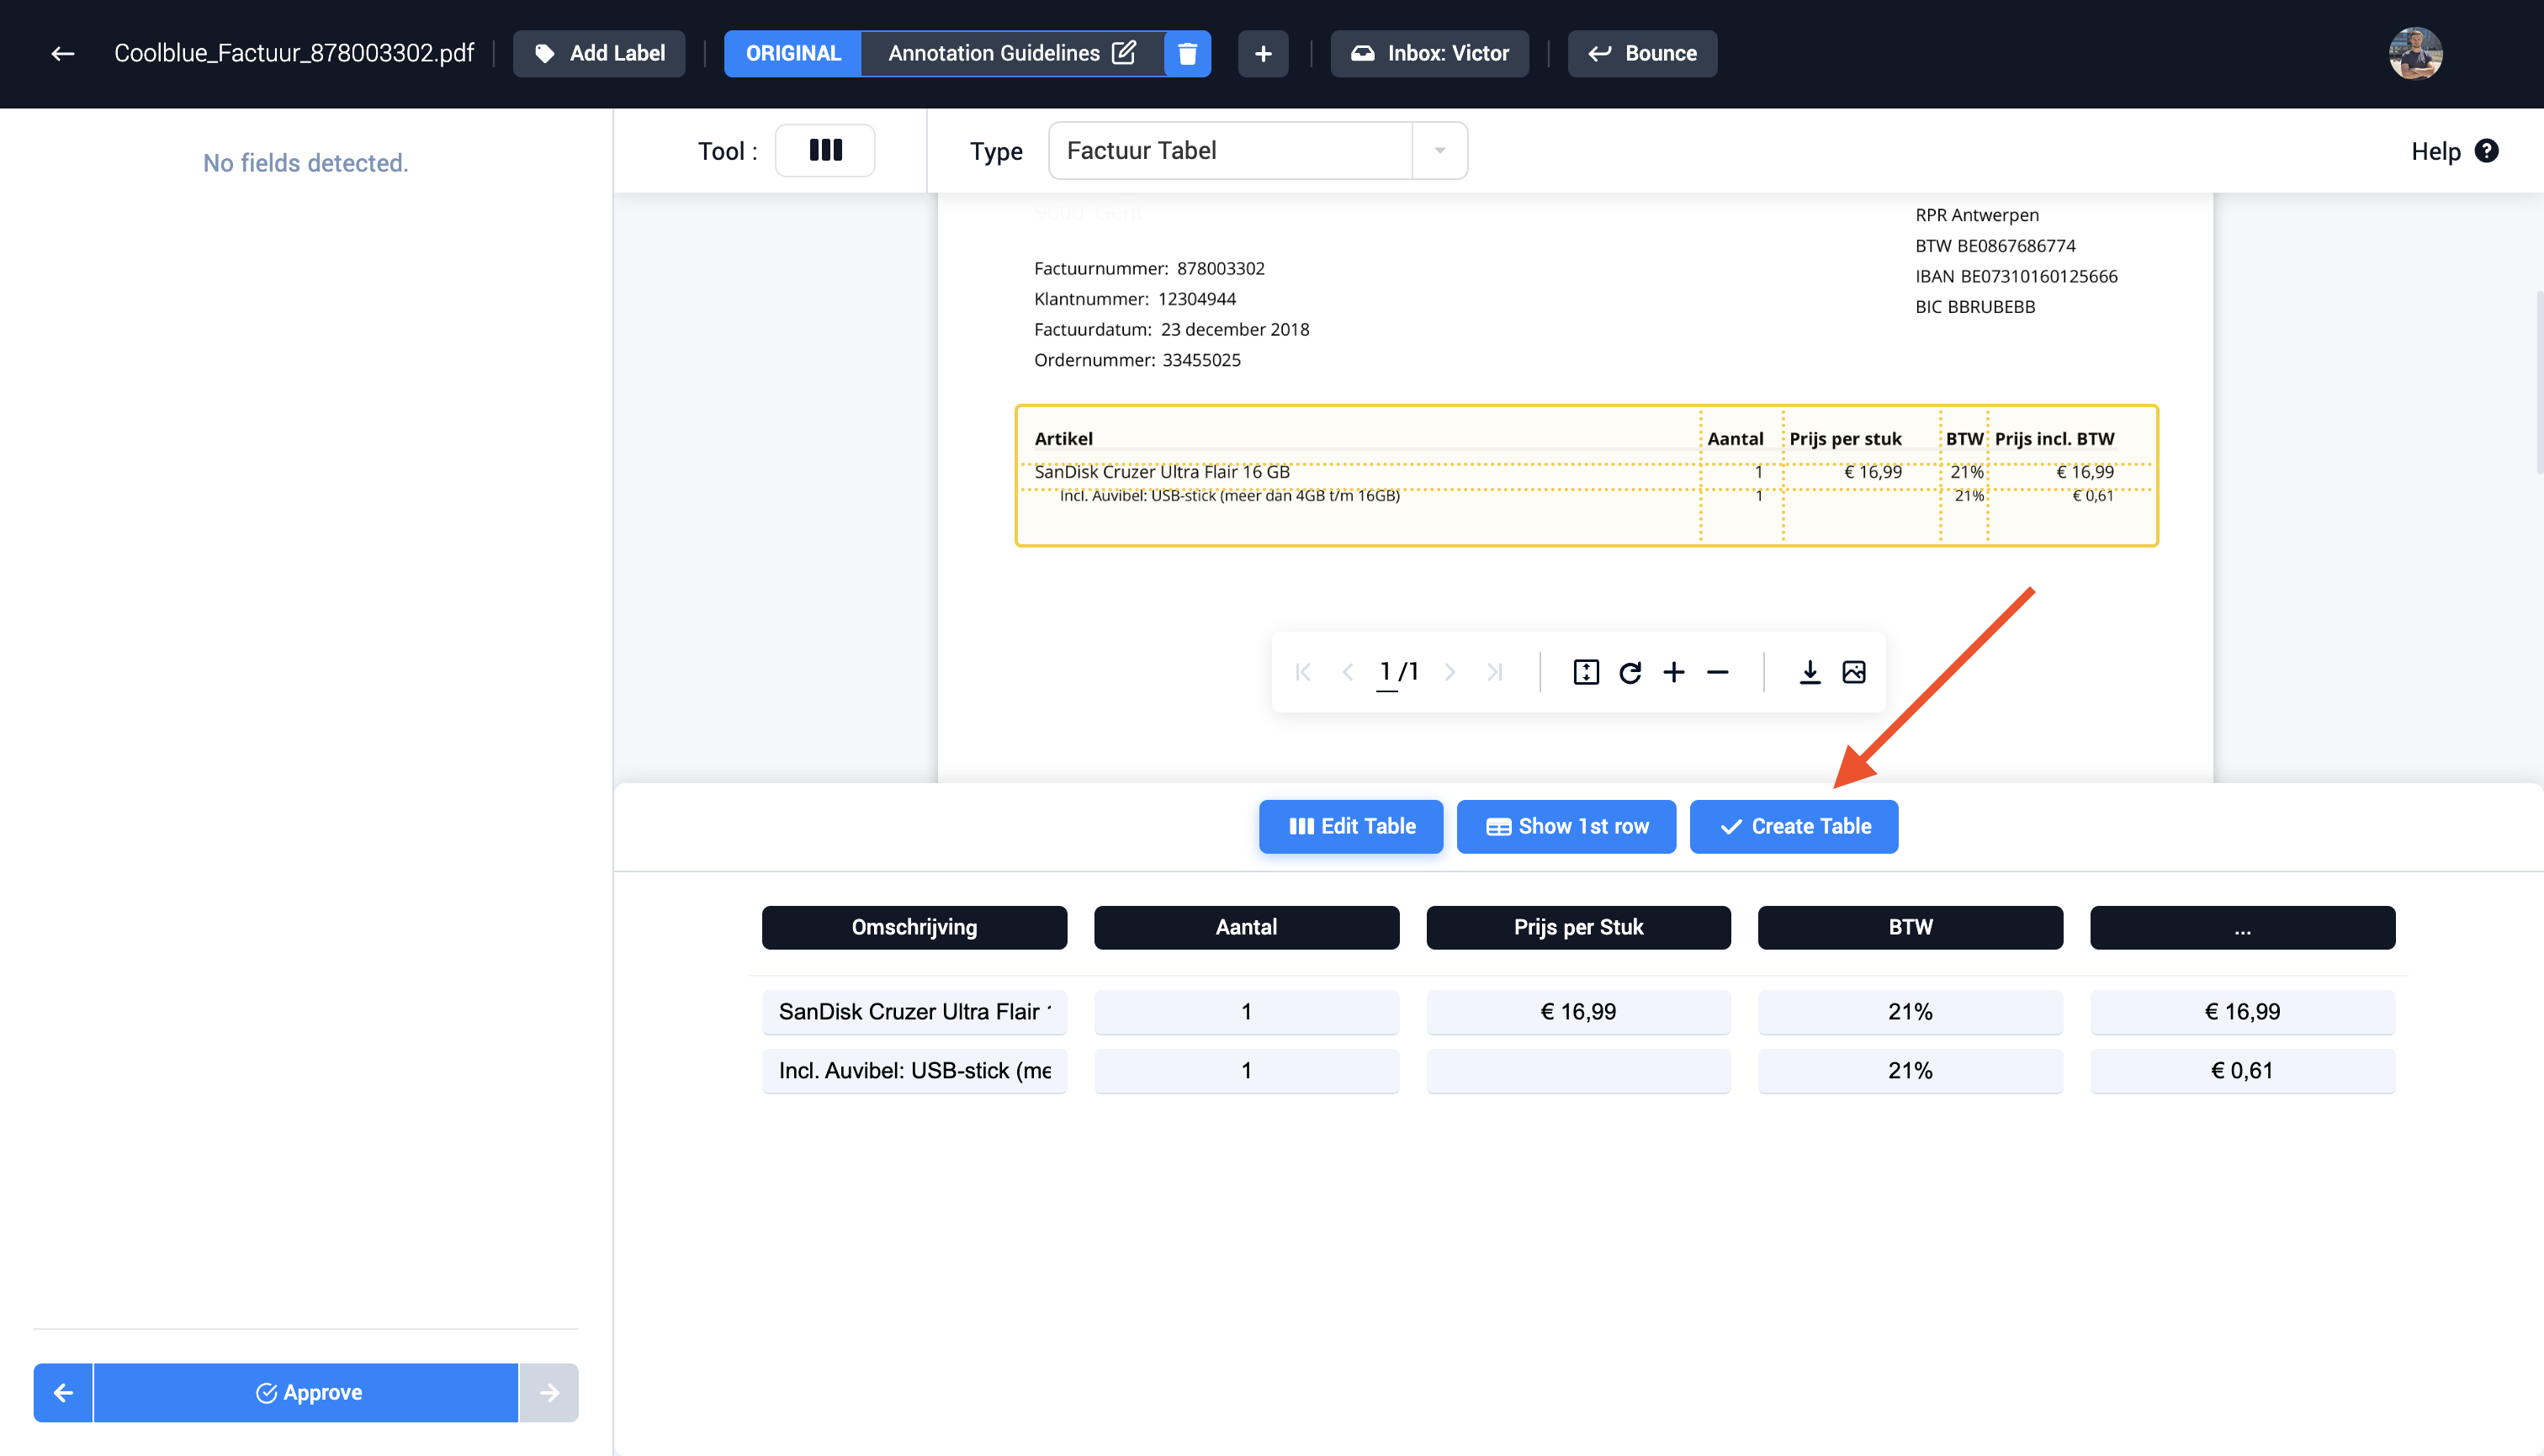
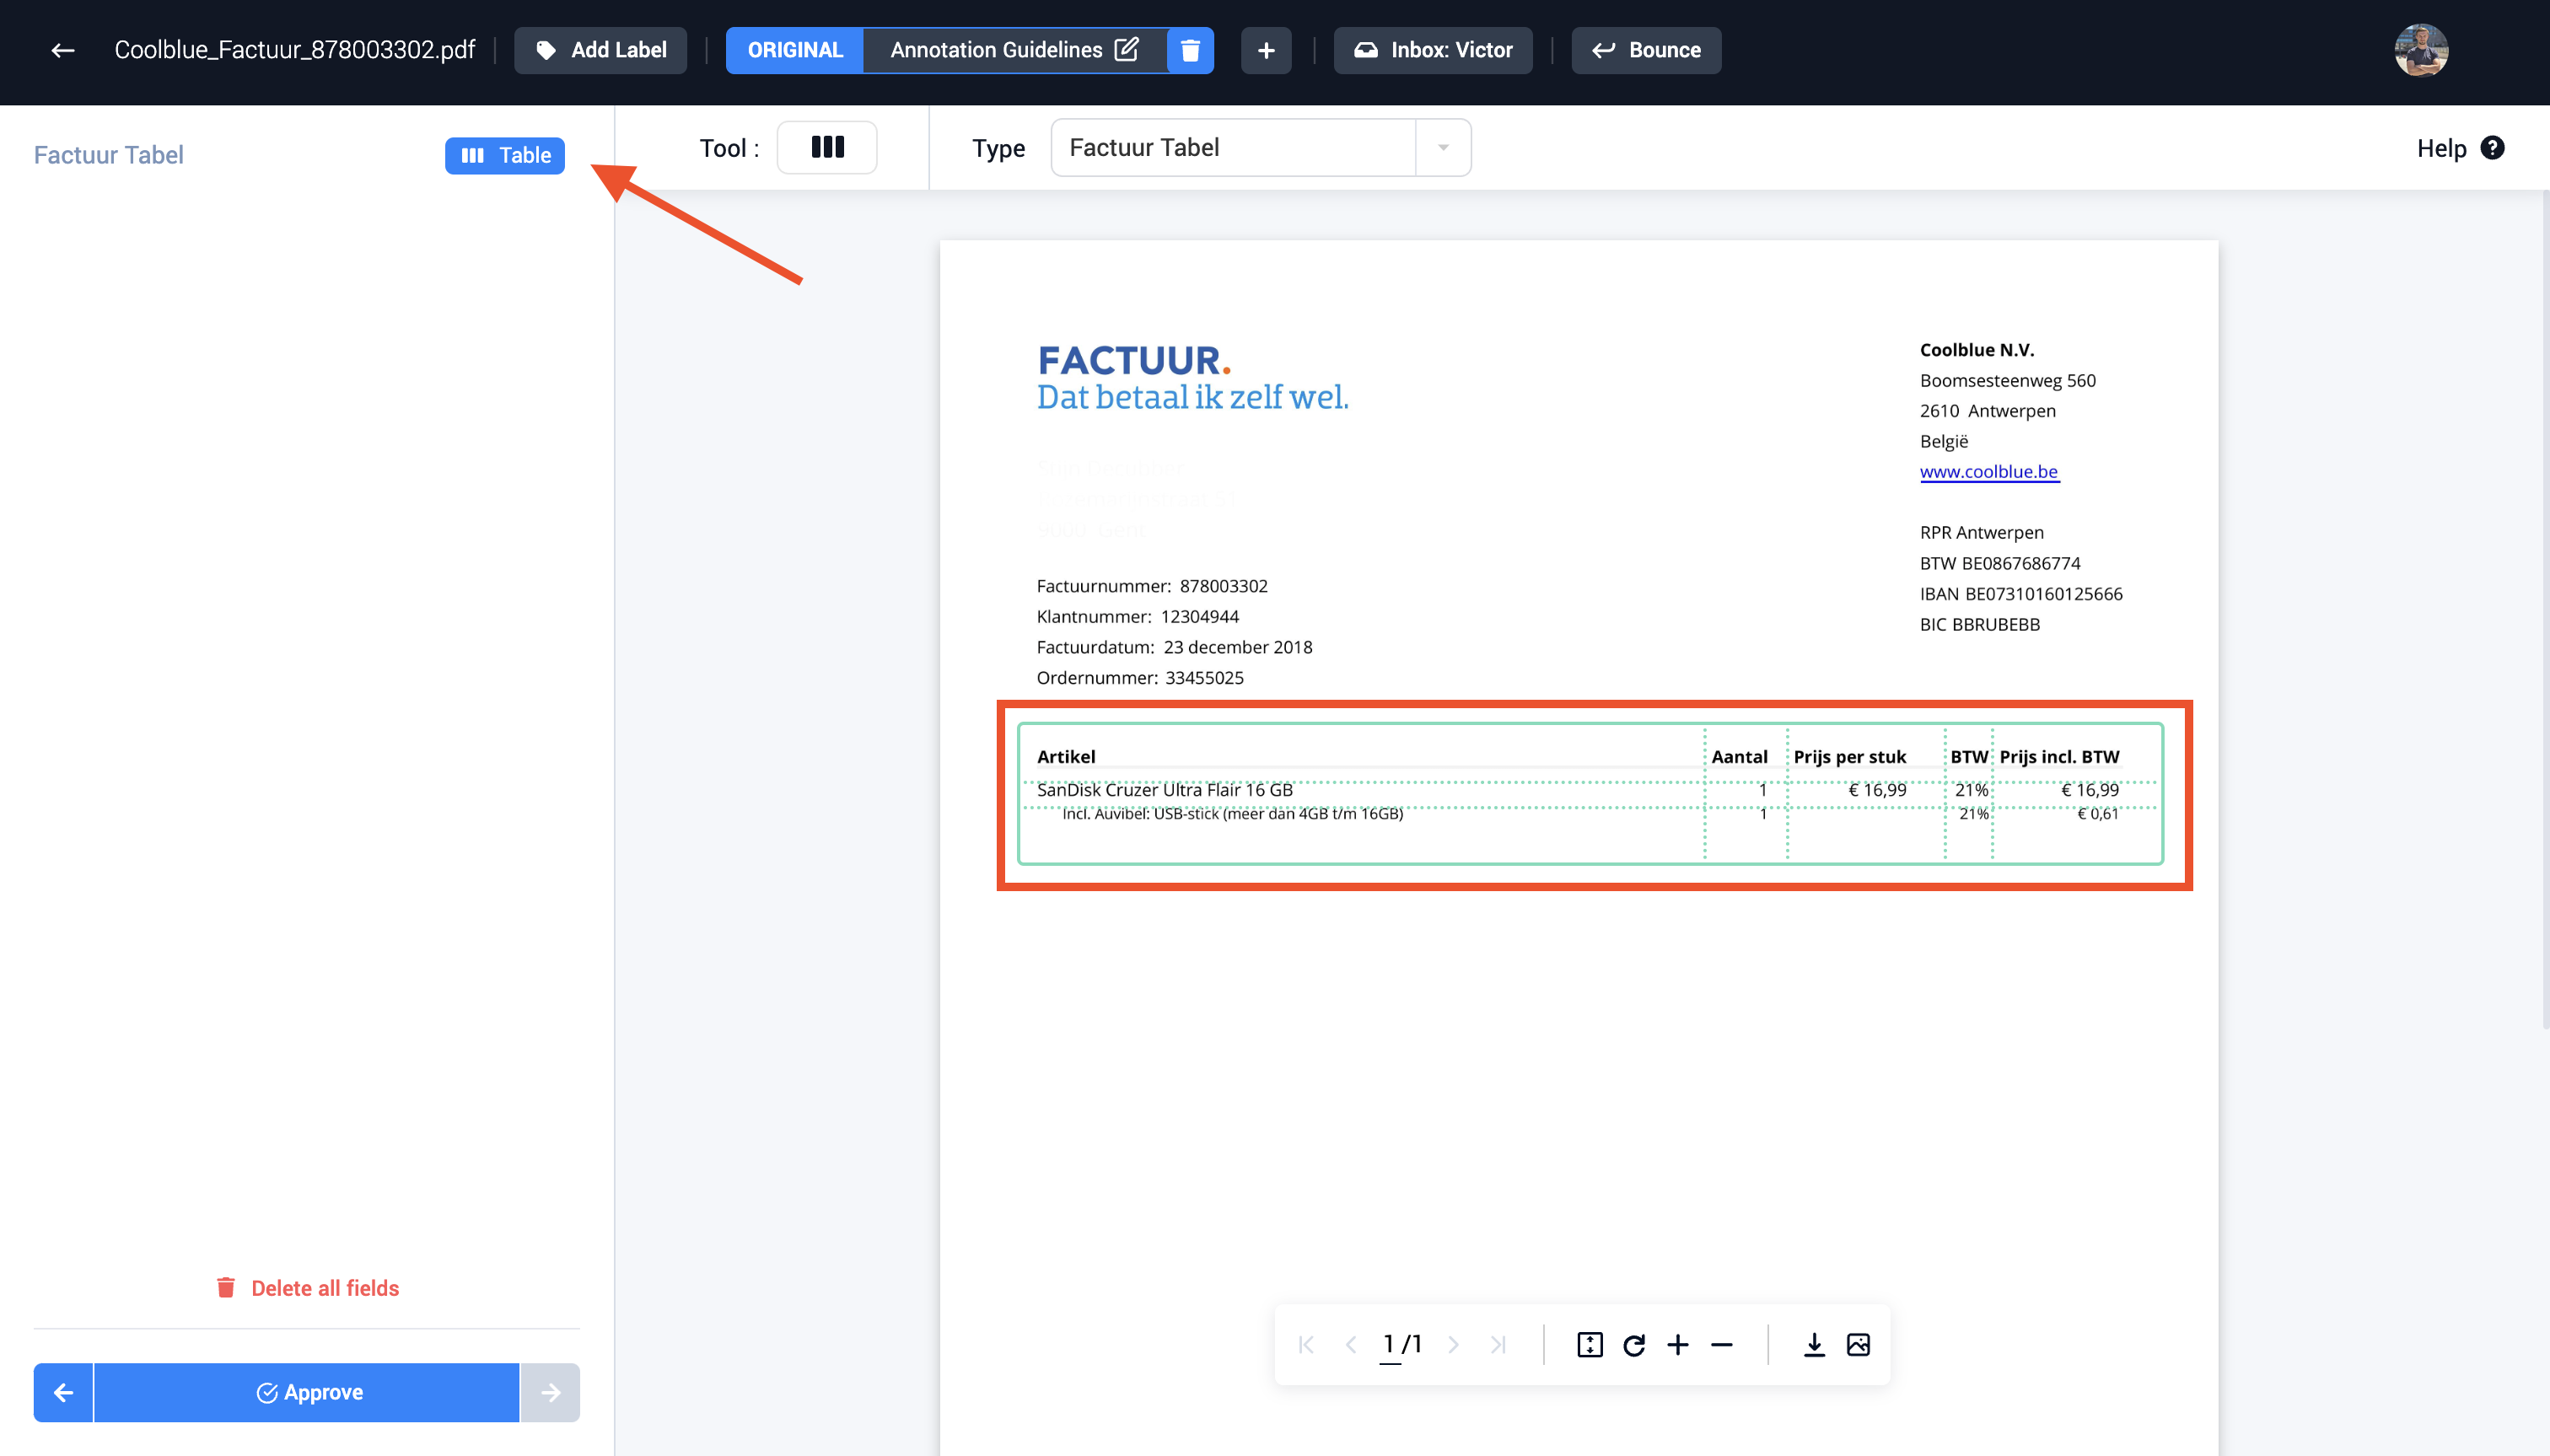
Step 7: Create the table. First accept the changes, then create the table. This new table is now visible in the field sidebar.
Inbox Labeling Mode
A newly created feature within the Paperbox application is the Inbox Labeling Mode. This feature has the following advantages:
- The inbox can now be configured using the following list of document tags, which makes the inbox more organized to work in and easier to navigate betwween different documents:
To-Do
- All documents that are uploaded on Paperbox will start with this specific tag, indicating that more label work needs to be done before this specific document can be used to train or evaluate a ML model.
Done
- When the annotation team has annotated all fields in this document, the tag Done can be assigned. This document will now be used to train the new ML model.
To Review
- Not sure about a document or how to label a specific field? Leave it open for review by Paperbox or for a coworker. Documents with the tag To Review will be handled later in the process. The user can even leave a more detailed comment on the document, explaining the reason why it isn't labeled yet.
- A pretrained model can be deployed on the labeling inbox, giving Paperbox users entity suggestions in a document. The user can iterate through each suggestion, either accepting it as a valid labeled entity, or rejecting the suggestion. Of course the pretrained model can make mistakes, so other entities can still be labeled inside the document. (Disclaimer: The use of a pretrained model needs to be discussed with the Paperbox team before starting)
- When using a pretrained model, different entity suggestions will be visible in the entity sidebar. The user has now the choice to either accept an entity suggestion or reject a suggestion. Accepting an entity suggestion can be done by clicking the green approve mark (or by using the enter hotkey). Rejecting a specific suggestion entity can be done by clicking the red rejection mark (or by using the delete hotkey)
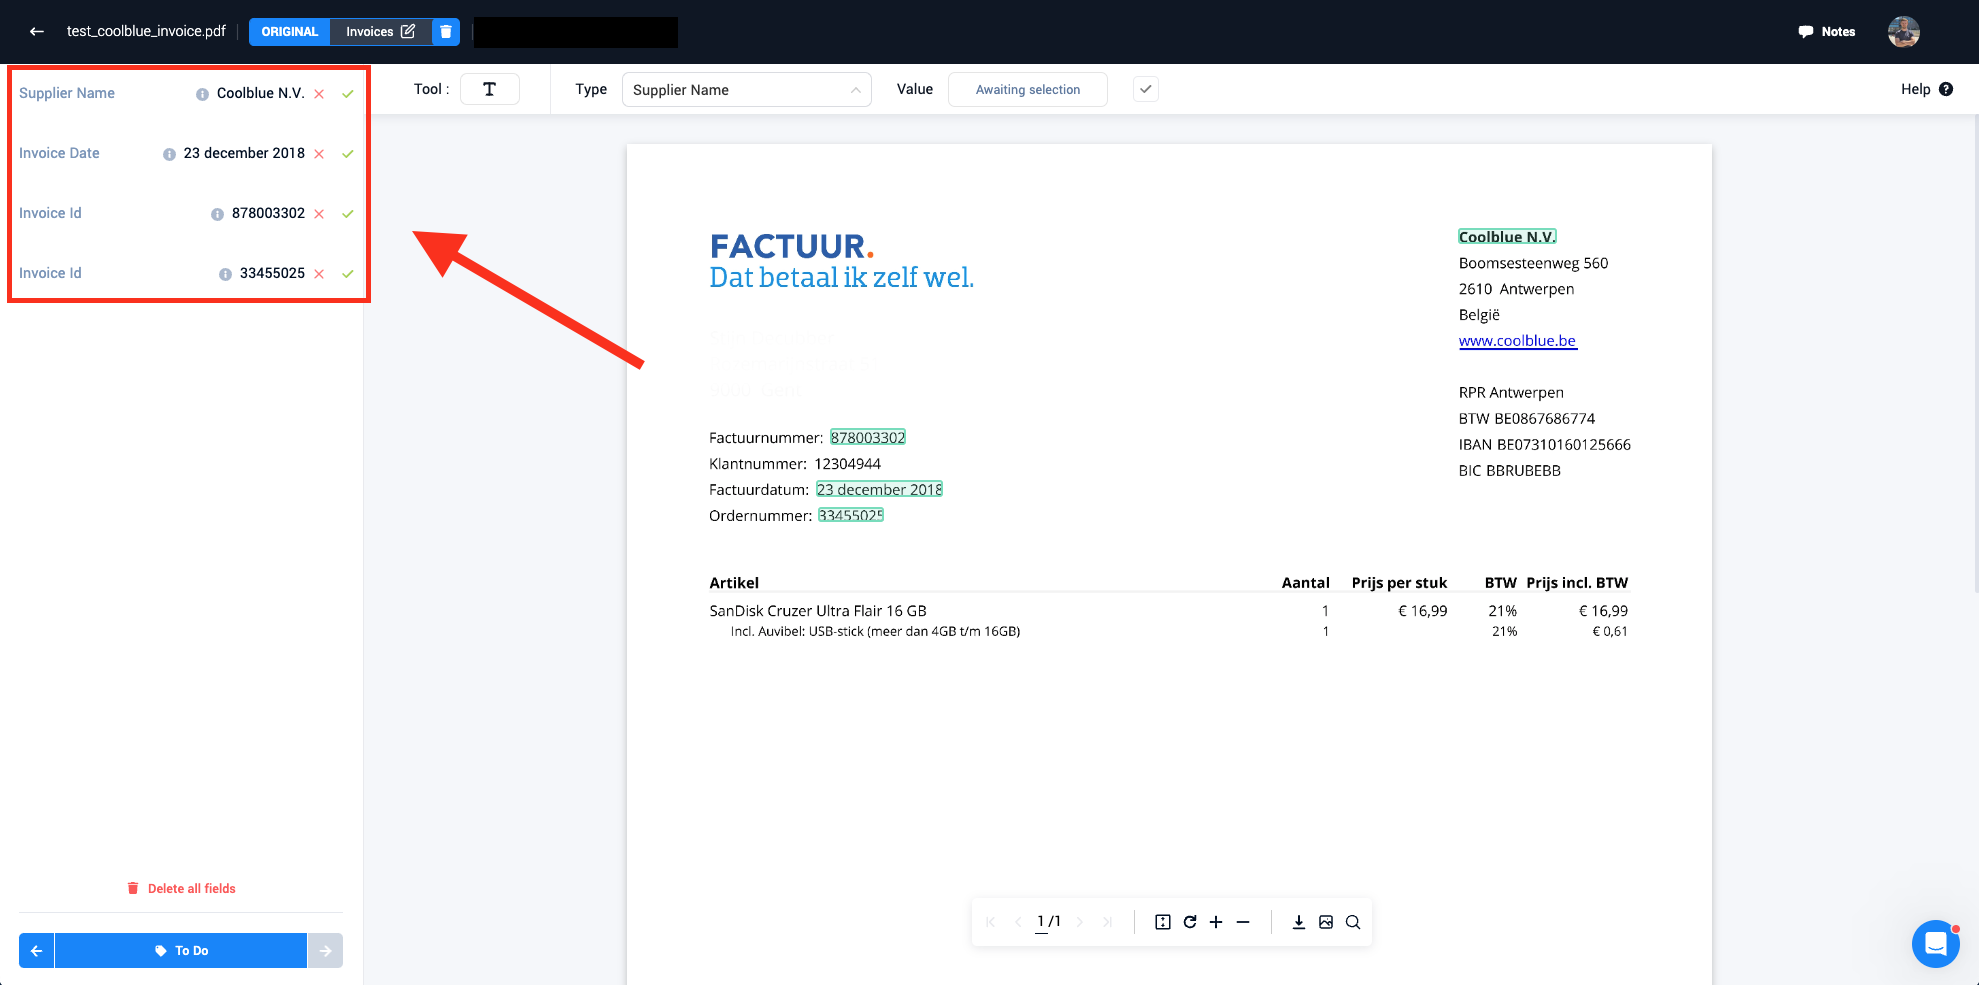
- When using a pretrained model, different entity suggestions will be visible in the entity sidebar. The user has now the choice to either accept an entity suggestion or reject a suggestion. Accepting an entity suggestion can be done by clicking the green approve mark (or by using the enter hotkey). Rejecting a specific suggestion entity can be done by clicking the red rejection mark (or by using the delete hotkey)
- A suggestion entity that got accepted by a user is turned into a Paperbox entity linked to that document. (As seen in the green box on the picture below). Here it is also visible that a pretrained model can make mistakes and suggest a wrong entity. The user can here thus reject the wrong entity, after which it will be deleted from the document.
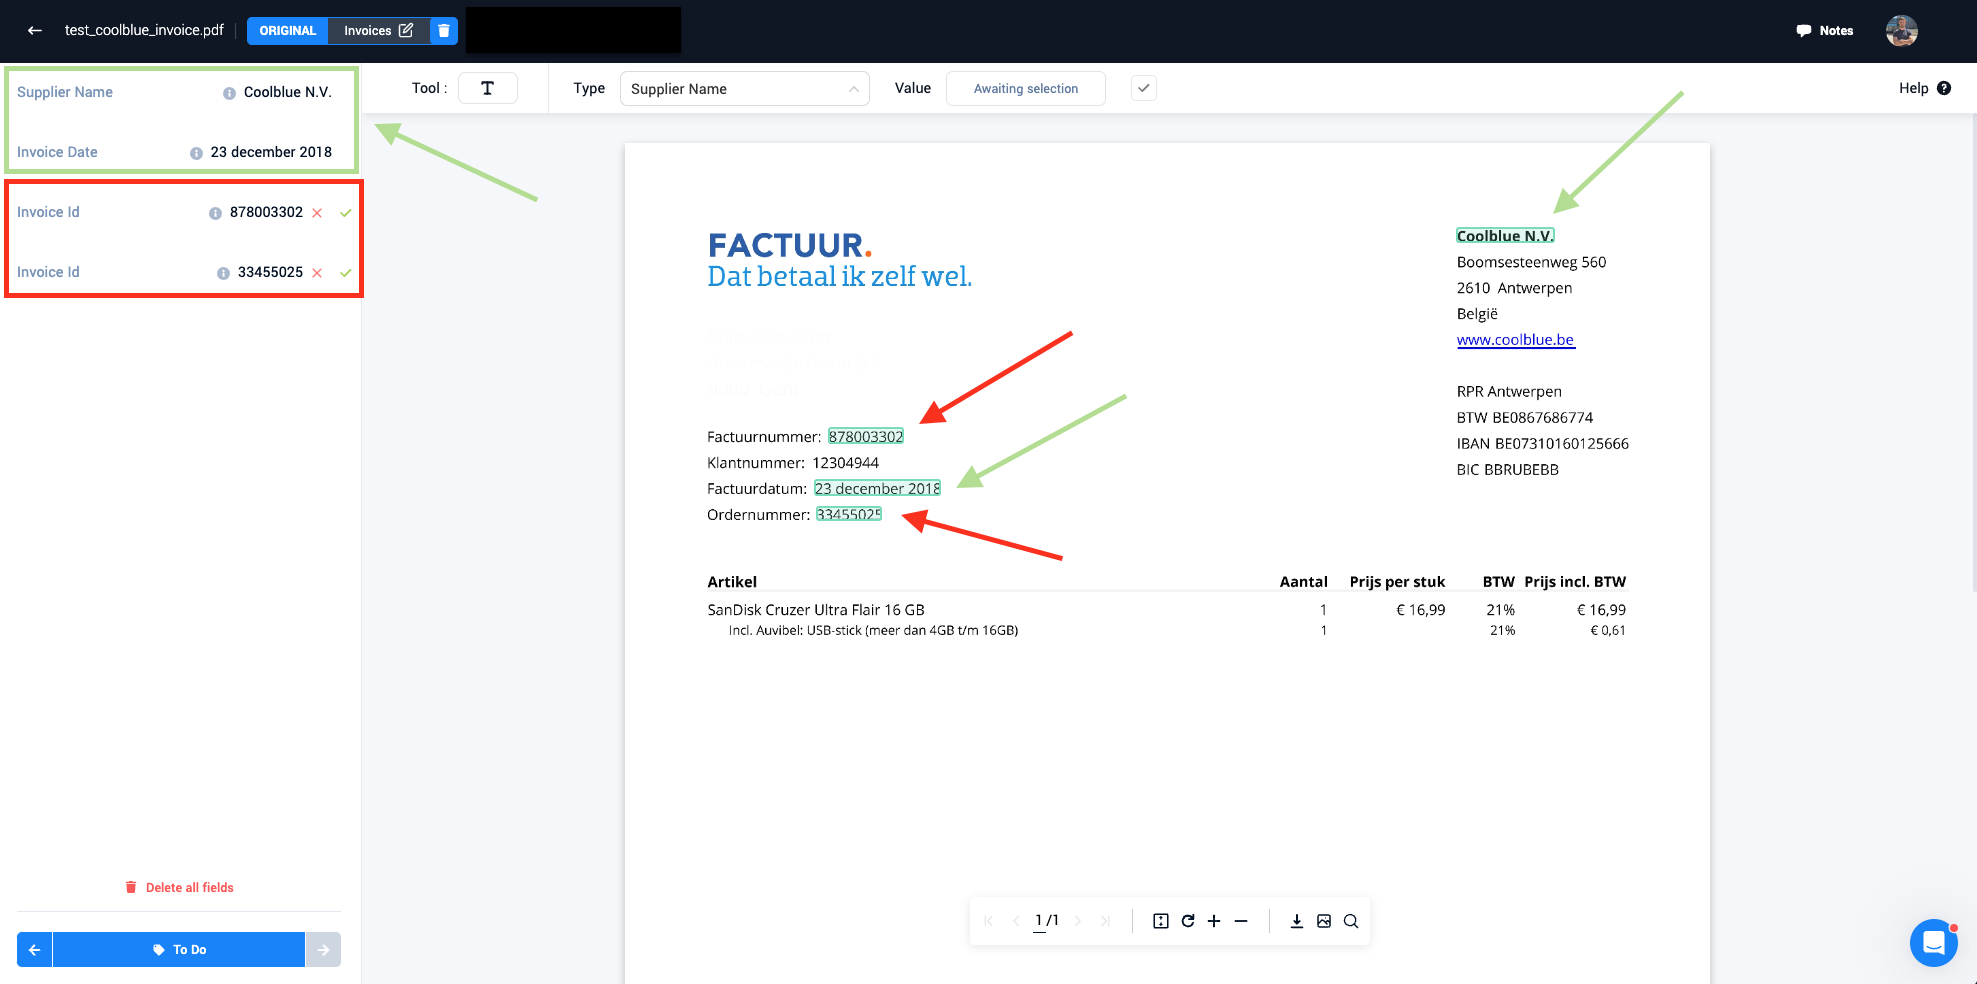
- After iterating through all suggestions of the model, the user can now add more entities that the model did not detect in the first step.